Download
1 / 27
270 likes | 896 Views
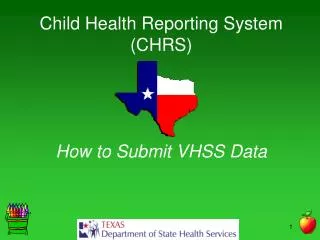
Child Health Reporting System (CHRS) How to Submit VHSS Data. Type chrstx.dshs.state.tx.us OR www.artximmunize.com into the address bar. (It doesn’t matter which address you use: each one takes you to the same website.).

E N D
Type chrstx.dshs.state.tx.usORwww.artximmunize.com into the address bar. (It doesn’t matter which address you use: each one takes you to the same website.) Next, enter your User ID and Password (refer to Login Tutorial for help on creating a User ID), and click the ‘Submit’ button to begin.
After logging in you will see a menu bar with 5 items—Level, Data, Reports, Help, and Logout. Move your cursor over the ‘Data’ tab to display the tabs for Vision, Hearing, and Spinal Screen Data Entry. Next, click ‘Vision / Hearing Screen’ to begin.
This screen is displayed after clicking ‘Vision / Hearing Screen’. Vision Screening is selected by default. The name of your school or child care facility is shown in the ‘Name’ box; MOST IMPORTANTLY you are given an email address where you may send questions if have trouble entering data. You may click ‘Hearing’ to enter hearing data instead of vision data. Next, click the ‘Find’ button
This screen is displayed after clicking the ‘Find’ button. You may click the ‘Contact Info’button to view/update contact information for your facility, the ‘Enter Vision Screening Information’button to begin entering vision data for your facility, or the ‘Cancel’button to return to the previous screen. Click the ‘Contact Info’ button now to display the ‘Contact Info’ screen.
This is the screen you will use to view or update contact information for your facility. All fields except ‘Facility ID’ and ‘Facility Name’ are editable. Click the ‘Submit’ button to save your changes after you update the contact information; click the ‘Back’ button if you want to return to the previous screen without making any changes. Click the ‘Back’ button now to return to the main Vision / Hearing screen.
Click the ‘Enter Vision Screening Information’ button to begin entering vision screening data. IMPORTANT: if you want to switch to Hearing Screening at this point click the ‘Cancel’ button to enable the buttons that allow you to choose Vision or Hearing.
This is the upper part of the screen displayed after you click the ‘Enter Vision Screening Information’ button. You will use the ‘Screening performed by’ box to record who performed the vision screening. Note that the ‘Cancel’ and ‘Contact Info’ buttons are disabled; they remain disabled until you finish data entry. Vision screening data is entered in the lower part of the screen; instructions for the lower part of the screen as well as use of the Step 1 and Step 2 buttons are given later in this tutorial. Click the ‘Edit’ button now to report who performed the vision screening.
If ‘PreSchool/School’ or ‘Health Dept./Clinic’ is selected in the ‘Screening performed by’ box, then ‘Organization’ is disabled If you select ‘Volunteers’ or ‘Other’, then you may enter descriptive text in the ‘Organization’ field Click the ‘Save’ button to record your changes or the ‘Cancel’ button to retain your previous selection. Click the ‘Cancel’ button now to return to the main Vision / Hearing screen.
This is the lower part of the screen displayed after you click the ‘Enter Vision Screening Information’ button. You will use this part of the screen to enter Vision data. Click the ‘Edit’ button for kindergarten now to enter vision screening data for that grade.
After clicking the ‘Edit’ button all of the data cells for kindergarten become editable. They are filled with 0’s by default; you do not need to delete the 0’s for cells that will not contain data. Enter data in some of the cells now and click the ‘Save’ button to record your entries.
Validity of data is checked when you click the ‘Save’ button; if there are errors your entries are not recorded and messages are displayed to help you correct the errors. Correct the data now and click the ‘Save’ button again. You may also click the ‘Cancel’ button to erase your entries.
Your data entries are saved if valid; as data for other grades are entered, totals are computed and displayed in the last row. You may click the ‘Completed Vision Screening Information’ button at any time during data entry if you want to return later to make changes or enter additional data. If you click the ‘Submit Final Vision Screening Information’ button you will not be able to modify or add to your data entries. Click the ‘Completed Vision Screening Information’ button now.
When you click the ‘Completed Vision Screening Information’ button the data entry parts are hidden, the ‘Completed …’ button becomes ‘Edit Vision Screening Information’, and the ‘Cancel’ and ‘Contact Info’ buttons are enabled. At this point you can: click the ‘Edit Vision Screening Information’ button to change or add to your vision screening data, click the ‘Cancel’ button TO SELECT HEARING SCREENING, click the ‘Contact Info’ button to update contact info, or click the ‘Submit Final Vision Screening Information’ button; REMEMBER if you click the ‘Submit Final …’ button you will not be able to come back and change your data. Click the ‘Cancel’ button now to enable the Vision / Hearing option buttons.
This screen is displayed after ‘Hearing’ is selected. It is the same as the screen displayed when ‘Vision / Hearing Screening’ is selected from the Data menu except that the title is Hearing Screening. Click the ‘Find’ button to begin entering Hearing Screen data
This screen is displayed after the ‘Find’ button is clicked with ‘Hearing’ selected. It is the same as that for Vision Screening except that ‘Vision’ is replaced by ‘Hearing’ in the title and on the Step 1 & 2 buttons; this screen exactly as the corresponding Vision screen.
The table in which hearing data is entered is the same as the corresponding table for vision data except that the ‘Screened with Correction’ column is removed. Click the ‘Completed Hearing Screening Information’ button to return to the main screen to finalize the vision screening data entry started earlier in this tutorial.
When you click the ‘Completed Hearing Screening Information’ button the data entry parts are hidden, the ‘Completed …’ button becomes ‘Edit Hearing Screening Information’, and the ‘Cancel’ and ‘Contact Info’ buttons are enabled; this behavior is the same as it is for the vision screen. Click the ‘Cancel’ button and then select ‘Vision’ to return to vision screening (vision / hearing option buttons are enabled when ‘Cancel’ is clicked).
You may click the ‘Edit Vision Screening Information’ button to modify or add to the vision data you entered previously or you may click the ‘Submit Final Vision Screening Information’ button to finalize your submission. Assume for the sake of this tutorial that you are done entering vision data. Click the ‘Submit Final Vision Screening Information’ button.
You are warned that you will not be able to modify your data after clicking the ‘Submit Final Vision Screening Information’ button. You can click ‘Cancel’ if you are not ready to complete the data entry process. Click the ‘OK’ button to submit your report to DSHS. You will receive a message acknowledging receipt of the data.
After you submit the final report you may only view the data you entered. Click the ‘View Vision Screening Information’ button now to view the data you submitted to DSHS.
After you submit the final report you may only view the data you entered. The ‘Edit’ buttons are disabled.
Data entry for spinal screening similar to that for vision / hearing. Select ‘Spinal Screen’ on the ‘Data’ tab to enter spinal data.
The initial screen is the same as it is for vision / hearing except that ‘Vision’ is replaced with ‘Spinal’. Click the ‘Find’ button as you did for vision / hearing to begin entering spinal data.
The screen displayed after clicking ‘Find’ is again the same as it is for vision / hearing except that ‘Vision’ is replaced with ‘Spinal’. Click ‘Enter Spinal Screening Information’ to enter spinal data.
The spinal screen data table functions the same way as the vision / hearing data tables, the difference being the type of data entered.
This is the end of the CHRS How to Submit VHSS Data Tutorial. Data entry instructions for the Annual Report of Immunization Status and instructions for creating a CHRS user account are located in separate tutorials on the CHRS home page.