Download
1 / 17
190 likes | 298 Views
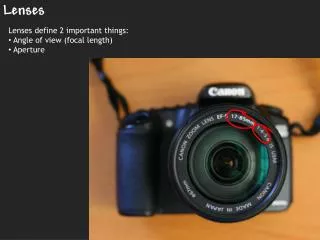
LENSES. A light ray bends as it enters glass and bends again as it leaves This refraction is due to the difference in the average speed of light in glass and in air. Glass of a certain shape can form an image that appears larger, smaller, closer, or farther than the object is actually viewed.

E N D
A light ray bends as it enters glass and bends again as it leaves • This refraction is due to the difference in the average speed of light in glass and in air. • Glass of a certain shape can form an image that appears larger, smaller, closer, or farther than the object is actually viewed. • Today, we use lenses in eyeglasses that help millions of people to see more clearly. LENSES
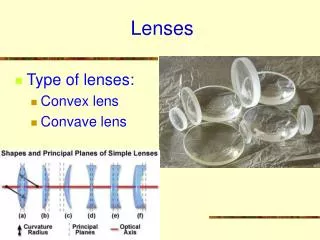
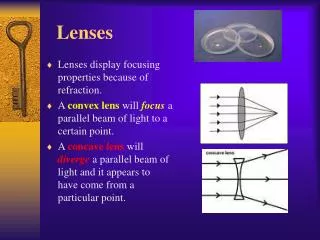
When a piece of glass has just the right shape, it bends parallel rays of light so that they cross and form an image. • Such a piece of glass is called a LENS. CONVERGING AND DIVERGING LENSES
The most bending of rays from a lens occurs at the outermost edge. • No net bend occurs in the middle “prism” because its glass faces are parallel and rays emerge in their original directions. CONVERGING AND DIVERGING LENSES
A lens that is thicker in the middle and rays of light that are initially parallel are made to converge to a point is called a CONVERGING LENS. • A lens that is thinner in the middle and rays of parallel light are made to diverge from a point is called a DIVERGING LENS. CONVERGING AND DIVERGING LENSES
The PRINCIPAL AXIS of a lens is the line joining the centers of curvature of the surfaces of a lens. • For a converging lens, the FOCAL POINT (point that the light rays either converge toward or diverge from) is the point at which a beam of parallel light, parallel to the principal axis converges. • The FOCAL LENGTH of a lens is the distance between the center of the lens and its focal point. CONVERGING AND DIVERGING LENSES
The focal point for a diverging lens is the point on the principal axis where the diverging rays appear to start. CONVERGING AND DIVERGING LENSES
Without lenses, an object far away is seen through a relatively small angle of view. • When you are closer, the same object is seen through a larger angle of view which allows the image to be seen in greater detail. • Magnification occurs when an image is observed through a wider angle with the use of a lens. IMAGE FORMATION BY A LENS
A converging lens will magnify only when the object is between the focal point and the lens. • The magnified image will be farther from the lens than the object and it will be right-side up. • If a screen were placed at the image distance, no image would appear on the screen because no light is actually directed to the image position. IMAGE FORMATION BY A LENS
The rays that reach your eye, however, behave as if they came from the image position, so the image is a VIRTUAL IMAGE. • When the object is far enough away to be beyond the focal point of a converging lens, light from the object does converge and can be focused on the screen. • An image formed this way is called a REAL IMAGE. IMAGE FORMATION BY A LENS
A real image formed by a single converging lens is upside down. • When a diverging lens is used alone, the image is always virtual, right side up, and smaller than the object. IMAGE FORMATION BY A LENS
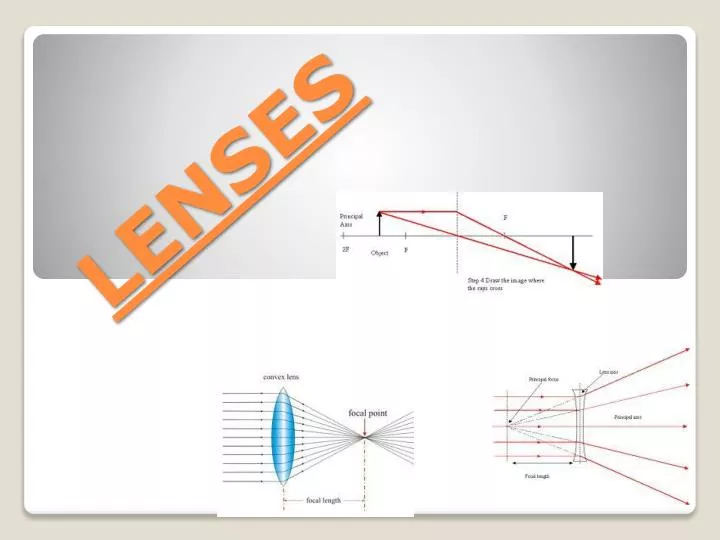
RAY DIAGRAMS show the principal rays that can be used to determine the size and location of an image. • To construct a ray diagram the size and location of the object, its distance from the center of the lens, and the focal length of the lens must be known. CONSTRUCTING IMAGES THROUGH RAY DIAGRAMS
For simplicity, we place one end of the object on the principal axis. • To locate the position of the image you only have to know the paths of two rays from a point on the object. • Any point except those on the principal axis may be used. CONSTRUCTING IMAGES THROUGH RAY DIAGRAMS
The path of one refracted ray is know from the definition of the focal point. • A ray parallel to the principal axis will be refracted by the lens to the focal point. • Another path is known: Through the center of the lens where the faces are parallel to each other. • A ray of light will pass through the center with no appreciable change in direction. CONSTRUCTING IMAGES THROUGH RAY DIAGRAMS
A third path is known: a ray of light that passes through the focal point in front of the lens emerges from the lens and proceeds parallel to the principal axis CONSTRUCTING IMAGES THROUGH RAY DIAGRAMS
The method of drawing a ray diagram applies also to diverging lenses. • On emerging from the lens, the three rays appear to come from a point on the same side of the lens as the object. CONSTRUCTING IMAGES THROUGH RAY DIAGRAMS