Java Applets: Introduction, Types, and Life Cycle
Learn about local and remote applets, differences from applications, when to use applets, and the applet programming introduction. Discover the applet life cycle and restrictions, with steps for developing and testing. Explore how applets differ from applications and when to utilize them.


Java Applets: Introduction, Types, and Life Cycle
E N D
Presentation Transcript
Applets • Introduction • Local & Remote Applets • How Applets differ from Applications • When to use applets • Applet Life Cycle • Applet Restrictions • Applet Programming
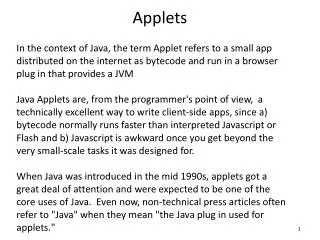
Introduction Types of Java Programs • There are three kinds of Java programs: • Applications • Applets • Libraries • An application is a Java program that is run by using a Java interpreter program. • An applet is a Java program that is run by a Java-enabled web browser. • A library is a set of Java classes that can be used by another Java program.
Applets are small Java programs that are primarily used in Internet computing. • Applets can be transported over the Internet from one computer to another and run using the Applet Viewer or any Web browser that supports Java. • Applets can perform arithmetic operations, display graphics, play sounds, accepts user input, create animation and play interactive games. • A web page can now contain not only a simple text or a static image but also a Java Applet, which when run can produce graphics, sounds and moving images. • Therefore. Java applets have begun to make a significant impact on World Wide Web.
Local & Remote Applets • We can embed applets into Web pages in 2 ways : • We can write our own applets & embed them into Web pages. • We can download an applet from a remote computer system and then embed it into a Web page.
Local Applet • An applet developed locally and stored in a local system is known as a local applet. • When a Web page is trying to find a local applet, it does not need to use the Internet & therefore the local system does not require the Internet connection. • It simply searches the directories in the local system and locates and loads the specified applet.
Remote Applet • A remote applet is that which is developed by someone else and stored on a remote computer connected to the Internet. • We can download the remote applet onto our system via the Internet & run it by connecting the system to Internet. • In order to locate and load a remote applet, we must know the applet’s address on the Web. This address is known as URL and must be specified in the applet’s HTML document as follows: CODEBASE = http: // www.netserve.com/ applets
How Applets differ from Applications • Applets do not use the main() method for initiating the execution of the code. Applets, when loaded, automatically call certain methods of Applet class to start and execute the applet code. • Unlike stand-alone applications, applets cannot be run independently.They are run from inside a Web page using a special feature known as HTML tag. • Applets cannot read from or write to the files in the local computer. • Applets cannot communicate with other servers on the network. • Applets cannot run any program from the local computer. • Applets are restricted from using libraries from other languages such as C or C++.
When to use applets • When we need something dynamic to be included in the display of a Web page. • When we require some “flash” outputs. • When we want to create a program and make it available on the Internet for us by others on their computers.
Steps involved in developing and testing are : • Building an applet code (.java file) • Creating an executable applet (.class file) • Designing a Web page using HTML tags. • Preparing <APPLET> tag. • Incorporating <APPLET> tag into the Web page. • Creating HTML file. • Testing the applet code.
Applet Life Cycle • Every Java applet inherits a set of default behaviors from the Applet class. • As a result when an applet is loaded, it undergoes a series of changes in its state. • The applet states include: • Born or initialization state. • Running state. • Idle state. • Dead or destroyed state.
An Applet can be in an active or inactive state. • When the applet is first loaded, it is in an inactive state. • When the applet is first displayed on the screen, it becomes active and inactive states until it is destroyed by the applet context. • Exactly what causes the applet to become active or inactive is upto the applet context. • e.g. the applet context might decide to make the applet inactive if the applet is scrolled out of view. • Or, it might make the applet inactive if the user views another document and leaves the document with the applet.
Born Initialization Begin (Load Applet) start() stop() Running Idle Stopped Display start() paint() destroy() Dead End Destroyed An applet’s state transition diagram
Initialization State : • Applet enters the initialization state when it is first loaded. • Achieved by calling the init() method of Applet class. • Applet is born. • At this stage, we can • Create objects needed by the applet • set up initial values • load images or fonts • set up colors • Occurs only once in the applet’s life cycle. • To provide any of the above behavior, we must override the init() method: • public void init() • { ------Action------- }
Running State : • Applet enters the running state when the system calls the start() method of Applet class. • Occurs automatically after the applet is initialized. Starting can also occur if the applet is already in Idle state. • Unlike init() method, the start method may be called more than once. • We may override the start() method to create a thread to control the applet. • public void start() • { • ------------- • ------------- (Action) • }
Idle or Stopped State : • An applet becomes idle when it is stopped from running. • Occurs automatically when we leave the page containing the currently running applet. We can also do so by calling the stop() method explicitly. • If we use a thread to run the applet, then we must use stop() method to terminate the thread. • We can achieve this by overriding the stop() method as: • public void stop() • { • ------------- • ------------- (Action) • }
Dead State : • An applet is said to be dead when it is removed from memory. • Occurs automatically by invoking the destroy() method when we quit the browser. • Like initialization, destroying stage occurs only once in the applet’s life cycle. • We may override the destroy() method as : • public void destroy() • { • ------------- • ------------- (Action) • }
Display State : • Applet moves to the display state whenever it has to perform some output operations on the screen. • Happens immediately after the applet enters into the running state. • The paint() method is called to accomplish this task. Almost every applet will have a paint() method. • Like other methods in the life cycle, the default version of paint() method does absolutely nothing. • We must override this method if we want anything to be displayed on the screen. • public void paint(Graphics g) • { • ------------- • ------------- (Action) • }
Applet Restrictions • Applets can never run any local executable program. • Applets cannot communicate with any host other than the server from which they were downloaded. • Applets cannot read or write to local computers file system. • Applets cannot find any information about local computer except for Java Version used, name and version of operating system. In particular applets cannot find out user’s name, email address etc. All these restrictions & limitations are placed in the interest of security of systems.These restrictions ensure that an applet cannot do any damage to the local system.
Java Applet Template import java.awt.*; import java.applet.*; public class AppletNameextends Applet { /* Applet description. */ public voidpaint(Graphics graphics) { /* applet display statements go here. */ } } put display statements here
extends allows us to inherit the capabilities of class Applet. Method paint is guaranteed to be called in all applets. import java.awt.*; import java.applet.*; public class WelcomeApplet extends Applet { public void init() { } public void paint(Graphics g) { g.drawString("Welcome to Java Programming!", 25, 25 ); } }
Creating an Executable Applet • Executable applet is nothing but the .class file of the applet, which is obtained by compiling the source code of the applet. • Compiling an applet is exactly the same as compiling an application. • Steps required for compiling an applet : • Move to the directory containing the source code and type the following command : • Javac HelloJava.java • The compiled output file called HelloJava.class is placed in the same directory as the source. • If any error message is received, then we must check for errors, correct them and compile the applet again.
Designing a Web Page A Web page is basically made up of text and HTML tags that can be interpreted by a Web browser or an applet viewer. Web pages should be stored in the same directory as the compiled code of the applets. Web page template: <HTML> </HTML> • <! • …………………… • …………………… • > Comment Section • <HEAD> • </HEAD> Head Section Title Tag • <BODY> • </BODY> Body Section Applet Tag
Adding Applet to HTML File <HTML> <! Web page displaying Title, Message and specifying the applet to be loaded & executed.> <HEAD> <TITLE> Welcome to Java Applets </TITLE> </HEAD> <BODY> <CENTER> <H1> Welcome to the World of Applets </H1> <BR> </CENTER> <CENTER> <APPLET CODE = HelloJava.class WIDTH = 400 HEIGHT = 200> </APPLET> <CENTER> </BODY> </HTML>
Running the Applet We must have the following files in our current directory : HelloJava.java HelloJava.class HelloJava.html To run an applet, we require one of the following tools: 1. Java-enabled Web browser (Such as HotJava or Netscape) 2. Java appletviewer If we use a Java-enabled Web browser, we will be able to see the entire Web page containing the applet. If we use the appletviewer tool, we will only see the applet output. The appletviewer is not a full-fledged Web browser. We can use it to run our applet as follows : appletviewerHelloJava.html
Applet Tag with all attributes <APPLET [ CODEBASE = codebase_URL ] CODE = AppletFileName.class [ ALT = alternate_text ] [ NAME = applet_instance_name ] WIDTH = pixels HEIGHT = pixels [ ALIGN = alignments ] [ VSPACE = pixels ] [ HSPACE = pixels ] > [ < PARAM NAME = name1 VALUE = value1> ] [ < PARAM NAME = name2 VALUE = value2> ] ……………………. ……………………. </APPLET>
Passing Parameters to Applets We can supply user-defined parameters to an applet using <PARAM…> tags. Each <PARAM> tag has a name attribute such as color, and a value attribute such as red. e.g. We can change the color of the text displayed to red by an applet by using a <PARAM…> tag as follows: <APPLET …..> <PARAM NAME= color VALUE = “red”> </APPLET>
To set up and handle parameters, we need to do two things : • Include appropriate <PARAM…> tags in the HTML document. • Provide code in the applet to parse these parameters. • Parameters are passed to an applet when it is loaded. • We can define the init() method in the applet to get hold of the parameters defined in the <PARAM> tags. • This is done using the getParameter() method, which takes one string argument representing the name of the parameter and returns a string containing the value of the parameter.
Displaying Numerical Values In applets, we can display numerical values by first converting them into strings and then using the drawString() method of Graphics class. We can do this easily by calling the ValueOf() method of String class.
Getting Input From the User • Applets work in a graphical environments. Hence, applets treat inputs as text strings. • The TextField class of the applet package, is used to create the area on the screen where the user can type the values & edit them, if necessary. • t1 = new TextField(8); • add(t1); • Next step is to retrieve the items from the fields for calculations. • s1 = t1.getText(); • Data in text field is in string form which need to be converted to the right form, before using it in any computation. x = Integer.parseInt(s1); • z = x * x; • The results are then converted back to strings for display. • s = String.valueOf(z);
Applet class hierarchy Class Applet java.lang.Object | +--java.awt.Component | +--java.awt.Container | +--java.awt.Panel | +--java.applet.Applet Java.applet package contains only one class & three Interfaces 1.AppletContext2.AppletStub3.AudioClip
The java.applet Package • The java.applet package defines the Applet class and the AppletContext, AppletStub and the AudioClip interface. • Applet class provides all necessary support for applet execution, such as starting & stopping. • It also provides methods that load & display images, and methods that load & play audio clips. • The Applet class defines the methods as follows :
The Applet class defines the methods as follows : AppletContext getAppletContext() – Returns the context associated with the applet. String getAppletInfo() – Returns a string that describes the applet. URL getCodeBase() – Returns the URL associated with the invoking applet. URL getDocumentBase() – Returns the URL of the HTML document that invokes the applet. String getParameter(String paramName) – Returns the parameter associated with paramName. String[][] getParameterInfo() – Returns a String table that describes the parameters recognized by the applet.
AudioClip getAudioClip(URL url) - Returns an AudioClip object that encapsulates the audio clip found at the location specified by url. AudioClip getAudioClip(URL url, String clipName) – Returns an AudioClip object that encapsulates the audio clip found at the location specified by url and having the name specified by clipName. Image getImage(URL url) - Returns an Image object that encapsulates the image found at the location specified by url. Image getImage(URL url,String imageName) - Returns an Image object that encapsulates the image found at the location specified by url and having the name specified by imageName.
boolean isActive() - Returns true if the applet has been started & returns false if the applet has been stopped. void resize(int width, int height) – Resizes the applet according to the dimensions specified by width & height. void play(URL url) – If an audio clip is found at the location specified by url, the clip is played. void play(URL url, String clipName) – If an audio clip is found at the location specified by url with the name specified by clipName, the clip is played.
Graphics Class Graphics class is in java.awt package. This class contains methods for drawing strings,lines, basic shapes and images. This class provides a coordinate scheme to draw that thing on a particular position in your applet. A few methods are : drawLine(int x1, int y1, int x2, int y2) ; drawRect(x,y,width,height); fillOval(x,y,width,height); drawImage(img, int x, int y, int width, int height, ref);
Font Class Font class is in java.awt package. This class provides you the wide variety of font faces, styles and sizes. You can make a object of Font class to make a font of your choice. Font f=new Font(String name,int style,int size); *Name of the font may be any available font name. *Style is a predefined int static values in Font class like BOLD, ITALIC, PLAIN. You can use it like-> Font.BOLD A combination is also possible-> Font.BOLD+Font.ITALIC *Size is simply the font size. Using font g.setFont(f);
Color Class Color class is in java.awt package. The constructor of this class provides you the wide variety of colors. You can make a object of color class to make a color of your choice. Color c=new Color(Color.red); Color c=new Color(int r,int g,int b); Color c=new Color(int rgb); There are static int values defined for common colors. Applet can use this colors like-> setBackground(Color.color); setForeground(new Color(30,50,255));
Typical UI components • Buttons (java.awt.Button) • Checkboxes(java.awt.Checkbox) • Simple Text (java.awt.TextField) • Larger text, editing areas (java.awt.TextArea) • Labels (java.awt.List) • Popup lists (java.awt.Choice) • Sliders, scrollbars (java.awt.Scrollbar) • Drawing areas (java.awt.Canvas) • Menus(java.awt.Menu,java.awt.MenuItem,java.awt.CheckboxMenuItem) • Containers (java.awt.Panel, java.awt.Window) • Adding GUI component methods (Applet extends Container)
import java.awt.*; import java.applet.*; /*<applet code=AppletAction.class height=400 width=400> </applet>*/ public class AppletAction extends Applet { Button b; Color c; public void init() { b=new Button("Red"); add(b); c=new Color(0,255,0); } public void paint(Graphics g) { setBackground(c); } public boolean action(Event evt, Object arg) { if (evt.target instanceof Button) { if (arg == "red") { c=new Color(255,0,0); repaint(); } } return true; } } Ex
Layout Managers • Java’s layout managers provide a level of abstraction to automatically map your user interface on all window systems. • The UI components are placed in containers. Each container has a layout manager to arrange the UI components within the container.
Kinds of Layout Managers • FlowLayout • GridLayout • BorderLayout • CardLayout • GridBagLayout
Example FlowLayout Manager The components are arranged in the container from left to right in the order in which they were added. When one row becomes filled, a new row is started.
FlowLayout Constructors • public FlowLayout(int align, int hGap, int vGap) Constructs a new FlowLayout with a specified alignment, horizontal gap, and vertical gap. The gaps are the distances in pixel between components. • public FlowLayout(int alignment) Constructs a new FlowLayout with a specified alignment and a default gap of five pixels for both horizontal and vertical. • public FlowLayout() Constructs a new FlowLayout with a defaultcenter alignment and a default gap of five pixelsfor both horizontal and vertical.
GridLayout Manager The GridLayout manager arranges componentsin a grid (matrix) formation with the number ofrows and columns defined by the constructor. The components are placed in the grid from left to right starting with the first row, then the second, and so on.
GridLayout Constructors • public GridLayout(int rows,int columns) Constructs a new GridLayout with the specified number of rows and columns. • public GridLayout(int rows, int columns, int hGap, int vGap) Constructs a new GridLayout with thespecified number of rows and columns,along with specified horizontal andvertical gaps between components.
BorderLayout Manager The BorderLayout manager divides the container into five areas: East, South, West, North, and Center. Components are added to a BorderLayout by using the add method. add(Component, constraint), where constraintis BorderLayout.EAST, BorderLayout.SOUTH, BorderLayout.WEST, BorderLayout.NORTH, or BorderLayout.CENTER.