Download

1 / 32
320 likes | 406 Views
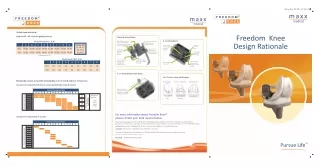
Discover about Freedom, a product specially designed for Asian patient's keeping their lifestyle in mind to give them a better experience, fit and best outcomes.

E N D
PCK Revision Knee Surgical Technique
CONTENTS INTRODUCTION ……………………………………………………………………………1 Overview ……………………………………………………………………………………………………1 Preoperative Planning ………………………………………………………………………………………1 Incision and Exposure ………………………………………………………………………………………2 Primary Implant Removal …………………………………………………………………………………2 STEMMED TIBIAL PREPARATION …………………………………………………………3 STEP 1: Reaming IM Canal …………………………………………………………………………………3 STEP 2: Refining the Proximal Tibial Face …………………………………………………………………4 STEP 3: Tibial Augment Preparation ………………………………………………………………………5 STEP 4: Tibial Baseplate Positioning ………………………………………………………………………6 STEP 5: Keel Preparation ……………………………………………………………………………………8 PCK FEMORAL PREPARATION ……………………………………………………………9 STEP 1: Sizing the Femur ……………………………………………………………………………………9 STEP 2: Reaming IM Canal …………………………………………………………………………………9 STEP 3: Distal Femoral Cut and Valgus Angle Preparation …………………………………………… 10 STEP 4: Preparation for Femoral Anterior and Posterior Cuts ………………………………………… 11 STEP 4A: A/P Cutting Block Positioning with No Femoral Offset OR ……………………………… 12 STEP 4B: A/P Cutting Block Positioning with Femoral Offset ……………………………………… 12 STEP 5: Performing Anterior and Posterior Cuts Including Augment Cuts ………………………… 14 STEP 6: Preparation for Intercondylar Box Cuts ……………………………………………………… 14 STEP 6A: Positioning the PCK Box Cut Guide (BCG) for No Femoral Offset OR …………………… 15 STEP 6B: Positioning the PCK Box Cut Guide (BCG) for Offsetting the Femoral ………………… 16 STEP 7: Performing Central Boss Reaming and Intercondylar Box Cuts …………………………… 17 TRIALING ………………………………………………………………………………… 19 Trialing the PCK Femoral Components ………………………………………………………………… 19 Trialing the Stemmed Tibial Components ……………………………………………………………… 20 Trialing the Patella ……………………………………………………………………………………… 22 Trial Reduction and Gap Balancing …………………………………………………………………… 22 IMPLANTS ………………………………………………………………………………… 23 Preparing The Stemmed Tibial Implant Assembly …………………………………………………… 23 Preparing the PCK Femoral Implant Assembly ………………………………………………………… 24 Implantation ……………………………………………………………………………………………… 25 a) Stemmed Tibial Components ………………………………………………………………………… 25 b) PCK Femoral Components …………………………………………………………………………… 25 c) Tibial Articulating Surface …………………………………………………………………………… 26 d) Patellar Component …………………………………………………………………………………… 26 ii
INTRODUCTION The Freedom PCK® (Progressive Constraint Kinematics) Femoral and Stemmed Tibial Components are intended for use in revision knee replacement surgery. The stemmed tibial baseplate is designed to allow the addition of a stem extension with optional offset junction to the distal keel and optional augmentation blocks to the distal tray. Likewise, the PCK femur can accomodate a stem extension, as well as optional distal and posterior condylar augmentation blocks. The intercondylar box is tapered such that, throughout the range of motion, the joint transitions from natural laxity in flexion to high stability in extension. Overview Surgical technique is an important factor in providing consistent and reproducible results. Basic principles of total knee replacement surgery should be followed throughout the procedure. The surgeon must pay close attention to balancing the flexion and extension gaps, accurately sizing the femoral, tibial, and patellar components, positioning the femoral component in appropriate external rotation, removing excessive osteophytes from the posterior condyles, maintaining the joint line, and implanting the final components using modern cementing techniques. Preparation of the femur, tibia, and patella is independent for each bone and can be performed in any order, based on surgeon preference. The principles of measured resection (replacing removed bone with equal amounts of implant) are used to provide this versatility during the operation. When trialing the implants, it is recommended that the surgeon assess overall alignment, extension angle, varus/valgus stability, flexion angle, patellofemoral tracking, and anterior/posterior stability. The surgical technique outlined is specific to the Freedom Knee® System. Preoperative Planning Preoperative radiographs can be used to anticipate aspects of the surgical procedure including implant sizing, stem extension length and diameter, quality of bone stock, and alignment of bone cuts. X-rays should include coronal and sagittal views of the operative knee in full extension. You may contact your Maxx representative for x-ray templates. Templates are available for all digital platforms. The angle between the mechanical and anatomic axes of the femur should be reproduced intraoperatively. The tibial component should be positioned perpendicular to the mechanical axis of the tibia in the frontal plane. Implant sizing must be determined intraoperatively as x-rays only provide an approximation. 1
Incision and Exposure The technique described uses the classical anterior midline incision to access the knee joint via a medial parapatellar arthrotomy. However, the subvastus and midvastus approaches can readily be used with the same instrumentation. When possible, follow the pre-existing scar from the primary procedure. Your Maxx representative can supply instrumentation to accommodate your preferred approach. Primary Implant Removal Incision Preserve as much bone stock as possible when removing the primary implants. It is generally beneficial to remove the femoral implant first, as this can improve access to the tibial components. A variety of tools can be utilized to disrupt the implant-bone interface, including osteotome, reciprocating saw, Gigli saw, and dedicated extraction instruments. Your Maxx representative can provide a femoral impactor/extractor and slap hammer to aid in femoral implant removal. Remove any bone cement that remains after primary implant extraction. Use tibial alignment guide blocks to measure the flexion and extension gaps, as a predictor for implant sizing and tissue balancing requirements. 2
STEMMED TIBIAL PREPARATION STEP 1: Reaming IM Canal Remove cortical bone to accommodate the stem extension and optional offset junction. Distal Reamer Consult Table A to determine the reamer depth marking corresponding to the stem extension and optional offset junction combination to be implanted. Ream the medullary canal with a sharp-tipped distal reamer (6.5mm or 9mm) until the appropriate depth marking reaches the surface of the proximal tibia (Fig. T1). Progressively increase reamer diameter in 0.5mm increments until the desired cortical bone contact is achieved. The ultimate reamer and stem diameters should match when uncemented; ream an additional 0.5mm or 1mm, in diameter, if cementing. Tibia with primary removed Figure T1: Reaming IM Canal NOTE The reamed depth of the IM canal increases if the tibial component is to be offset, see Table A. If the need to offset the tibia is undetermined at this time, the additional depth can be reamed later. TABLE A TIBIAL IM CANAL REAMING DEPTH REQUIREMENTS REAMER DEPTH MARKING No Offset 65 100 130 175 STEM LENGTH With Offset 100 130 155 205 40mm 75mm 100mm 150mm Subsequent instrumentation uses the ø9mm shaft of the distal reamer as a positioning reference. However, in the case of a narrower ø7.5mm stem, the IM 9mm tibial alignment rod can be used instead of the reamer. This rod provides more length at the required ø9mm to attach instrumentation. It can also be used for a ø9mm stem, if preferred. 3
STEMMED TIBIAL PREPARATION 2 of 6 STEP 2: Refining the Proximal Tibial Face Refine the proximal tibial face after primary implant removal in order to improve the bone’s interface with instruments and implant. The depth of resection should be minimized to preserve bone stock. Assemble the IM tibial cutting guide (TCG) (Fig. T2) by inserting the reamer connector through the 3° slot in the vertical body and snapping the appropriate left or right TCG jig onto the jig connector. Slide the reamer connector over the distal reamer and engage the primary cam lever to secure the entire guide to the distal reamer at roughly the desired height. Fine tune the resection level by sliding the jig connector and TCG jig along the vertical body and engage the secondary cam lever to lock them in place. An angel wing through the cutting slot can help visualize the amount of resection as well as any need for medial and/or lateral augmentation. Markings on the vertical body are every 5mm for reference. Snug the TCG jig against the anterior of the tibia using the ratcheting connection between the vertical body and reamer connector. It can be released and repositioned by depressing the button in the vertical body. Distal Reamer Reamer Connector Primary Cam Lever IM TCG shown from opposite side Vertical Body Button Secondary Cam Lever Angle markings Jig Connector TCG Jig Figure T2: Assembling Tibial Cutting Guide NOTE As a reference, if the proximal surface of the TCG jig is set at the same height as the proximal tibial surface, resection through the cutting slot will result in a minimum depth of 3mm at the anterior face of the tibia. With the desired resection level set, pin the TCG jig to the tibia using long pins. Remove the tibial cutting guide (TCG) by releasing the primary cam lever, depressing the button on the side of the vertical body, and separating the guide from the pinned TCG jig and reamer (Fig. T3). The distal reamer and the pinned TCG jig should be the only instrumentation remaining at this point. Resection depth can be further adjusted 2mm distally or proximally by using the ±2mm pin holes in the TCG jig. Assess the need for medial and/or lateral augmentation with the aid of an angel wing. Augmentation is addressed next in Step 3: ‘Tibial Augment Preparation.’ TCG Jig Long Pins Figure T3: Pinning Tibial Cutting Jig NOTE Using the 3° slot in the vertical body results in a 3° posterior slope of the resected tibia. 4
STEMMED TIBIAL PREPARATION 3 of 6 Proceed to resect the tibia using an oscillating saw through the cutting slot in the TCG jig, removing the distal reamer, if necessary. If the refinement of the tibial face results in an acceptable interface for implantation and no augmentation is required, proceed directly to Step 4: ‘Tibial Baseplate Positioning’; otherwise, continue with augment preparation. STEP 3: Tibial Augment Preparation Remove deficient bone to be replaced with proximal tibial augmentation blocks. If it is absent, reintroduce the distal reamer into the IM canal. Assemble the IM tibial cutting guide (TCG) to the distal reamer just as before (refer to Fig. T2), except replace the TCG jig with the tibial augment cutting jig (Fig. T4). Assemble the jig so the cutting slots extend toward the side where augmentation is required, medial or lateral. Set the height position of the tibial augment cutting jig using an angel wing to align the proximal surface of the jig with the proximal most point on the resected surface of the tibia. At the same time, make sure the jig is snug against the anterior of the tibia. Engage the secondary cam lever to fix the jig height position. Secure the jig to the tibia with long pins through the neutral pin holes marked ‘0‘. Remove the TCG as before, and the distal reamer as well. IM Tibial Cutting Guide 10mm Augment Cut ‘0’ pinning hole Long Pins Tibial Augment Cutting Jig Figure T4: Assembling and pinning of Tibial Augment Cutting Jig Both medial and lateral augmentation are addressed by turning over the jig and repositioning it on the long pins. Resect the bone to accommodate the required number of tibial augments. With the jig pinned in the ‘0’ holes, saw through the ‘+5’mm slot for a single augment or through the ‘+10’mm slot for two augments. For a third augment, move the tibial augment cutting jig to the ‘+5’mm pin holes and saw through the ‘+10’mm slot, giving a total of 15mm of resection. NOTE Tibial augments are optional for use with the stemmed tibial baseplate. They are 5mm thick and may be stacked up to three high to correct defects from 5mm to 15mm. Tibial augments are reversible to address both medial and lateral defects and decreasing sizes can be stacked accordingly to create a conical profile. Differing amounts of augmentation between the medial and lateral sides can also be accommodated. 5
STEMMED TIBIAL PREPARATION 4 of 6 STEP 4: Tibial Baseplate Positioning Size and position the tibial baseplate to achieve maximal coverage of the proximal tibial surface, either centered about the IM canal or offset by 4mm or 6mm. Tibial Offset Guide Plate (showing underside) If removed for resection, reintroduce the distal reamer into the IM canal. Select the appropriately sized tibial offset guide plate, which has bony support on all sides with no overhang. If tibial augment cuts were made in the previous step, select the corresponding size and thickness of tibial offset guide plate augments (referred to as “augments” here) to attach to the underside of the tibial offset guide plate. Attach the augments with the appropriate length augment pin (Fig. T5a) If desired, hold the tibial offset guide plate with the tibial tray coupler (Fig. T5b). Tibial Offset Guide Plate Augment (10mm) Augment Pin (10mm) Figure T5a: Assembling Tibial Guide Plate and Augments For appropriate positioning, start by placing the tibial offset guide plate over the distal reamer and against the resected proximal tibia. Next, slide the central dial over the distal reamer and secure it in the recess of the tibial offset guide plate (Fig. T6). Keep the underside of the tibial offset guide plate against the resected proximal tibia and slightly rotate it about the distal reamer to achieve maximum coverage. If coverage is optimal, secure the tibial offset guide plate to the tibia with long pins. In this case, the tibial offset guide plate is centered about the IM canal and therefore no tibial offset will be performed. Tibial Tray Coupler (optional) Figure T5b: Positioning Tibial Guide Plate Long Pin NOTE For cases with NO tibial offset, proceed directly to Step 5 on Keel Preparation. Central Dial Tibial Offset Guide Plate However, if tibial coverage is inadequate with the tibial offset guide plate positioned using the central dial, as shown in Figure T7a, better coverage will be achieved through offsetting the tibial component with respect to the IM canal. (optional Tibial Tray Coupler not shown) Figure T6: Pinning Tibial Guide Plate (NO offset) In these cases, an offset junction component will later be included between the tibial baseplate and the tibial stem. At this time and taking advantage of the current instrument set up, the tibia will be prepared to accommodate the distal portion of this offset junction component that is in line with the IM canal. Having positioned the tibial offset guide plate using the central dial, secure the tibial offset guide plate to the tibia with long pins (Fig T7a). [Note that the coverage of the tibial offset guide plate on the resected tibial plateau is not ideal in this position and its final position will be determined later using an offset dial.] Central Dial Tibial Offset Guide Plate (inadequate coverage of cut tibial face) Distal Reamer Figure T7a: Temporary positioning of Tibial Guide Plate (Offset to be performed) 6
STEMMED TIBIAL PREPARATION 5 of 6 Remove the central dial and distal reamer and place the tibial broach housing in the recess of the pinned tibial offset guide plate. Using the entry reamer, gently ream until the proximal most end of the reamer reaches the top of the tibial broach housing (Fig. T7b). Entry Reamer Tibial Broach Housing NOTE Alternatively, the ø17mm distal reamer can be used in place of the entry reamer. Ream until the 100mm groove reaches the top of the tibial broach housing. Figure T7b: Reaming for distal portion of Offset Junction With the distal portion of the bone prepared for the offset junction, the tibial offset guide plate will now be repositioned, representing the final location of the tibial baseplate. Two offset dials of 4mm and 6mm are available. These offset dials offer a ball plunger/detent tactical interface with the tibial offset guide plate and provide 360 degrees of relative offset positioning of the tibial baseplate with respect to the IM canal. Re-introduce the distal reamer into the IM canal, and if needed, ream the additional depth noted for the Stem with Offset Junction in Table A on page 3. (Be sure to reduce this reaming depth accordingly for any augment cuts already performed on the proximal tibial face). 4mm Offset Dial Long Pin Drop the tibial offset guide plate over the reamer onto the surface of the tibia. Slide the 4mm offset dial over the distal reamer and secure it in the recess of the tibial offset guide plate (Fig. T8). Turn the 4mm offset dial about the distal reamer, repositioning the tibial offset guide plate on the surface of the resected tibia to achieve optimal coverage. If coverage is still inadequate, repeat this process using the 6mm offset dial. Determine the best-fit combination of baseplate size, offset amount, and offset positioning, and then secure the tibial offset guide plate to the tibia with long pins. In using an offset dial, it is important to note which marking on the offset dial is aligned with the midline marking on the tibial offset guide plate (Fig. T8). Remove all instrumentation except the pinned tibial offset guide plate and proceed to the next step, Keel Preparation. Tibial Offset Guide Plate (improved coverage of cut tibial face) (optional Tibial Tray Coupler not shown) Figure T8: Final positioning of Tibial Guide Plate (Offset to be performed) NOTE Recording the offset dial marking that aligns with the midline marking on the offset guide plate (in this case, ‘4.5 B’) aids in later assembling the trial and implant components correctly. 7
STEMMED TIBIAL PREPARATION 6 of 6 STEP 5: Keel Preparation Ream to remove cancellous bone to accommodate the tibial keel and the proximal portion of the optional offset junction. Broach to accommodate the tibial keel. Long Pin Entry Reamer Ream for the tibial keel and optional offset junction: Tibial Broach Housing Tibial Offset Guide Plate Place the tibial broach housing in the recess of the pinned tibial offset guide plate. For no offsetting, use the entry reamer to gently ream the proximal tibia until the distal most groove on the reamer reaches the top of the tibial broach housing (Fig. T9a). In cases of offsetting, use the entry reamer to gently ream the proximal tibia until the proximal most groove on the reamer reaches the top of the tibial broach housing (Fig. T9b). The additional reamed depth will prepare the bone to accept the proximal portion of the offset junction component. Figure T9a: Tibial Keel Reaming (NO offset) Long Pin Entry Reamer Tibial Broach Housing Tibial Offset Guide Plate NOTE Alternatively, the ø17mm distal reamer can be used in place of the entry reamer. For no offsetting, ream until the 65mm groove reaches the top of the tibial broach housing. Ream an additional 5mm if the tibial component is being offset. Note depth of reaming Offset reamed IM canal Figure T9b: Tibial Keel Reaming (Offset to be performed) Broach for the tibial keel: Tibial Broach Insert the tibial broach through the tibial broach housing and gently tap until it reaches its endpoint (Fig. T10- shown here with no offset). Extract the broach from the bone, using a slap hammer if necessary. Long Pin Tibial Broach Housing Tibial Offset Guide Plate The tibia is now prepared for trialing. Figure T11 depicts the tibia prepared for cases in which an offset junction will be implanted, showing accommodation for both the proximal and distal portions of the offset junction as well as the tibial keel. Broaches the shape of tibial implant Figure T10: Broaching Tibial Keel Remove all instrumentation for trialing. Augment cuts on proximal tibial surface Reamed and broached for keel of Tibial Component and proximal portion of Offset Junction Reamed ø17mm for distal portion of Offset Junction Reamed IM canal for Stem Figure T11: Prepared Tibia (shown as for cases of offset) 8
PCK FEMORAL PREPARATION STEP 1: Sizing the Femur Determine the size of revision femur to be implanted. The removed primary implant is a useful reference, and the femoral profile guides (Fig. F1) can also be used to visualize the fit of each size. Femoral Profile Guide STEP 2: Reaming IM Canal Figure F1: Sizing of the Femur Remove cancellous bone to accommodate the stem extension. TABLE A FEMORAL IM CANAL REAMING DEPTH REQUIREMENTS Consult Table A at right to determine the reamer depth marking corresponding to the stem extension to be implanted. Ream the intramedullary (IM) canal with a sharp-tipped distal reamer (ø6.5mm or ø9mm). Ream angled anteriorly and until the appropriate depth marking reaches the distal surface of the femur (Fig. F2). (Be sure to reduce this reaming depth accordingly if the distal face will be augmented.) Progressively increase reamer diameter in 0.5mm increments until the desired cortical bone contact is achieved. The ultimate distal reamer and stem implant diameters should match when uncemented. If cementing the stem, the reamer diameter should be 0.5mm or 1mm larger than that of the stem. REAMER DEPTH MARKING No Offset 65 100 130 175 STEM LENGTH With Offset 100 130 155 205 40mm 75mm 100mm 150mm Distal Reamer NOTE The reamed depth of the IM canal increases if the femoral component is to be offset, see Table A above. If the need to offset the femoral is undetermined at this time, the additional depth can be reamed later. Entry angle into IM canal Figure F2: Reaming IM canal 9
PCK FEMORAL PREPARATION 2 of 10 STEP 3: Distal Femoral Cut and Valgus Angle Preparation Refine the distal femoral face after primary implant removal to improve the bone’s interface with instruments and implant. The depth of resection should be minimized to preserve bone stock. If necessary, remove deficient bone to be replaced with distal femoral augmentation blocks. Subsequent instrumentation uses the ø9mm shaft of the distal reamer as a positioning reference. However, in the case of a narrower ø7.5mm stem, the IM 9mm tibial alignment rod must replace the reamer to provide the required ø9mm reference shaft. This rod can also be used for a ø9mm stem, if preferred. To position the Distal Femoral Cutting Guide Jig (DFCG jig), slide the 6° angle block over the engaged distal reamer, oriented according to the correct operative side. NOTE The Freedom Knee® PCK femoral has a fixed 6° valgus angle. Snap the DFCG jig onto the adapter, and insert the adapter into the slot of the 6° angle block marked ‘Revision.’ Set the resection level by laying the 6° angle block against the distal face of the femur (Fig. F3) and then securing the DFCG jig to the bone using long pins. Use the angel wing to visualize the resection plane, and assess the need for any medial or lateral distal augmentation. Resection depth can be adjusted by 2mm distally or proximally by using the ±2mm pin holes in the DFCG jig. DFCG Jig DFCG adapter 6˚ angle block Figure F3: Assembling Distal Femoral Cut Guide To maintain the correct joint line when both medial and lateral augmentation is needed, use the U-plate to position the resection plane above the femoral surface. In this case, insert the U-plate through the appropriate DFCG jig augment slots (+5, +10 or +15) and lay the U-plate against the distal face of the femur before securing the DFCG jig to the bone with long pins (Fig. F4). U-plate DFCG Jig Once the DFCG jig is secure, detach the adapter and remove it along with the 6° angle block. If there is bone close to or surrounding the distal reamer that also needs clearing, remove the distal reamer before resecting. Make the distal femoral cut using an oscillating saw through the neutral 0mm slot in the DFCG jig if no augmentation is necessary. Saw through the +5mm, +10mm or +15mm augment slots, independently on the medial and lateral sides, to prepare the femur to accept 1, 2 or 3 femoral distal augments, respectively. Differing amounts of distal augmentation is acceptable between the medial and lateral sides. Posterior augmentation will be addressed in the next step. Figure F4: Assembling Distal Femoral Cut Guide with both medial and lateral augmentation 10
PCK FEMORAL PREPARATION 3 of 10 NOTE Femoral distal and femoral posterior augments address distal and posterior condylar defects and are optional for use with the PCK femoral component. They are symmetric to address both medial and lateral defects and are each 5mm thick. Femoral augments, on the distal face, may be stacked up to three high to correct defects from 5mm to 15mm. Femoral augments, on the posterior face, may be stacked up to two high to correct defects of 5mm and 10mm. However, the maximum number of distal and posterior augments combined per side is four; i.e. if three distal augments are used on the medial side, then at most one posterior augment may be used on that same side. STEP 4: Preparation for Femoral Anterior and Posterior Cuts Refine the anterior and posterior femoral cuts, including posterior augmentation cuts, if necessary. Assess the need for offsetting the femoral component with respect to the IM canal. Reintroduce the distal reamer into the IM canal if it was removed to perform the distal femoral resection. Select the size of femoral A/P cutting block that matches the implant size. If the distal face was prepared for augmentation in the previous step, a trial femoral augment can be attached to the underside of the femoral A/P cutting block to increase the stability of the block on the distal face. One side of the femoral A/P cutting block, either medial or lateral, should always rest on the cut distal face of the femur. The other side of the femoral A/P cutting block should, at most, have one trial femoral augment attached. The thickness of this augment should equal the difference between the extent of medial and lateral augmentation prepared for in Step 3. For example, if in making the distal femoral cuts, the lateral side was prepared for 5mm of augmentation and the medial side for 15mm of augmentation, the lateral side of the femoral A/P cutting block should ultimately rest on the bone and the medial side of the block should have one 10mm thick trial femoral augment attached (Fig. F5). (In all situations, the femoral A/P cutting block will never have more than one trial femoral augment attached.) The “small” augments are used for sizes B, C and E femorals and the “large” augments are used for sizes F, G and H femorals. Each size is available in thicknesses of 5, 10 and 15mm with corresponding lengths of augment pins. Attach the augment to the underside of the femoral A/P cutting block through the posterior most hole, using the appropriate length augment pin (Fig. F5). Femoral A/P cutting block (showing underside) 10mm thick Trial Femoral Augment Augment Pin Figure F5: Assembling Femoral A/P Cutting Block and Femoral Augments Femoral A/P cutting block Drop the femoral A/P cutting block over the distal reamer (Fig. F6), resting it on the previously resected distal face of the femur. Then slide the femoral A/P cutting block insert over the distal reamer and fit it into the recess of the femoral A/P cutting block, orienting it according to the correct operative side (Fig. F6). Left orientation Femoral A/P cutting block insert Figure F6: Positioning Femoral A/P Cutting Block (NO offset) 11
PCK FEMORAL PREPARATION 4 of 10 Prior to pinning the block, assess the need for offsetting the femoral component with respect to the IM canal. Within the medial-lateral plane, the width and current position of the femoral A/P cutting block mimic those of the same size femoral implant. An angel wing through the cutting slots will help assess the need for offsetting the femoral component in the anterior or posterior direction. If offsetting, proceed directly to STEP 4B. Otherwise, continue with STEP 4A. STEP 4A: A/P Cutting Block Positioning with No Femoral Offset [Involves femoral A/P cutting block insert instrumentation] If not offsetting the femoral with respect to the IM canal, use an angel wing to best align the anterior and posterior cutting slots of the femoral A/P cutting block with the anterior and posterior resected surfaces from the explanted femoral. Slightly rotate the femoral A/P cutting block, as needed, to balance this optimal alignment and the desire for the femoral A/P cutting block to rest flush against the distal face of the femur. Secure the femoral A/P cutting block to the resected distal surface of the femur with smooth or threaded headed pins. Be sure to fix the femoral A/P cutting block through only the remaining available holes. Figure F7 shows some of the available pinning options when augmenting the medial side. The medial posterior straight hole is not available because the augment is attached through this hole. The oblique hole on the augmented side is avoided when the trial femoral augment used is 10mm or thicker. After securing the femoral A/P cutting block, proceed directly to Step 5: ‘Performing Anterior and Posterior Cuts Including Augment Cuts’. Augment cut Femoral A/P cutting block Long pin Threaded pin Long pin Femoral A/P cutting block insert Figure F7: Pinning Femoral A/P Cutting Block (NO offset) STEP 4B: A/P Cutting Block Positioning with Femoral Offset [Involves femoral offset guide plate and offset dial instrumentation] If the decision is made to offset/reposition the femoral component, check the distal reamer depth in the IM canal against the values in Table A under the column “with offset”, on page 9. If needed, ream the additional depth as reported in this table. (Be sure to reduce this reaming depth accordingly for any augment cuts already performed on the distal face). 12
PCK FEMORAL PREPARATION 5 of 10 Prepare the femoral A/P cutting block with the necessary trial augment as previously described in Step 4 (Fig. F5). Drop the femoral A/P cutting block over the distal reamer, resting it on the previously resected distal face of the femur. Depending on implant size, select either the “small” (B-E) or “large” (F-H) femoral offset guide plate. Drop the femoral offset guide plate over the reamer orienting it for the correct operative side and so that the visible face of the guide plate reads “A/P OFFSET”. Align and secure it to the femoral A/P cutting block on the 2 small pins protruding from the cutting block’s distal face. Then slide the femoral offset dial component (Left or Right component according to operative side) over the distal reamer and fit it into the recess of the femoral offset guide plate (Fig. F8). Augment cut Femoral A/P cutting block Femoral Offset Guide Plate, Showing “A/P Offset” Alignment pins Femoral Left Offset Dial Figure F8: Positioning Femoral A/P Cutting Block (Offset to be performed) Turn the femoral offset dial around the distal reamer to reposition the femoral A/P cutting block for optimal coverage of the femur. Use an angel wing to best align the anterior and posterior cutting slots of the femoral A/P cutting block with the anterior and posterior resected surfaces from the explanted femoral. Secure the femoral A/P cutting block to the femur with threaded headed pins through the oblique holes (Fig. F9). If using a trial femoral augment of 10mm thick or more, use only one threaded headed pin through the oblique hole on only the non-augmented side. Further fixation of the femoral A/P cutting block, using long pins through the straight holes on the distal face, can be done after removal of the offset dial and femoral offset guide plate. Augment cut Femoral Offset Guide Plate, Showing “A/P Offset” In using a femoral offset dial, it is important to note which marking on the offset dial is aligned with the corresponding mark on the femoral offset guide plate (Fig. F9). Threaded Headed Pin Femoral Left Offset Dial Figure F9: Pinning Femoral A/P Cutting Block (Offset to be performed) NOTE Recording the offset dial marking that aligns with the marking on the offset guide plate (in this case, ‘1.5 A’) aids in later positioning the Box Cut Guide and assembling the trial and implant components correctly. Remove the femoral offset dial and femoral offset guide plate and proceed with Step 5: ‘Performing Anterior and Posterior Cuts Including Augment Cuts’. 13
PCK FEMORAL PREPARATION 6 of 10 STEP 5: Performing Anterior and Posterior Cuts Including Augment Cuts Visualize the anterior and posterior cuts using the angel wing. Ensure that anterior notching will be avoided, and assess the need for posterior augmentation. Make the anterior and posterior cuts using an oscillating saw through the appropriate cutting slots in the femoral A/P cutting block. For the posterior cuts, use the ‘0mm’ slots if no augmentation is needed or use the ‘5mm’ or ‘10mm’ augment slots to remove bone for 1 or 2 augments, respectively, as required. The maximum number of posterior augments per side is two. NOTE As previously stated, the maximum number of distal and posterior augments combined per side is four. Therefore, two posterior augments may be used on a particular side only if two or fewer distal augments are used on that same side; again adding up to a combined maximum number of four augments per side. Remove the femoral A/P cutting block and proceed with Step 6: ‘Preparation for Intercondylar Box Cuts’. STEP 6: Preparation for Intercondylar Box Cuts Assembling and positioning of the PCK box cut guide (BCG) Select the size of PCK box cut guide (BCG) to match the implant size and attach trial femoral augments to the underside with augment pins as needed (Fig. F10). The same trial femoral augment and augment pin components were previously used with the femoral A/P cutting block. The “small” augments are used for sizes B, C and E femorals and the “large” augments are used for sizes F, G and H femorals. Each size is available in thicknesses of 5, 10 and 15mm with corresponding lengths of augment pins. Use the correct thickness of trial femoral augments on the corresponding medial and lateral sides to match the previously made distal augment cuts. Orient the trial femoral augments as to ensure no interference with the subsequent box and chamfer cutting slots. Box Cut Guide Trial Femoral Augments (5mm and 10mm) Augment Pins of appropriate length Figure F10: Assembling Box Cut Guide and Femoral Augments If there is no femoral offset, position the BCG as per Step 6A. Otherwise, if the femoral A/P cutting block was positioned to offset the femoral, proceed directly to Step 6B: ‘Positioning the PCK Box Cut Guide (BCG) for Offsetting the Femoral’. 14
PCK FEMORAL PREPARATION 7 of 10 STEP 6A: Positioning the PCK Box Cut Guide (BCG) for No Femoral Offset [Involves femoral drill guide housing and reducer instrumentation] Select and attach the appropriate size femoral drill guide housing, small (B-E) or large (F-H), to the BCG, oriented according to the correct operative side. Drop the assembly over the distal reamer and position it flush against the anterior and distal faces of the resected femur (Fig. F11). Slide the femoral drill guide reducer over the distal reamer and into the boss of the femoral drill guide housing. The femoral drill guide reducer accepts the ø9.0mm of the distal reamer and is needed to correctly position the BCG. Secure the BCG using long pins through the straight holes on its anterior face (use the most distal set of straight holes if multiple sets exist). Femoral Drill Guide Housing Long Pins Box Cut Guide “LEFT” text exposed for left orientation Distal Reamer Femoral Drill Guide Reducer Femoral Drill Guide Housing Figure F11: Positioning Box Cut Guide (NO offset) Remove the femoral drill guide reducer and drill guide housing and note the following prior to extracting the distal reamer. NOTE If the distal reamer diameter exceeds those listed in the table at right corresponding to the femoral implant size, it is necessary to temporarily remove the BCG from the long pins prior to extracting the distal reamer. After removing the distal reamer, reassemble the BCG onto the long pins before proceeding. TABLE B. MAXIMUM REAMER Ø VS. FEMORAL IMPLANT SIZE FEMORAL IMPLANT SIZE B C E F G H REAMER Ø Ø17.5mm Ø18.0mm Ø18.0mm Ø22.0mm Ø22.0mm Ø22.0mm After extracting the distal reamer, additional pins can be used through the oblique holes to further secure the BCG. With only the pinned BCG remaining, proceed directly to Step 7: ‘Performing Central Boss Reaming and Intercondylar Box Cuts’. 15
PCK FEMORAL PREPARATION 8 of 10 STEP 6B: Positioning the PCK Box Cut Guide (BCG) for Offsetting the Femoral [Involves femoral offset guide plate and offset dial instrumentation] Reintroduce the original distal reamer into the IM canal if it was previously removed (diameter which matches the stem to be implanted). Rest the prepared BCG (refer to Fig. F10) against the distal and anterior faces of the femur. Depending on implant size, select either the “small” (B-E) or “large” (F-H) femoral offset guide plate. Drop the femoral offset guide plate over the distal reamer, orienting it according to the correct operative side and so the visible face of the guide plate reads “BOX OFFSET” (Fig. F12). Recess the pegs on the underside of the femoral offset guide plate into the holes on the distal face of the BCG, connecting the two parts. Then slide the femoral offset dial component (Left or Right component according to operative side) over the distal reamer and fit it into the recess of the femoral offset guide plate. Turn the femoral offset dial around the distal reamer to correctly position the BCG. Align the marking on the femoral offset dial with the mark on the femoral offset guide plate, replicating the value used in the positioning of the femoral A/P cutting block in the previous step, 1.5A in our example (Fig. F13). Box Cut Guide Initially secure the BCG using just one long pin through only the straight hole on the side to which the BCG is biased. In our example of a left knee, the BCG (and ultimately the femoral implant) is shifted slightly medially with respect to the IM canal. In this case, pinning the BCG on only the medial side ensures avoiding any interference with the distal reamer. Alignment holes Distal Reamer Femoral Offset Guide Plate Femoral Offset Dial – LEFT Figure F12: Positioning Box Cut Guide (Offset to be performed) Long Pin Disassemble the instrumentation as follows. First, remove the femoral offset dial and offset guide plate. Prior to extracting the distal reamer, temporarily remove the BCG from the long pin. Extract the distal reamer and replace the BCG on the long pin. After extracting the distal reamer, additional pins can be used through the straight or oblique holes to further secure the BCG. With only the pinned BCG remaining, proceed with Step 7: ‘Performing Central Boss Reaming and Intercondylar Box Cuts’. Dial marking alignment for LEFT knee Box Cut Guide Femoral Offset Guide Plate “LEFT” text exposed for left orientation Femoral Offset Dial – LEFT Figure F13: Pinning Box Cut Guide (Offset to be performed) 16
PCK FEMORAL PREPARATION 9 of 10 STEP 7: Performing Central Boss Reaming and Intercondylar Box Cuts Remove intercondylar bone to accommodate the femoral boss and intercondylar box of the PCK femoral implant as well as the distal end of the optional offset junction component. Follow the appropriate description regarding Central Boss Reaming below, depending on whether the femoral component is offset with respect to the IM canal. Central boss reaming in cases with no offset: NOTE If the distal reamer used is ø17mm or larger, central boss reaming is not needed. Proceed directly to the next section entitled ‘Intercondylar box cuts’. If the distal reamer used is less than ø17mm, the femur must be prepared to accept the central boss of the PCK component. Re-attach the appropriate size femoral drill guide housing [small (B-E) or large (F-H)] to the pinned BCG, oriented according to the correct operative side. Pins can be introduced through the oblique set of holes in BCG for additional fixation. Advance the entry reamer through the femoral drill guide housing until the proximal end of the reamer reaches the top of the femoral drill guide housing (Fig. F13a). Remove the entry reamer and femoral drill guide housing, leaving the BCG in place for the subsequent box and chamfer cuts. Long pin Box Cut Guide Entry Reamer Femoral drill guide housing (transparent) Figure F13a: Reaming Central Boss (NO offset) NOTE Alternatively, the ø17mm distal reamer can be used in place of the entry reamer. Reaming until the 100mm groove is about 15mm shy of the top of the femoral drill guide housing replicates the depth achieved using the entry reamer. 17
PCK FEMORAL PREPARATION 10 of 10 Central boss reaming in cases with femoral offset: NOTE Central boss reaming is always needed in cases where the femoral is offset. Prepare the femur to accept not only the central boss of the PCK femoral component, but also the distal portion of the offset junction component. Attach the appropriate size femoral drill guide housing [small (B-E) or large (F- H)] to the pinned BCG, oriented according to the correct operative side. Pins can be introduced through the oblique set of holes in BCG for additional fixation. Advance the ø17mm distal reamer through the femoral drill guide housing, reaming until the 100mm groove reaches the top of the femoral drill guide housing (Fig. F13b). Remove the distal reamer and femoral drill guide housing, leaving the BCG in place for the subsequent box and chamfer cuts. Long pin Box Cut Guide Ø17mm Distal Reamer Femoral drill guide housing (transparent) Figure F13b: Reaming Central Boss (Offset to be performed) Intercondylar box cuts: For this step, ensure that the pinned BCG is the only instrumentation present. With a reciprocating saw, use the three centralized surfaces of the BCG to aid in making the box cuts on the distal femur (Fig. F14). Be careful not to risk fracture by undermining the medial or lateral condyles. Use an oscillating saw through the cutting slot in the BCG to perform the anterior chamfer resection. Guide the saw along the posterior angled faces of the BCG to perform the posterior chamfer resection. Guides for box cuts Anterior chamfer cutting slots Guides for posterior chamfer cuts Figure F14: Performing Box Cuts Opening IM canal to accept femoral offset component: If offsetting the femoral and the IM canal is reamed to a diameter smaller than Ø17mm, additional reaming is necessary to prepare the femur to accept the proximal portion of the offset junction in line with the IM canal. Remove all instrumentation. Using the Ø17mm reamer and following the previously reamed IM canal, ream until the 65mm mark on the shaft of the reamer is flush with the depth of the box cut. Remove all instrumentation in preparation for trialing. 18
TRIALING Trialing the PCK Femoral Components Select the size of femoral trial that matches the size to be implanted. Optional components include a stem extension trial, femoral augment trials and 4mm offset junction trial. Femoral Trial Augments (optional) Augment Pins If needed, attach the appropriate size and thickness of femoral trial augment(s) with the appropriate length augment pins(s) to the femoral trial (Fig. I1). The thickness and placement of the femoral trial augment(s) is dictated by the femoral distal and posterior augment cuts previously made. If not offsetting, thread and hand tighten the appropriate diameter and length stem extension trial into the femoral trial (Fig. I2a). Figure I1: Attaching Femoral Trial Augments If offsetting, thread and hand tighten the appropriate diameter and length stem extension trial into the 4mm offset junction trial. Thread the offset junction trial into the central boss of the femoral trial until the offset junction trial can spin freely (Fig. I2b). Stem Extension Trial Femoral Trial Align the femoral trial and offset junction trial markings according to the rotational position recorded earlier between the femoral offset guide plate and the femoral offset dial (refer to step 4B, page 12, and Fig. F9, page 13, under the PCK Femoral Preparation for offset marking). Secure this orientation by inserting the longest augment screw (15mm) through the hole in the femoral trial and threading it into the offset junction trial (Fig. I3). Figure I2a: Attaching Femoral Stem Trial (No offset) Stem Extension Trial Offset Junction Trial (4mm) Femoral Trial Figure I2b: Attaching Femoral Stem Trial and Offset Junction Trial Stem Extension Trial Offset Junction Trial (4mm) Femoral Trial ‘1.5-A’ Orientation Augment Screw Figure I3: Securing Femoral Offset Positioning 19
TRIALING 2 of 4 Place and impact the femoral trial assembly into the prepared femur using a femoral impactor. Using a tibial alignment guide, reduce the knee to estimate the tibial liner thickness (Fig. I4). Tibial Alignment Guide Femoral Trial Assembly Trialing the Stemmed Tibial Components Select the appropriate sizes of the stemmed tibial tray trial and stem extension trial components that match the sizes to be implanted. Optional components include an offset junction trial and tibial augment trials. Impactor Figure I4: Impacting Femoral Trial and Estimating Tibial Liner Thickness If not offsetting, thread and hand tighten the stem extension trial into the keel of the stemmed tibial tray trial (Fig. I5a). If offsetting, thread and hand tighten the stem extension trial into the distal end of the offset junction trial. Thread the proximal end of the offset junction trial into the keel of the stemmed tibial tray trial until the offset junction trial can spin freely (Fig. I5b). Align the stemmed tibial tray trial and offset junction trial markings according to the rotational position recorded earlier between the tibial offset guide plate and the offset dial (refer to step 4, page 11, and Fig. T8, page 7, under the Stemmed Tibial Preparation for offset marking). Secure this orientation by inserting the longest augment screw (15mm) through the hole in the stemmed tibial tray trial and threading it into the offset junction trial (Fig. I5b). Stemmed Tibial Tray Trial Stem Extension Trial Figure I5a: Attaching Tibial Stem Trial (No offset) Augment Screw Stemmed Tibial Tray Trial Offset Junction Trial ‘4.5-B’ Orientation Stem Extension Trial Figure I5b: Attaching Tibial Stem Trial (No offset) 20
TRIALING 3 of 4 If required, secure tibial augment trial(s) to the distal surface of the stemmed tibial tray trial with the appropriate length augment screw(s) (Fig. I6). The number and size of augment trials per side is determined by the previously made tibial augment cuts. Stacked multiple tibial augment trials can be of the same size or in descending sizes. The lugs on the tibial augment trials are used to aid their alignment and placement. Thread the augment screw(s) fully through each augment before stacking and threading the screw through the next augment. Hand tighten the screw(s) using a 2mm hex driver to lock the augment(s) to the stemmed tibial tray trial. Tibial Augment Trials Tibial Trial Assembly (shown with offset) Augment Screw Figure I6: Attaching Tibial Augment Trials Impact the tibial trial assembly into the resected and prepared tibia (Fig. I7). Tibial Trial Assembly NOTE An alternate assembly method for the stemmed tibial trial assembly with offset is as follows. As previously described, thread and hand tighten the stem extension trial into the distal end of the offset junction trial, and thread the proximal end of the offset junction trial into the keel of the stemmed tibial tray trial until the offset junction trial can spin freely. Attach tibial augment trials as described and shown in Fig. I6. Impact the assembly into the prepared tibia prior to securing the orientation of the offset junction trial. Allow the tibial trial assembly to find its natural position in the prepared tibia and adjust the placement of the stemmed tibial tray trial to maximize tibial coverage. As the last step, lock this orientation in place by inserting the longest augment screw (15mm) through the stemmed tibial tray trial and threading it into the offset junction trial. Impactor Figure I7: Impacting Tibial Trial Insert the appropriate size PS tibial trial liner or PCK tibial trial liner into the recess in the stemmed tibial tray trial (Fig. I8). The approximate liner thickness was estimated earlier using the tibial alignment guide. Multiple tibial liner thicknesses can be trialed here to obtain the correct balance during reduction of the knee. PCK Tibial Trial Liner PS Tibial Trial Liner OR Tibial Trial Assembly Figure I8: Inserting Tibial Trial Liner 21
TRIALING 4 of 4 Trialing the Patella Refer to Freedom Total Knee® System Surgical Technique (MXO-MP00005) for information on the preparation and trialing of the patella. Trial Reduction and Gap Balancing Perform a trial reduction of all the components (Fig. I9). Check alignment, varus/valgus stability, extension, patellofemoral tracking, anteroposterior stability, and flexion degrees. Use a gap balancing chart to adjust and modify any imbalance in the knee. Soft tissue releases can be performed as necessary to allow for fine tuning the tension in extension and flexion. Once satisfied with their performance, remove the femoral and tibial trial assemblies. Take note of all components, their respective sizes, the tibial trial liner thickness, and the coordinated markings between the offset junction and stemmed tibial tray trial and between the offset junction and femoral trial. These markings should match those recorded earlier in the procedure. Refer to step 4 (Fig. T8) under the Stemmed Tibial Preparation and step 4B (Fig. F9) under the PCK Femoral Preparation to review the offset orientation. Figure I9: Reduction of Knee with Trial Components 22
IMPLANTS Preparing The Stemmed Tibial Implant Assembly Prepare the stemmed tibial baseplate by removing the necessary plugs using care to not damage the component. The taper hole plug is removed using an osteotome between the plug and keel. If augmenting, the tibial augment hole plugs are removed by placing the baseplate face down on a flat surface and pushing out the plugs with the 2mm hex driver. If a PCK tibial liner is to be implanted, the central sealing plug is unthreaded using a 2mm hex driver. Stem Extension Stemmed Tibial Baseplate Set Screw (1) In cases where no tibial offset is needed, there is one Morse-type taper locking mechanism with set screw between the stemmed tibial baseplate and stem extension (Fig. I10a). The set screw is included with the tibial component, but packaged separately in its own pouch. Seat the stem extension firmly within the keel taper. Place the baseplate face down on a flat surface of the surgical cart and while protecting the stem extension strike it solidly once with a two- pound mallet. Use the 2mm hex key to thread and hand tighten the set screw through the hole in the keel. Figure I10a ‘4.5-B’ Orientation Stem Extension In cases involving a tibial offset junction, there are two Morse- type taper locking mechanisms with set screws (Fig. I10b). The set screws are included with their respective components, but again packaged separately in their own pouches. Seat the stem extension firmly within the distal end of the offset junction. Properly orient the offset junction with respect to the baseplate, replicating the alignment markings determined during trialing, and firmly seat its proximal end into the keel taper of the baseplate. Place the baseplate face down on a flat surface of the surgical cart and while protecting the stem extension strike it solidly once with a two-pound mallet. Use the 2mm hex key to thread and hand tighten the set screws through the holes in both the body of the offset junction and the keel of the baseplate. Offset Junction Set Screws (2) Stemmed Tibial Baseplate Figure I10b NOTE The set screw in the baseplate must be assembled before attaching the tibial augments in the next step. 23
IMPLANTS 2 of 4 Attach tibial augment(s) to the distal surface of the stemmed tibial baseplate with the appropriate length augment screw as required (Fig. I11). The lugs are used to aid alignment and placement. Thread the augment screw fully through each augment before stacking and threading it through the next augment. Hand tighten the screw(s) using a 2mm hex driver to lock the augment(s) to the baseplate. Tibial Augments Tibial Implant Assembly (shown with offset) Preparing the PCK Femoral Implant Assembly Augment Screw In cases where no femoral offset is needed, there is one Morse-type taper connection with set screw between the femoral implant and optional stem extension (Fig. I12a). The set screw is included with the femoral component, but packaged separately in its own pouch. Firmly seat the stem extension into the female taper of femoral implant central boss. Protect the articulating surface of the femoral; support it against the surface of the surgical cart, and while protecting the stem extension, strike it solidly once with a two-pound mallet. Use the 2mm hex key to thread and hand tighten the set screw through the hole in the side of the central boss. Figure I11 Stem Extension Set Screw Femoral Implant In cases involving a femoral offset junction, there are two Morse-type taper locking mechanisms with set screws (Fig. I12b). The set screws are included with their respective components, but again packaged separately in their own pouches. Seat the stem extension firmly within the female taper of the offset junction. Properly orient the offset junction with respect to the femoral implant, replicating the alignment markings determined during trialing, and firmly seat its distal end into the female taper of the femoral implant. Protect the articulating surface of the femoral; support it against the surface of the surgical cart, and while protecting the stem extension, strike it solidly once with a two-pound mallet. Use the 2mm hex key to thread and hand tighten the set screws through the holes in both the body of the offset junction and the central boss of the femoral. Figure I12a Stem Extension Set Screw Offset Junction Femoral Implant Set Screw Figure I12a Attach posterior femoral augment(s) and distal femoral augment(s) with the appropriate length augment screw(s) as required. The number and type of augments should replicate that of the trial assembly (Fig I13). Femoral Posterior Augment Femoral Distal Augments Augment Screws Figure I13 24
IMPLANTS 3 of 4 Implantation Using the standard mixing protocol for the bone cement, mix and prepare the bone cement for cementing the implants. We recommend the following order of implantation. a) Stemmed tibial components b) PCK femoral components c) Tibial articulating surface (tibial liner) d) Patellar component a) Stemmed Tibial Components Prior to cementing, irrigate the bone surfaces and drill sclerotic areas with a 1/8” drill bit to a depth of approximately 1/8”. Firmly press cement into the bone surfaces, including the perimeter of the reamed keel entry hole, to allow for adequate interdigitation. Place cement on the undersurface of the stemmed tibial baseplate and firmly impact the assembled stemmed tibial components into place using the tibial impactor (Fig. I14). Remove excess cement. If desired, cement can also be used on the stem extension. In this case, the IM canal must have been reamed 0.5mm to 1mm in diameter larger than the stem diameter to be implanted (refer to Step 1 under Stemmed Tibial Preparation “Reaming IM Canal”). Impactor Tibial Implant Assembly Figure I14 b) PCK Femoral Components Femoral Implant Assembly Hyperflex the knee and dry the distal femoral bone cuts. Finger pressurize the posterior condyles with cement. Apply bone cement to the undersurface of the femoral component. Firmly impact the femoral components into place using the femoral impactor (Fig. I15). Remove excess cement. If desired, cement can also be used on the stem extension. In this case, the IM canal must have been reamed 0.5mm to 1mm in diameter larger than the stem diameter to be implanted (refer to Step 2 under PCK Femoral Preparation “Reaming IM Canal”). Impactor Figure I15 25
IMPLANTS 4 of 4 c) Tibial Articulating Surface Impactor Irrigate the surface of the stemmed tibial baseplate and remove any excess debris to clear the locking mechanism. Firmly impact the selected PS or PCK tibial liner into place with the tibial impactor and check to see that the locking mechanism is engaged (Fig. I16). In cases with a PCK tibial liner, use a 2mm hex driver to advance the captured locking screw (currently inside the liner) into the stemmed tibial baseplate, securing the liner in place. PCK Tibial Liner PCK Tibial Liner Locking Screw Figure 116 d) Patellar Component Refer to Freedom Total Knee® System Surgical Technique (MXO-MP00005) for information on preparation and implantation of the patella. Closure is performed in the usual manner. 26
NOTES 27
NOTES 28
NOTES 29
For more information about Freedom Knee® please contact your local representative. SEARCH: freedom knee Please see the package insert for complete device description, product selection information, indications, contraindications, precautions, adverse effects, warnings, materials, sterilization and patient guidance associated with the Freedom Total Knee® System. CAUTION: THIS DEVICE IS RESTRICTED TO SALE BY OR ON THE ORDER OF A LICENSED PHYSICIAN Freedom Knee® is manufactured by Maxx Orthopedics, Inc. FREEDOM, FREEDOM KNEE, PCK, Pursue Life and Think Outside the Box are Registered Trademarks of Maxx Orthopedics, Inc. © 2017 Maxx Orthopedics. All rights reserved. Updated September 2017. Maxx Orthopedics, Inc. 531 Plymouth Road, Ste. 526 Plymouth Meeting, PA 19462 USA www.maxxortho.com Maxx Orthopedics Brochure No. MXO-MP00023-R03