
Scoliometer
Scoliometer. HS 349L. Instructions for Use . 1. View the person from behind, standing erect. See figure 1. Instructions for Use. 2. Ask the person to extend his arms forward and place hands together with palms flat against each other, as if to dive into water. See figure 2 .
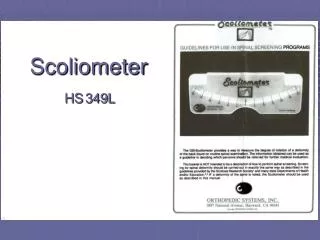

Scoliometer
E N D
Presentation Transcript
Scoliometer HS349L
Instructions for Use • 1. View the person from behind, standing erect. • See figure 1
Instructions for Use • 2. Ask the person to extend his arms forward and place hands together with palms flat against each other, as if to dive into water. • See figure 2
Instructions for Use • 3. Ask the person to bend forward slowly, stopping when the shoulders are level with the hips. View the patient from both the front and the back. For best view, your eyes should be at the same level as the back. Note any rib elevation and/or asymmetry in the flank (low back) area. • See figure 3
Instructions for Use • 4. Before measuring with the Scoliometer, adjust the height of the person’s bending position to the level where the deformity of the spine is most pronounced. This position will vary from one person to another depending upon the location of the curvature. For example, a curve low in the lumbar spine will require that the person bend further forward than one which is present in the thoracic or upper spine.
Instructions for Use • 5. Lay the Scoliometer across the deformity at right angles to the body, with the “0” mark over the top of the spinous process. Let the Scoliometer rest gently on the skin; do not push down. Read the number to degrees of rotation. • See figure 4a and 4b
Instructions for Use • 6. Note: If there is asymmetry in both the upper and lower back, two Scoliometer readings will be necessary. The curves will almost always go in opposite directions with the one in the thoracic spine usually to the right and the other in the lumbar spine usually to the left. • See figure 5a and 5b
Instructions for Use • 7. The screening examination is considered positive if the reading on the Scoliometer is 5 degrees or more at any level of the spine. Persons in this category should be referred immediately for further medical evaluation (orthopedic surgeon). Lesser degrees of rotation may or may not indicate a mild degree of scoliosis. Immediate referral is not necessary; however, in such cases re-screening is recommended within three to six months. Consult your local medical advisor to the program for details.
Instructions for Use • 8. Record your findings on the postural examination form for future reference.
Instructions for Use • 9. A change of 3 degrees or more of a scoliometer measurement indicates a possible curve progression. A change of 2 degrees or less usually indicates only minor variation in posture. It should be noted however, that in some patients, curve progression may occasionally occur without a change in the clinical measurement.