eBackPack
eBackPack. Working with the interface and interacting with the iPad app. . Logging in to eBackPack. https:// bishopmoore.ebackpack.com/login Your login name is the same as your Bishop Moore login. ( lennoxm ) The default password = hornets.

eBackPack
E N D
Presentation Transcript
eBackPack Working with the interface and interacting with the iPad app.
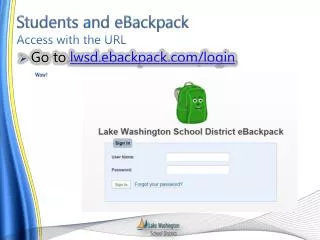
Logging in to eBackPack • https://bishopmoore.ebackpack.com/login • Your login name is the same as your Bishop Moore login. (lennoxm) The default password = hornets. • You will be asked to change your password when you login.
Your Home Page Your homepage will list all the recent activity happening with your eBackPack account. It will show assignments awaiting review, current assignments, graded work, and recently added files.
Your eBox. • An eBox is like an email inbox and outbox combined together into one. You will see all interactions between users related to files in your eBox.
Your Files. • The My Files section of your control panel is where you will store all of your documents. From here, you can add, rename, move, copy or delete folders.
Adding files… • Once you’ve created a folder, click on that folder. You’ll have the option now to add files to that directory. • Once files are added, you’ll be able to make changes to those files or move them to different locations.
Creating Classes… • To create a class, click on the ‘Settings and Reports’ tab.
Click the ‘Classes’ tab. • You’ll see ‘Active’ classes and ‘Deleted’ classes. • Click Active. • From here, you can add a class.
Working with your classes… • Any classes you’ve created will now appear on your control panel when you return to the eBackPack home screen. • To add an assignment, click the add assignment button.
Create an assignment folder… • When students are logged in, they can access that folder and upload their completed work to the assignment folder. • Once you’ve created an assignment folder, students in your class will be able to see that folder. You can then click ‘Add Files’ to add any assignment documentation.
Student submissions… • When students turn in assignments you will be notified on your ‘Updates’ page at the top of your control panel. Click the class, then assignment. You can then Review/Grade the work.
Grading student work. • Once assignments have been submitted, you can click on the submissions from either your class page or your updates page.
Returning work to students. • The Grade and Review screen allows you to assign a grade, make comments and even attach additional files. Once finished, click ‘Complete Review and Return’.
QUESTIONS? • If you have any additional questions or would like to learn more about the advanced feature of eBackPack, feel free to e-mail me or stop by my office in the media center at any time.