Download

1 / 15
150 likes | 183 Views
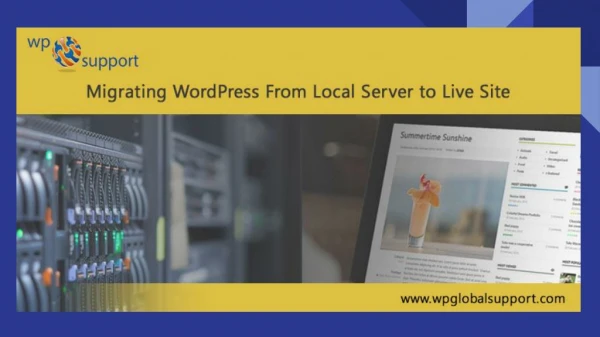
Are you seeking the most effective and simple methods of how to install WordPress on localhost, Ubuntu, Windows 10, and Mac? If yes, then stop here because you arrive at the right place.<br><br>Visit- https://www.pnjsharptech.com/blog/how-to-install-wordpress/<br>

E N D
How to Install WordPress on Localhost, Ubuntu, and Windows? Are you seeking the most effective and simple methods of how to install WordPress on localhost, Ubuntu, Windows 10, and Mac? If yes, then stop here because you arrive at the right place. WordPress is the highly famous and most demanded CMS, also known as a content management system, on the internet. It permits you to test the latest WordPress features, understand how to grow with WordPress, simply set up flexible blogs, and create internet sites before transferring them to the live server. In this blog post, we will share with you some simple steps of how to install WordPress on localhost, Ubuntu, and Windows. So, let’s started! How To Install WordPress on Localhost Nowadays, installing WordPress on localhost is extremely simple. You merely have to follow the below-mentioned steps. Step 1: Download a Local Server Software
Firstly, we will have a local server software just to create a localhost environment and install WordPress on localhost. For example, MAMP is the best and cross-platform web server solution heap package. Because WordPress is written in PHP language, so it needs a platform to operate. MAMP is the best and unmatched method to do this. In addition, you could use the development environment of your preference as per your operating system (whether it is MacOS or Windows). Step 2: Install MAMP Server The second step is you need to click on the downloaded MAMP and MAMP Pro package file to operate the installer. Now you need to do is hit on the “Continue” on some following popups till the “Install” option comes. Click on “Install” upon consenting to the conditions and guidelines of the software license.
Step 3: Run MAMP on Your Computer System As soon as you have installed MAMP efficaciously, run MAMP on your laptop or computer system and hit on the Start Servers. After launching the servers, the system will automatically take you to a success page in your default browser demonstrating some information. Currently, your MAMP is fully prepared to work. Step 4: Create a Proper Database
Your WordPress internet site requires a proper database to save its data on. For this, go to localhost/ PHPMyAdmin on your browser. Next, hit on the “New” and give it a simple name then again hit on the “Create” to complete the procedure. Always keep the “Database Name” in your mind as you surely require using it in the future. Step 5: Download WordPress To install WordPress on localhost, you require to download WordPress from the official internet site. Unzip the downloaded zip file quickly.
Step 6: Put WordPress in MAMP’s htdocs At this stage, you need to go to the MAMP directory on your laptop or computer’s system drive. Now, unlocked “htdocs” folder (discovered within the MAMP directory), and as it is paste the unpacked WordPress folder in there. Step 7: Install WordPress on Localhost
Finally, you require to do that type of localhost/WordPress (whatever the name of your WordPress file in the htdocs) on your laptop or computer browser’s address bar and click enter. Currently, do some more actions to finish the WordPress installation on localhost. At last, choose language and hit on the “Continue“. Ultimately, hit on the “Let’s go!” push button on the subsequent page. How To Install WordPress in Windows Installing WordPress on Windows may possibly appear like a chaotic procedure, but it’s easy if you operate thoroughly. Here, we have arranged the five most effective and extremely easy steps to install WordPress on windows. Step 1: Download and Install XAMPP XAMPP and WAMP are two extraordinarily important local server solution packs for MySQL, PHP, Apache, etc. WAMP is expressly developed for Windows, whereas XAMPP is cross- platform and operates in each operating system. Furthermore, you could also host and alter regular internet sites on Windows utilizing XAMPP. Here, we will proceed with XAMPP because if you alter your operating system, the procedure doesn’t alter for you. Though, if you would like to make use of WAMP, here is how you establish your own WAMP server.
Now you need to download and install XAMPP as premises. And as soon as XAMPP operates on your laptop or computer system, after that you will have the XAMPP control panel noticeable on your screen. Here, you could easily use the control panel to direct and operate the server as well as database functionalities within your personal computer. Now you need to click the Start button alongside Apache & MySQL to start their functionality on your computer. If the background color of the names alterations to light green, it suggests the modules are begun and running appropriately. You could make use of the Stop button to halt them at any time. Also, you could easily ignore the additional features like Mercury, Tomcat, FileZilla, etc. Except you know for really you require them, keep them off merely to avoid additional strain on your server. Step 2: Create a Localhost Database XAMPP encompasses MySQL in it. So, you could establish a proper database utilizing it. Now, hit on the ‘Admin’ choice alongside MySQL on the XAMPP control panel. It’ll direct you to the phpMyAdmin databases dashboard.
Now, pick New from the left sidebar and input your specific database name, and pick out Collation type. Ticking on the Create button will generate a localhost database. Step 3: Download the Most Recent Version of WordPress Always download the most recent version of WordPress: download WordPress. You’ll get a zipped folder with WordPress files in it. Easily extract the file, and there will be a folder comprising the core WordPress files. Give a new name to the folder as your database name (mysite). Remain the similar name for both database as well as WordPress folder. It’s necessary to synchronize the database and files. In the XAMPP control panel, try to navigate to Explorer > htdocs. Then paste the retitled WordPress file (mysite) within the htdocs folder.
Step 4: Install WordPress and Construct a Localhost Website Now, start your web browser. Go to the address bar and simply type localhost/mysite and hit to the enter. At this point, mysite is the server’s name. If this WordPress installation panel seems, then you have done it brilliantly until this stage. If not, then please recheck and replicate the earlier steps. Choose your favorite language and hit Continue to continue. In the following window, you must select the database you would like to use with your WordPress localhost internet site. Fill in the areas like so: Database Name: mysite (the database we generated directly above) Username: root Password: (stay this area vacant) After filling up the areas, now hit the Submit button at the end of the page. On the following window, hit the Run the Installation push button to start the WordPress installation procedure. On the subsequent page, enter your Site Title, select Username, Password, and give an email address. Later hit the Install WordPress push button. In a few moments, you will see WordPress installed on your windows effortlessly.
To type localhost/mysite on the address bar of your web browser. Step 5: Log In to Your WordPress Localhost Internet site stay on your WordPress localhost website, simply You just need to type localhost/mysite/wp-adminon your address bar. It’ll direct you to the login page. Input the formerly selected username and password to log into your windows WordPress localhost internet site. In case you would like to alter your localhost website’s password, simply navigate to Users then All Users then Admin then New Password/Change Password. If you haven’t altered the default password, you may possibly be inquired to input a different password rather than altering the password. Now you need to visit the WordPress dashboard and discover all the Customize Your Site push button on the exhibit to begin tailoring. Following the push button will direct you to the internet site customization menu. Right from the customization menu, you could make numerous alterations to your localhost internet site. WordPress version 5.7 has launched altering themes to background, widgets, menu, site color, and several others in a structured customization menu.
How To Install WordPress in Ubuntu In this section, we will share the numerous but simple steps for the installation of the LAMP stack before proceeding to install WordPress. Step 1: Install Apache Web Server To easily install Apache web server, a problem the command underneath: $ sudo apt-get install apache2 apache2-utils We require to allow Apache2 web server to begin at system boot time, as well begin the service as follows: $ sudo systemctl enable apache2 $ sudo systemctl start apache2 To check whether the server is operating well, start your web browser and go into http://server_address. The Apache2 default index page will be demonstrated in case the web server is up and functioning.
Step 2: Install MySQL Database Server Later, we require to install the MySQL database server by functioning the command underneath: $ sudo apt-get install mysql-client mysql-server If you would like to install MariaDB, you could install it utilizing subsequent command. $ sudo apt-get install mariadb-server mariadb-client For the period of the package installation, you will be encouraged to set the root user password for mysql. Select a strong and secure password, then click on the OK push button twice to continue further. The database server deployment is not yet protected, for this purpose, a problem the subsequent command to toughen its safety: $ sudo mysql_secure_installation Initially, you will be inquired to install the ‘validate_password’ plugin, so simply type in Y/Yes and press Enter, and then select the default password intensity level. Significantly, if you do not choose to alter the root password, subsequently type N/No when triggered to do so. Answer Y/Yes for the rest of the following queries.
Step 3: Install PHP and Modules Finally, we intend to install PHP and a small number of modules for it to be successful with the web as well as database servers applying the command underneath: $ sudo apt-get install php7.0 php7.0-mysql libapache2-mod-php7.0 php7.0-cli php7.0-cgi php7.0-gd Moreover, to check if php is functioning in partnership with the web server, we require to generate a info.php file inside /var/www/html. $ sudo vi /var/www/html/info.php And quickly paste the code beneath into the file, save it, and immediately exit. <?php phpinfo(); ?> When that is completed, start your web browser, and simply type in the address http://server_address/info.php. You must be competent to view the php info page beneath as a confirmation. Step 4: Install WordPress CMS Download the most recent WordPress package and extract it by releasing the commands beneath on the terminal:
$ wget -c http://wordpress.org/latest.tar.gz $ tar -xzvf latest.tar.gz Then shift the WordPress files from the extracted folder immediately to the Apache default root directory, /var/www/html/: $ sudo rsync -av wordpress/* /var/www/html/ Later, set the appropriate permissions on the internet site directory, that is provide ownership of the WordPress files to the web server as follows: $ sudo chown -R www-data:www-data /var/www/html/ $ sudo chmod -R 755 /var/www/html/ Step 5: Create WordPress Database Implement the command under and give the root user password, then click on the Enter to relocate to the mysql shell: $ mysql -u root -p At the mysql shell, simply type the subsequent commands, pushing Enter after every single line of a mysql command. Consider using your own, reasonable values for database_name, databaseuser, and use a powerful and protected password as databaseuser_password. Go the /var/www/html/ directory and give new name to existing wp-config- sample.php to wp-config.php:
$ sudo mv wp-config-sample.php wp-config.php Subsequently, revise it with your database info underneath the MySQL settings section. Later, reopen the web server and mysql service applying the commands under: $ sudo systemctl restart apache2.service $ sudo systemctl restart mysql.service Start your web browser, then again enter your server address: http://server- address to find the welcome page underneath. Read through the page and hit on the “Let’s go!” to continue further and fill all ask for on screen info. Conclusion Anticipating that everything went on just outstanding, you can now relish WordPress on your system. If you are looking for a top website development company in India, then stop here. We, PNJ SharpTech, are a leading company shaping digital solutions right from conceptualization to implementation, data migration, API integrations, and plugin development with complete ingenuity. We develop superior-performing and simple-to-manage WordPress websites for our precious clients with good quality business results. View Source: How to Install WordPress development