Full Face Mask and Wireless Communications
1.29k likes | 1.79k Views
Full Face Mask and Wireless Communications. East Carolina University Diving & Water Safety 2002. Overview. This course introduces the diver to the techniques of full face mask scuba and wireless SSB underwater communications.

Full Face Mask and Wireless Communications
E N D
Presentation Transcript
Full Face Mask and Wireless Communications East Carolina University Diving & Water Safety 2002
Overview • This course introduces the diver to the techniques of full face mask scuba and wireless SSB underwater communications. • The course covers benefits, limitations, disadvantages, and hazards of: full face masks, and u/w wireless communication. • This module includes lecture, confined water practice sessions, open water skills evaluation, and a written exam.
Goals of Training • To provide an overview of full face mask and half mask diving equipment and techniques. • To allow full face mask diving and wireless communication to be experienced in a controlled setting. • To provide an understanding of the advantages and limitations of full face mask diving. • To introduce divers into the correct protocols for underwater speaking and communication. • To introduce divers to emergency procedures specific to full face mask and half mask diving equipment.
Outline of Training • Lecture • Communicating and Speaking Underwater • Equipment • Maintenance • Advantages and Limitations • Choosing Equipment • Emergency Situations • Pool work • Openwater work
Communicating and Speaking Underwater • Traditional underwater communication involve the use of visual or tactile techniques. • Hand signals, slates, squeezes, pulls, etc. • These techniques are useful but tend to be slow and limited.
Communicating and Speaking Underwater • Under normal scuba conditions, speech is impaired by two factors: • The lack of an adequate airspace in front of the mouth. • The scuba mouth piece.
Communicating and Speaking Underwater • Providing an airspace in front of the mouth allows divers to speak and be understood by another diver close by. • Use of underwater SSB (single side band) equipment extends the range of the spoken word underwater.
Communicating and Speaking Underwater • To make yourself understood you must: • Speak Slowly • Enunciate Properly • Speak words individually • Time exhalations to minimize bubbles (this may be necessary when listening also.) • Do not speak over other divers • Do not clutter the airwaves -e.g. singing, swearing, etc.
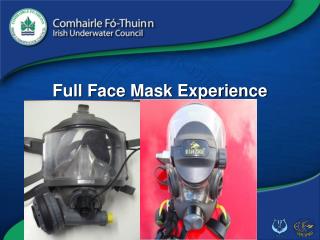
Equipment • AGA • EXO-26 • Half Mask • SSB 2000 • SSB 3000 • XT-100 Buddy Phone • MKII Buddy Phone • 3000-S (surface unit) • CDK-4 Surface Kit
AGA • The Divator MK II, commonly referred to as the AGA Mask, manufactured in Sweden by Interspiro Inc. • The AGA differs from other full face masks in that the regulator hose comes into the mask from the left side.
AGA • The Aga has a flat visor, the sides of which are mat finished to avoid optical distortions. • The visor is considered low volume by full face standards, and is designed to minimize positive buoyancy effect. • The visor is closer to the wearer's eyes, giving the user an increased angle of vision.
AGA • The masks have holed studs for mounting glasses.
AGA • The mask is designed with an inner mask that fits over the divers mouth and nose. • This inner mask has separate inhalation and exhalation channels which minimize the dead air space in the mask and does not allow for the mixing of inhaled and exhaled air.
AGA • The mask uses a demand style 2nd stage regulator. • It is not a free flow system. • If the mask is sealed properly, it will only supply air when you demand it. • This is true with both the positive pressure and non-positive pressure 2nd stage regulator.
AGA • Air flows from the 1st stage via the AGA supply hose into the 2nd stage regulator then up passages into the mask.
AGA • Defogging Feature: • During inhalation, air flows from the breathing valve up through the deminster ports and over the inside of the visor to prevent condensation from forming, and on through the non-return valves into the inner mask.
AGA • Equalizing Pressure: • The AGA is equipped with an adjustable nose dam to aid in equalizing pressure in the ears and sinuses.
AGA • The nose dam should be adjusted so that the nose can be engaged with a slight upward pressure on the mask.
AGA • Purge Button Placement: • The purge button is located on the right side of the mask on the end of the regulator.
AGA • Breathing Resistance: • Breathing resistance will increase slightly if the diver is in a face up position. • This is less noticeable with the positive pressure version of the AGA. • A poor fitting, non-positive pressure mask, may seep water around the face seal under these conditions.
EXO 26 • The EXO-26 full face mask is designed and manufactured by Diving Systems International of Santa Barbara, CA. • It differs from the AGA by having a ridged exoskeleton and it does not have an inner mask.
EXO 26 • The volume of air held in the mask, while it is on the divers face, is higher than the AGA.
EXO 26 • Scuba Style Ear Equalizing: • A large nose pocket in the mask allows divers to equalize ear pressure by pinching the nose.
EXO 26 • Regulator Adjustment Knob: • The EXO-26 is not a positive pressure breathing mask. However, the regulator can be adjusted by the diver during use to reduce breathing resistance. Adjustment can be made to the point of the regulator free flowing.
EXO 26 • Automatic Defogging: • As the diver inhales, the incoming air goes up through the inlet tube and down across the lens, defogging and flushing the mask with each breath.
EXO 26 • Earphone Pockets: • The mask seal of the EXO-26 is equipped with pockets which house the earphone portion of the underwater communication equipment.
EXO 26 • Purge Button Placement: • The purge button is located on the center line of the mask over the divers’ mouth.
EXO 26 • Regulator Adjustment: • The adjustment knob should be set for easy breathing on the surface. • Once under water, the adjustment may be changed to compensate for work rate or other factors.
EXO 26 • Breathing Resistance: • Breathing resistance will increase in a face up position. • If the adjustment knob is too tight and the mask is poorly fit, it is possible for water to leak past the face seal. Usually at the temple area. • Backing out the adjustment knob will lesson resistance and prevent leaking. • In the face down position, the opposite reaction will occur and the adjustment knob should be turned in to stop any excess regulator flow.
EXO 26 • To clear water from the mask, use the purge button. • An EXO-26 completely filled with water, should take no more than 3 seconds to totally purge.
Donning & Removing Masks • Place the mask on the face with the chin in the chin cup.
Donning & Removing Masks • Always pull down the head harness (spider) as far as possible at the back of your head
Donning & Removing Masks • Tighten the bottom straps of the spider first, but not all the way.
Donning & Removing Masks • Next tighten the temple straps. • Alternate between the temple and bottom straps until the face is positioned properly and snugly into the mask. • The top center strap can is used to give support to the mask while on the surface.
Donning & Removing Masks • To remove the mask, grasp the bottom of the mask on each side where the buckles attach. • Grasp the buckle tabs with the thumbs and pull the tabs forward. • This will release the lower legs of the spider and allow the bottom portion of the mask to be pulled away from the face as if the mask were hinged to the forehead.
Half-Mask • The Half Mask is designed to provide an air space over the divers mouth for verbal communication under water. • The divers wear their personal mask. • The version in our inventory is the HM-2 Mouth Mask produced by OTS.
Half-Mask • The Half Mask is designed to be worn with the Buddy Phone on the right side of the divers head. • This puts the mask in the proper position, chin cup down.
Half-Mask • The proper position of the Half Mask on the divers’ face puts the diver’s chin in the chin cup. • The upper lip of the mask seals over the upper lip of the diver.
Half-Mask • OTS suggests the Half Mask be donned before the face mask is put in place. • The disadvantage to this approach is the scuba mask will be dislodged in an out of air situation.
Half-Mask • We prefer the Half Mask to be put in place over the divers mouth after the diver has donned the scuba mask. • This allows the Half Mask to be pulled down around the divers’ neck without dislodging the scuba mask.
Half-Mask • The head strap should be arranged so that it forms a halo around the crown of the divers head. • It is important to tighten the Half Mask straps only enough to provide an adequate seal. • Over tightening may cause discomfort and leakage.
Half-Mask • The Half Mask feels less stable on the face than full face masks or normal scuba regulators. • Due to the placement of the second stage, it is much easier to bump the regulator and pull the Half Mask down on the divers chin. • This usually does not adversely affect the breath-ability of the system, but it does take some getting use to.
Half-Mask • The Half Masks in our inventory have been modified slightly from the standard OTS model. • We have placed a fastex buckle on the left side of the head strap. • This allows the diver to remove the Half Mask from around the neck without removing the scuba mask. • This is useful in small boat operations where the diver needs to give up the scuba unit before getting back on the boat.
Half-Mask • Purge Button Placement: • The purge button is located on the center line of the mask over, or slightly below, the divers’ chin.
Half-Mask • Breathing Resistance: • Because of the placement of the scuba second stage, the breathing resistance will increase considerably if the diver is in a face up position. • A poor fitting mask may seep water around the face seal under these conditions.
Mask Care & Maintenance • The face masks and breathing valves should be rinsed inside and out with clean fresh water after use. • Special care should be taken with the communication equipment during rinsing! • As with any SCUBA regulator, the purge button should not be pressed during rinsing, if the air is off.
Mask Care & Maintenance • After rinsing the masks, air dry or blow dry using compressed air. • Note: Some of the masks trap water after rinsing. • Care should be taken to eliminate this excess water by shaking and/or carefully manipulating the mask skirt as needed.
Mask Care & Maintenance • The masks should be stored in a cool, dry place, out of direct sun light. • The lever on a positive pressure Aga should be in the open or “out” position for storage. • This relieves tension on the springs inside the regulator.