Download
1 / 42
420 likes | 493 Views
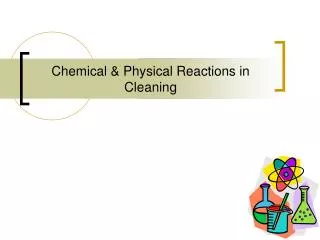
Physical Cleaning. Disconnect Power Open the Case. Physical Cleaning. Disconnect Power Open the Case Vacuum out the dust – don’t blow into your CD, DVD or FD. Physical Cleaning. Disconnect Power Open the Case Vacuum out the dust Clean your Mouse Ball Vacuum your Keyboard.

E N D
Physical Cleaning Disconnect Power Open the Case
Physical Cleaning Disconnect Power Open the Case Vacuum out the dust – don’t blow into your CD, DVD or FD
Physical Cleaning Disconnect Power Open the Case Vacuum out the dust Clean your Mouse Ball Vacuum your Keyboard
Backup, Backup, Backup!!! • You’ve been waiting for it! • Backup all your files that you don’t want to lose. While the cleaning process shouldn’t affect any data, we sometimes make mistakes with our fingers. • Better Safe than Sorry!
Delete Temporary Files May need to reset Tools-Folder Options-View-Show Hidden & System Files Local Settings – Delete all files in Temp and Temp Internet Files folders for each user Windows\Temp – delete all files in this folder
Remove Compressed Files • Caution!! This involves editing the Registry! • Proceed at your own risk! • HKLM-Software-Microsoft-Windows-Current Version-Explorer-Volume Cache-Compress Old Files: Delete this key if it is present
Remove Compress Old Files • Run REGEDIT to delete a key • CAUTION!!! If you are not comfortable, bypass this step
Disk Cleanup Computer • My Computer • Right click on C Drive (and all hard drives) • Click on Properties • Click on Clean Up Drive • Recycle Bin (save what you may need first) • Temp Files • Install Files • Etc.
Remove Spyware and Malware Use BOTH Adaware and Spybot Search & Destroy to remove trojans, malware, spies and other bad stuff Run these first to eliminate the need to check for known problems later
Caution!!! Add/Remove Programs • Once again, this area is for people who know what they are doing. If you are not sure about a program, either Google it and check it out or leave it alone! That said: • Open up Control Panel, Add/Remove Programs and remove programs not needed – Be careful about removing Shared Files
Task Manager • RIGHT click on the Taskbar and look at duplicate program entries under Processes – click on the title of the Processes tab to sort alphabetically • If not sure about what a process is, Google it or leave it alone
MSCONFIG • Start – Run – msconfig • In Startup and Services check to see what programs do not need to start • If they are not needed, uncheck them • If you have a problem after restarting, then re-check them • If you’re uncertain, . . . Google the file names
Get Rid of the Language Bar • Control Panel, Regional Settings, Languages, Details, Languages, Uncheck the “Show Language Bar” box
Keep Your Antivirus Updated! • Whichever AV program you use, if it is not updated you’re not getting full protection! • Security suites slow systems down! Don’t use unless you need to • Google “AVG Free” to get a free antivirus that does a good job, then configure to update and run daily
Internet Explorer • Keep your Temp Internet Files empty
Defrag Your System Regularly • http://www.auslogics.com/en/software to find free software to defrag your hard drives • Defrag monthly to keep your system running smoothly