Download
1 / 22
290 likes | 932 Views
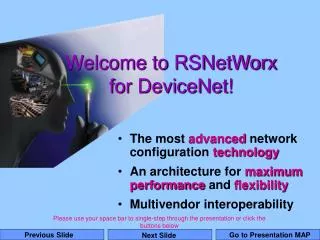
Welcome to RSNetWorx for DeviceNet!. The most advanced network configuration technology An architecture for maximum performance and flexibility Multivendor interoperability. Please use your space bar to single-step through the presentation or click the buttons below. Presentation MAP.

E N D
Welcome to RSNetWorxfor DeviceNet! • The most advanced network configuration technology • An architecture for maximum performance and flexibility • Multivendor interoperability Please use your space bar to single-step through the presentation or click the buttons below
Presentation MAP General Screen Navigation and Building a Network Device Configuration for EDS-Based Devices Scanner Configuration Maintenance and Diagnostic Features You may click on any of the titles above to view that part of the presentationor single-step with the space bar
Space Bar for More... Welcome Screen! Right-hand window - this is where your network will be displayed Toolbar for common tasks such as Save, Print, Zoom, Browse,etc. Windows Standard pull down menus for “File..Save” Cut, Copy, Paste, etc. DeviceList- this is where you choose your hardware - based on Category or Vendor
Space Bar for More... Welcome Screen! (continued) Should an error occur while you are working on or offline, it will appear in this window. A right mouse click anywhere on this window will allow you to clear, copy or hide these error messages. Note: Select an error message, press F1, and you'll see a troubleshooting tips window
Space Bar for More... Building a Network Click the + to expand any category to reveal the subcategories or devices under it. Choose the latest version on top or past major revisions below! Add the devices to the network by dragging and dropping into the right hand window - or simply double click on the device!
Space Bar for More... Building a Network (continued) Continue to add devices to your network - Rockwell Automation devices - or third party vendors - RSNetWorx supports them all! The next available address is automatically assigned. To change the address while offline, simply double click and edit! Watch your network grow in the right-hand window
Building a Network (continued) Right-click on any device while building your network for these options... “Find hardware” allows you to search for hardware by any part of the name. “Add to favorites” allows you to build your own custom hardware list.
Space Bar for More... Building a Network (continued) Or display in a spreadsheet type of view... By clicking on the display tabs, you can display graphical view... Or show Master/Slave relationships (shown after some configuration has occurred) Or show Diagnostics – this online capability is discussed in detail in the RSNetWorx Help system (Search for “diagnostics overview”)
Device Configuration for EDS-Based Devices Use your mouse to choose a scanner type, or single step using the space bar
Device Configuration for EDS Based Devices Use Cut Copy and Paste to configure multiple devices of the same type, configure one device then simply copy it over and change the node address! You can also cut, copy and paste multiple devices from one configuration file to another! A right button mouse click on a device will enable you to cut copy and paste - or to change device properties. Let’s take a look... (Note: if you prefer to use menus, the Edit and Device menus contain these same choices!)
Space Bar for More... Building a Network (continued) The General properties will allow you to change the node name, description and address of a device. Device specific parameters are just a click away (as shown) - as are the details of the I/O exchange This dialog could have also been launched by simply double-clicking on the device. Here we can view all of the device specific parameters and make changes as our system requires. All of this is available through the use of EDS files!
Space Bar for More... Saving Your Configuration You can save your work at any time. Choose “File”, “Save as...” in the pull down menu and you’ll see the dialog shown... Enter the name of your network here and click on the save button.
Scanner Configuration Use your mouse to choose a scanner type, or single step using the space bar
Configuring a DeviceNet Scanner (for instance a 1747-SDN) Space Bar for More... Double Click on the scanner to bring up this dialog box... The summary tab shows a quick view of the nodes in this scanner’s scanlist. ADR stands for Auto-Device-Replacement – a powerful feature of Allen-Bradley scanners. ADR allows you to get a replacement device working running without using the software to reconfigure it! See Help->Search “configure ADR parameters” for more information! The General tab shown here displays information such as Name, Description and Node Address The Module tab is where you choose the slot of your scanner (which affects memory mapping) and set advanced parameters such as Interscan Delay and E.P.R. The Input and Output tabs allow you to configure where in your Controller (PLC) data table your nodes will be mapped - this is how the DeviceNet data is sent to the PLC! The Scanlist is where you choose the nodes to reside in your scanlist, set electronic keying
Configuring a DeviceNet Scanner (for instance a 1747-SDN) Space Bar for More... In the scanlist, the left hand pane shows all “slave”devices on the network that are not yet in any scanner’s scanlist. Use the “single arrow” buttons to add or remove an individual device in your scanlist... Or use the “double arrow” buttons to add or remove the entire list! We also change the electronic keying here. Electronic keying determines how closely the online device has to match the configured device, for the scanner to start an I/O exchange. Automap on Add checkbox: This enables this feature GLOBALLY - so whenever you add a device to your scanlist, your device will be automatically mapped into the scanner’s memory. You can edit the I/O parameters for a device in the scanlist by double-clicking on a entry in the right column, or selecting an entry and click on the Edit I/O parameters button.
Configuring a DeviceNet Scanner (for instance a 1747-SDN) Space Bar for More... Note: You must use the setting on the Module tab to set the “base” address for the displays used in the Input and Output tabs. You can change the offset or the location of where data is mapped using these buttons. You can change the offset or the location of where data is mapped using these controls. Click on the Input tab to setup mapping of your input devices By clicking on the “Advanced” button you can do segmentation mapping. The details of the mapping are shown here. If a device has a “+” next to it in the upper pane, you can expand the selection to see information detailing the I/O data for that device. Note: The Output tab has the same options and capabilities.
Space Bar for More... Using “Configuration Recovery” and “ADR” Upload and Download buttons are used to send or receive Configuration Recovery data from the scanner when online. Enable Node Address Recovery - enables the functionality GLOBALLY - within the SCANNER The “ADR Space” let’s you know how much recovery memory you have used. Select the devices you want to the scanner to store configuration for, and then select “Load Device Config”. That will load the current settings for those devices from RSNetWorx. Once Auto-Address Recovery is enabled, and Load Device Config has been selected, these buttons are used to choose just “Configuration Recovery” or full “ADR”. Note: Not all devices can receive configuration data while in run mode (such as our 1761-DNI module); these devices will not operate properly with Configuration Recovery. Also, some devices only allow address setting by hardware switches, and therefore Auto Address Recovery will not work for those devices
Configuring a 1771-SDN The 1771-SDN is a two channel scanner. Each channels is independently configured to scan its respective network; however there is a single memory map to the processor that is shared by the two channels. See the Help system (Help->Contents, Search on “1771-SDN Scanner”), and you’ll see a number of topics that will help you with the special characteristics of the 1771-SDN.
Maintenance and Diagnostics Simple indicators, and instant access to troubleshooting and corrective action information. This reduces the time to find and fix problems! RSNetWorx MD is a new subsystem available for RSNetWorx for DeviceNet. It is through the Diagnostics tab. Information on problems with diagnostics are logged as well as displayed dynamically For more information on this powerful feature, see the Help system (Search for “Diagnostics overview”)
Return to DeviceNet Roadmap Click on the underlined text to