Download
1 / 17
170 likes | 321 Views
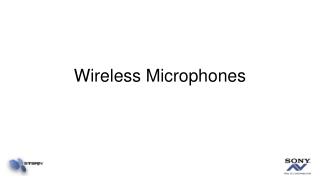
Proper Use and Care of Wireless Microphones. Media Technology Resources. Introduction. All of our large lecture rooms have wireless microphone systems Proper use and care will help insure that they work properly when you need them. Agenda. How to install the batteries

E N D
Proper Use and Care of Wireless Microphones Media Technology Resources
Introduction • All of our large lecture rooms have wireless microphone systems • Proper use and care will help insure that they work properly when you need them
Agenda • How to install the batteries • How to use the microphone • Limitations of the microphone • How to store the microphone when finished
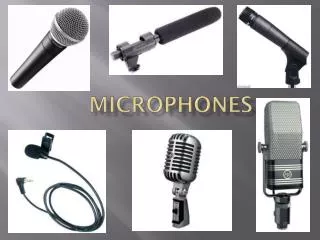
What is the Wireless Microphone? • The wireless microphone consists of two parts • First the transmitter and microphone is the part you wear • Secondly the receiver, which is in the console and attached to the amplifier
What type of Battery? • All of our Nady Microphones use a 9 volt battery • Users are responsible for supplying their own battery • 9 volt batteries may be purchased from MTR for $2.00 each • 3-4 batteries should last the term depending on how many classes you use the microphone for.
How to Install the Battery • The battery compartment is at the front bottom of the transmitter. • Carefully slide the cover down a bit, then flip it open
How to Install the Battery • Check to see that the positive and negative terminals align properly. • This is important or it WILL damage the transmitter • Gently insert the battery and close the cover
Turning ON the Microphone • Turn Input Level down before turning ON. • All our transmitters have a 3 position switch • The switch needs to be ON for the mic to work • The Red Battery Light will Flash for a second to show it is working • The Standby Position is like a MUTE position
Battery Light Indicator • The battery light should flash for a second when you turn the microphone ON • If it doesn’t flash or comes on solid red then the battery may be dead or low.
Volume Control (Input Level) • Turn Input Level (volume) down before turning On • Adjust the input level as necessary while testing. • Setting the level too high, may result in feed back • If the audio is noisy with static clicks and pops, you may need a new battery
Wearing the Microphone • The transmitter may clip to your belt or waist band of your pants or you may put it in your pocket. (No keys or coins in pockets.) • Clip the microphone to your shirt around the middle of your chest. (Not to the left or right) • Do not clip it on or near a brooch, tie clip or pens in your shirt pocket
Limitations of using the Microphone • The microphone can only pick up what it hears: if you have a bad case of laryngitis it will not help. • Project your voice as if speaking to the first five or six rows of students. • If you clip the mic to one side of your shirt, but then turn your head away from the mic while you write on the board, it will not work. • Because of the location of the speakers in some rooms (Example STM125) feed back may be a problem if the volume is turned up too loud.
When Finished • Shut off the microphone and remove the battery • Carefully wind up the microphone cable and put the microphone back in the console • Take your battery with you, or someone else will use it • Store your battery carefully. If the terminals touch coins, keys or other metal it may drain the battery.
Please Do !!! Before and after you start • Please check that there are no knots in the microphone wire. • Turn on the Main Power Switch on the console. (The receiver and/or amplifier may be inside the console connected to the Main Power Switch.) When finished. • Please wrap the cord gently and place it under the microphone(This way there is no tension or stress on the wire where it is connect to the transmitter) • Let us know if there are any problems with the microphone.
Please Do Not…. • Please Do Not wrap the microphone cable around the transmitter! This will break the wires in the cable. • Do Not clip the microphone to the wires! • Do Not allow the wire to become tied in a knot. • Do Not close the console door on the wire.
Summary • Users supply their own battery (may be purchased from MTR for $2.00) • Make sure the battery is inserted properly or it will damage the microphone • Be gentle with the microphone cable as the wires are thin and delicate
For Assistance: • Mike Seto, Ext. 3392 Mark Cormier, Ext. 3343 Bricker Academic. BA303 • Carolyn Morrison, Ext. 2285 Mark Bruvelaitis, Ext. 3654 Peters Bldg. P1035