Download
1 / 11
110 likes | 179 Views
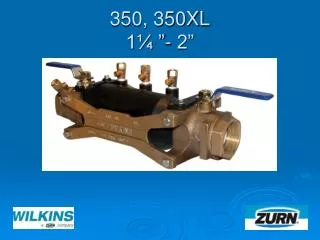
350, 350XL 1¼ ”- 2”. Modification Overview. Production of the 1¼”-2” 350 began in 2004 and is current. The lead free version 350XL was introduced in 2010. Check Housing Removal. The plastic housing (vessel) must be removed for service. There is no spring load.

E N D
Modification Overview • Production of the 1¼”-2” 350 began in 2004 and is current. • The lead free version 350XL was introduced in 2010.
Check Housing Removal • The plastic housing (vessel) must be removed for service. • There is no spring load. • Housing is bolted and o-ring sealed. • Remove the four housing bolts. • Lift the vessel up and out.
Check Valve Removal • The check valves are held in place by a closure sleeve. • Gently pry the closure sleeve away from the body. • Both modules must slide out of the housing. • Use a short blunt object on a flat surface to push against the #2 check.
Check Valve Removal • Make sure all test cocks are open to break any vacuum. • Push down on the body to slide the modules out.
Disassemble Check Module • Hold the cage firmly and twist the seat counter-clockwise about ¼ turn. • Check modules are spring loaded.
Check Seat Removal • The check seat is free once the module has been disassembled. • If seat is damaged, the entire module must be replaced.
Check Disc Replacement • The check disc and poppet are free once the module has been disassembled. • The check disc is free once the retainer washer is removed.
Check Valve Reassembly Notes • Lubricate o-rings on check modules. • #2 check slides into vessel first. • Insert the #1 check and turn it until the spring retainer lines up with the notches on the #2 seat. • Push both modules into the vessel.
Check Valve Reassembly Notes • Lubricate the o-ring on the closure sleeve and insert against the modules. • Place on a flat surface and push down with a “rocking motion” until the sleeve seals with the vessel.
Housing Reassembly Notes • Lubricate the inlet and outlet o-ring on the housing. • “Rock” the vessel from side to side as it slides into position. * Note: Make sure the o-rings on both ends of the vessel stay in their groove as it slides into place.