Download
1 / 26
260 likes | 426 Views
NetVu Console Product Training. V2.0 US. NetVu Console. Remote NetVu Connected CCTV Console with traditional joystick control. Key Benefits Add remote control and additional viewing to an existing standalone CCTV system with no need to retrain operators

E N D
NetVu Console Product Training V2.0 US
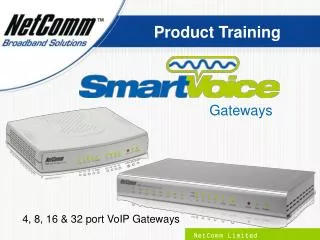
NetVu Console Remote NetVu Connected CCTV Console with traditional joystick control. Key Benefits • Add remote control and additional viewing to an existing standalone CCTV system with no need to retrain operators • No need for a PC for remote viewing and control Main Features • Joystick telemetry control over the network • Controls up to 99 cameras from up to 20 NetVu Connected DVR or Servers • Works with a composite or VGA monitor (future) • (future) Simultaneous view of up to 16 cameras from any mix of sites. Currently you can only select the first camera to start the 16 way view.
NetVu Console Features • IP to analogue conversion allows use of composite and VGA monitors • Simple network connection via Ethernet • NetVu Connected Technology allows integration with other NetVu Connected products • Transparent Telemetry control through an associated DVR • 3-axis joystick allows an operator to easily control the pan, tilt and zoom functionality with one simple movement • Common set-up interface locally or over the network • Easy configuration on local monitor using mouse control
NetVu Console Features • Playback from NetVu Connected DVRs • Event Search from NetVu Connected DVRs • Control via IR Remote • Audio Listen and Challenge (future) • Softkeys provide simple user and programming interface • Supported protocols via associated DVR include; Dennard, JVC, Bosch, BBV, Mark Mercer, Panasonic, American Dynamics, GE, Pelco, Samsung
Simplified Setup • On Screen Menus are the same as Webpages
Operating NetVu Console
NetVu Console Keyboard Live/Play System Select Help Panic Event Goto Playback Control Menu Numeric Keypad Exit (menus) Menu Cursor Navigation
NetVu Console Softkeys Navigation is via a color coded soft 5 key system. The colored menu buttons provides an intuitive approach to operator and installer use. The colored keys on the remote control correspond to the menu options displayed on screen.
Softkey Menus || << > >> Next Play Preset ePTZ Goto Event Aux Prog Setup Next Next Full Quad Multi Map Next For PTZ cameras only
Installing the NetVu Console
NetVu Console Connections VGA - SVGA 15 Way D Female monitor connection MON - 75Ω BNC composite monitor KBD RJ12 Connector for NetVu Console Keyboard NET - RJ45 10/100BaseT Ethernet connection IR- 3.5mm Jack Socket for IR Remote Extender AUD IN - RCA (phono) socket AUDIO OUT - RCA (phono) socket SERIAL - 9 way (male) for Serial Mouse POWER - 12V DC 10 W Mains powered, separate power supply LEDs PWR ON – Green STATUS - Green
NetVu Console Connections IR Extender Port to allow use of Standard (SD type) IR Remote Control VGA Connector (future) Serial Port for Mouse (Optionally used in configuring NetVu Console and Debug)
Configuring the NetVu Console
Setting the IP Address of the NetVu Console • By default the unit is configured for DHCP where the unit is automatically allocated an IP address from the network DHCP server. • As this IP address can change without notification (i.e. if there was a power failure), it is recommended that the NetVu Console is allocated a fixed IP address to remove the possibility of address change. • If a permanent IP address is not assigned to the unit, it will attempt to contact the DHCP server every time it starts up. If for any reason, a DHCP server cannot allocate an IP address to the unit, the encoder will use a default IP address.
Webpage Configuration • The NetVu Console can be configured via a set of intuitive webpages or via GUI menus on the Monitor. • To access the web pages: • 1. Launch a web browser such as Internet Explorer or Mozilla Firefox • 2. Type the IP address of the unit into the address bar. • 3. The Network page will be displayed.
NetVu Console Webpages The configuration pages are accessible using the links on the left hand side of the page. NOTE: Any changes made on the web pages are not (yet) automatically saved when the page is closed. Remember to press the Save button when making any changes. Use the ‘Cancel’ button to revert To the previous settings and Then navigate away.
General System Settings This page shows the general information about the unit. The serial port should be set for Mouse connection as this is useful to configure the product When using the on-screen menus. The default image format can be set to JPEG or MPEG4 and image resolution is selectable as High, Medium or Low as normal. Can the settings be changed just like NVO from the keyboard or remote?
Network Configuration IP Address, Subnet, Gateway are the settings that have Already been configured using the Serial Port configuration. DHCP addresses will be shown if the unit was installed on a DHCP network. The unit should be restarted implement the changes.
Configuring Servers To set which servers can be connected to go to the Servers page as shown. Enter the IP addresses of the NetVu Connected servers. Upto 20 systems can be defined each with up to 99 cameras, across multiple servers
Configuration GUI Menus The NetVu Console can be easily programmed using configuration menus on the monitor. To enter the menus:- Either :- Press Next until Setup appears and then press it. Or Press the Menu button on the keyboard. The Network page will then appear.
IP Address, Subnet, Gateway settings can be programmed using the mouse. Use the links to the left of the page to configure the General, Audio and Servers settings as per the webpages. Press Exit to return to normal operation.
SD video is currently not showing up through network video. • If connection to dvr is not available, the screen will not change
Future plans • VGA output • Audio • Relays • Alarms • Copy images using a external flash drive
ePTZ – used to do a Digital Zoom on a PTZ camera. • Goto Timeline • Events show the last 20 events for the DVR.