Download

1 / 103
1.03k likes | 1.28k Views
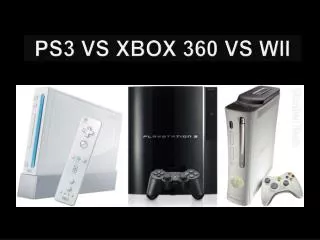
Battle-Tested Deferred Rendering on PS3, Xbox 360 and PC. Tibor Klajn scek, Technical Director, ZootFly. Overview. The G-Buffer Rendering pipeline Lighting details Anti-aliasing HDR Platform-specific issues. G-Buffer. We use a full deferred shading approach

E N D
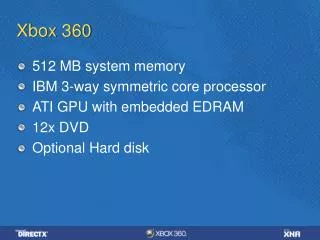
Battle-Tested Deferred Rendering on PS3, Xbox 360 and PC Tibor Klajnscek, Technical Director, ZootFly
Overview The G-Buffer Rendering pipeline Lighting details Anti-aliasing HDR Platform-specific issues
G-Buffer We use a full deferred shading approach A single, heavily #ifdef-ed material shader writes the G-Buffer 3 RTs on consoles + native depth 32-bit (8888) RTs, 16 bytes/pixel Using DX9 on PC so 4 RTs since we have to write depth as well
G-Buffer shader Supports all standard stuff (skinning, parallax, reflection...) Detail texture (UV offset and normal bend) Overlay texture (own UV set) Rim light Self illumination from texture Vertex shader wind Per-polygon billboarding
G-Buffer layout Accumulation buffer needed for forward lighting (e.g. lightmaps, self-illumination, rim light, fog) DOF amount calculated here to avoid extra depth reads in post process stage
G-Buffer visualization • Color
G-Buffer visualization • Normal
G-Buffer visualization • Depth (exaggerated)
G-Buffer visualization • Specular amount
G-Buffer visualization • Specular exponent
G-Buffer normals Hemispheric normals looked bad - Projection lets you see neg. normals - Shading can swim because of this Straight RGB 888 world-space was good, but needed an extra channel Stored in spherical coordinates - Two 8-bit channels – just 16 bits - Looks better than other two - Conversion cost can be quite high - Lookup texture can be a win here
G-Buffer position On PC store linear Z as RGB encoded float On consoles use the main z-buffer - undo projection in light shader World space position - Interpolated camera to far plane vector * linear Z + camera pos Google “reconstruct position from depth”
1. Opaque & Alpha Test Lays down initial G-Buffer and Z Fill accumulation buffer with ambient, IBL and self-illumination Z-prepass was not a win for us We render sorted by material first and still get good early Z Just in case you forgot: make sure to render alpha test last OUT: Z, accum, color, normal
2. Decals Alpha test, alpha blend, multiply, additive Can write all RTs except depth Change normals & color before lighting Can't change specular - output alpha used for blending - but specular is in the alpha channel OUT: accum, color, normal
3. Background Vanilla sky box (optional) Any geometry labeled as background by the artists Simple shader, no lighting Up to artists to make it look good Far 10% of Z range reserved for this pass OUT: Z, accum
4. Lighting Explained in detail in a moment Most of the work happens here We support all standard light types plus a few custom additions Ambient, Point, Spot, Volume, Directional, Ortho OUT: accum
5. Transparencies Alpha geometry & particles sorted Forward shader Lighting only via 3rd order SH - Compute lighting for center of obj. SH coefficients efficient to calculate in jobs Artists hand tweak cases where it doesn’t look right - Split mesh into more chunks - Tweak mesh/vertex colors
Lighting – overdraw • 33 lights in view, all pretty large
Three color light Artists specify three diffuse colors Front color (N•L) Mid color 1-abs(N•L) Back color (-N•L) Wrap around(-ish) - Back = black - Mid = 0.5 * front - Almost correct Less lights needed FASTER!
Sub-surface scattering / Translucency Just front color bleeding through to the back We’re not actually doing proper scattering... But looks really cool on leaves and other thin surfaces Also helps noses, earlobes etc. You also get shadows from behind!
With SSS *Note the shadows
Projected texture Every light can project a texture It’s just multiplied at the end Cube texture for point lights Had issues with MIP LOD calculation on Z discontinuities Only solution was to manually override LOD (tex2Dlod) Select LOD based on screen-space size, but be aggressive Tweak selection until it looks OK
Lighting shader code float lightdot = dot( Normal , ToLight ); // Fake sub-surface scattering float3 SSSColor = FrontColor * SSSAmount; SSSColor *= 0.3 + shadow*0.7; float3 Result; Result = saturate( lightdot) * lerp( BackColor , FrontColor , shadow ); Result += saturate(1-abs(lightdot)) * MidColor; Result += saturate(-lightdot) * (BackColor + SSSColor); Result *= PixelMaterialColor; Result += SpecularBlinn( Normal , HalfVec ) * SpecColor * Shadow; Result *= ProjectedMaskTexture; • Excerpted just the relevant bits...
Light filters/groups We have no filtering Could use IDs, but didn’t - shader would run on tons of pixels that would get rejected in the end - needs extra channel in g-buffer Artists use custom water tight meshes grouped under the light in Maya to contain lights
Multiplicative lights All our lights can be set to use multiply as blend mode Useful for adding in dark spots without many lights Also helps if you need to add a dark spot in a hurry before shipping
Multiplicative lights • Before
Multiplicative lights • After
Ambient light Box shape with a nice fade It’s basically a SH light probe - Group a bunch of point, spot and directional lights under it in Maya - Plus a standard ambient term - They all get baked into 3rd order SH - Just lookup with the pixel normal
Directional light Cascaded shadow map Cascades rendered as boxes Final non-shadow pass is a fullscreen quad - quad at far plane to stencil mask out sky/background Projector texture is tiled and animated cheap, fake cloud shadows!
Early stencil rejection Without it we’d run at about 4 fps so I can’t stress the importance of it enough! Very simple to set up, but easy to break too Very fast rendering Cuts down light rendering time tremendously
Early stencil rejection All lights are rendered as geometry - Sphere for point, cone for spot etc. - 50-100 polys Use same geometry for stencil mask unless artist supplies a mesh We use a standard Z-Fail approach Yes, we should be using Z pass to get early Z in the masking pass But this pass was always fast so we chose to fix other stuff first
Early stencil rejection Mask pass (no pixel shader): TwoSidedStencilMode = true StencilFunc = Always StencilZFail = Invert CCW_StencilFunc = Always CCW_StencilZFail = Invert StencilWriteMask = 1 SCull/HiZ = Equal to 1 Light shader pass: StencilFunc = Equal StencilRef = 1 This works well with SCull (PS3)
Early stencil example #1 Simple case, light geometry e
Early stencil example #1 Simple case, light geometry e
Early stencil example #2 Custom geometry e
Early stencil example #2 Custom geometry e
Directional light stencil Every cascade must only light pixels untouched by previous cascades Cascade overlap unpredictable when FOV & settings change Came up with a way to always keep stencil test EQUAL to 1 Plays nice with SCull Every cascade rendered into stencil twice, but still plenty fast
Directional light stencil Green Stencil == 1 Red Stencil > 1 Write Mask: 00000001 Z Fail: Invert • Mask cascade #1 and do lighting
Directional light stencil Clear cascade #1 Green Stencil == 1 Red Stencil > 1 Write Mask: 00000010 Z Fail: Invert
Directional light stencil Mask cascade #2 and do lighting Green Stencil == 1 Red Stencil > 1 Write Mask: 00000001 Z Fail: Invert