On day one, students pour chocolate into identical “forms”.
Introduction to Casting B. On day one, students pour chocolate into identical “forms”. Inexpensive supply kits for melting and casting chocolate are available at craft stores. Introduction to Casting B.
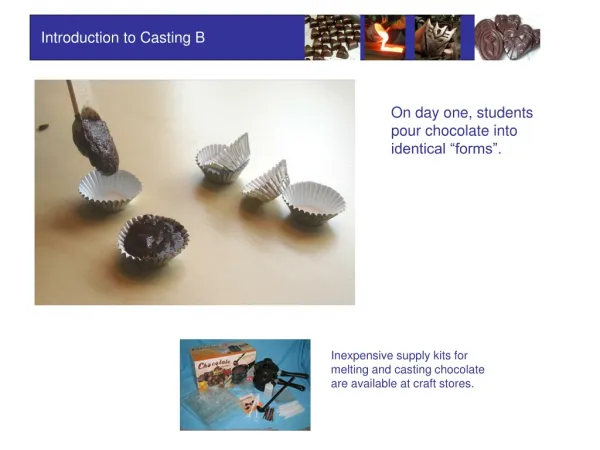

On day one, students pour chocolate into identical “forms”.
E N D
Presentation Transcript
Introduction to Casting B On day one, students pour chocolate into identical “forms”. Inexpensive supply kits for melting and casting chocolate are available at craft stores.
Introduction to Casting B When the chocolate starts to cool and solidify, each student can make an inscription with a toothpick. The parts are placed in the refrigerator ready for discussion and eating the next day. An interesting site to learn about metal sand casting. http://cltad.arts.ac.uk/groups/camberwellmateriallibrary/wiki/e28fb/Sand_Casting.html
Introduction to Casting B Students draw ideas for their mold and casting. These drawings can be done on the computer or by hand. Using the drawing as a reference, they shape a pattern out of Fimo clay. Take time to make sure students understand the concept of relief in order to remove the pattern and subsequent castings from the mold cavity . The patterns are hardened by heating on a metal tray in an oven at low temp. Another option is to have students work with pre-made plastic molds. This approach is not as much fun and not as informative.
Introduction to Casting B Students cut three small sheets of aluminum foil for each mold cavity. They then use their fingers (or the eraser end of a pencil) to press the foil around the hardened pattern to form the mold cavity. Have students make a minimum of two mold cavities.
Introduction to Casting B Students need to calculate the volume of the mold in order to determine the appropriate amount of casting material (i.e. chocolate). A simple approximate method is to pour sugar into the mold until it evenly fills the entire cavity. The sugar can then be poured out in to a small plastic measuring cup. Students record the volume in their journals.
Introduction to Casting B Students record the volume in their journals to use for later math calculations. The weight of the sugar can be recorded. This can be compared to the weight of the cast chocolate for further calculations.
Introduction to Casting B Students pour melted chocolate into their molds. These are set on trays and refrigerated overnight. Bring to their attention that there will be some excess material that can be cut off later on. This excess material is referred to as flash in metal casting.
Introduction to Casting B Students get one of their molded chocolates and a random selction of other students products. They removed the excess and weight their casting and record findings in their journal for math activities.