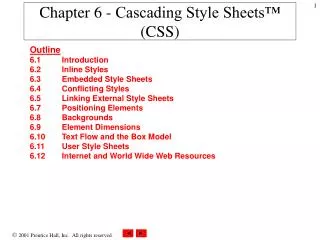
Dynamic HTML -Cascading Style Sheets™ (CSS)
Dynamic HTML -Cascading Style Sheets™ (CSS). Outline 6.1 Introduction 6.2 Inline Styles 6.3 Embedded Style Sheets 6.4 Conflicting Styles 6.5 Linking External Style Sheets 6.7 Positioning Elements 6.8 Backgrounds 6.9 Element Dimensions 6.10 Text Flow and the Box Model

Dynamic HTML -Cascading Style Sheets™ (CSS)
E N D
Presentation Transcript
Dynamic HTML -Cascading Style Sheets™ (CSS) Outline 6.1 Introduction 6.2 Inline Styles 6.3 Embedded Style Sheets 6.4 Conflicting Styles 6.5 Linking External Style Sheets 6.7 Positioning Elements 6.8 Backgrounds 6.9 Element Dimensions 6.10 Text Flow and the Box Model 6.11 User Style Sheets 6.12 Internet and World Wide Web Resources
CSS • Allow to specify the style of page elements (spacing, margins, etc.) separately from the structure of your document (section header, body text, links, etc.). This separation of structure from content allows greater manageability and makes changing the style of your document easier. • CSS is... • Flexible, and a fairly logical language, easy to use and to implement. • Offers site-wide, rich styling. • Keeps the structure of a document. • Compacts the file size by reducing HTML 'clutter' and • Reduces the time spent for maintaining and changing the site.
The style attribute specifies the style for an element. Some style properties are font-size and color. 1 <?xml version = "1.0"?> 2 <!DOCTYPE html PUBLIC "-//W3C//DTD XHTML 1.0 Strict//EN" 3 "http://www.w3.org/TR/xhtml1/DTD/xhtml1-strict.dtd"> 4 5 <!-- Fig. 6.1: inline.html --> 6 <!-- Using inline styles --> 7 8 <html xmlns = "http://www.w3.org/1999/xhtml"> 9 <head> 10 <title>Inline Styles</title> 11 </head> 12 13 <body> 14 15 <p>This text does not have any style applied to it.</p> 16 17 <!-- The style attribute allows you to declare --> 18 <!-- inline styles. Separate multiple styles --> 19 <!-- with a semicolon. --> 20 <p style = "font-size: 20pt">This text has the 21 <em>font-size</em> style applied to it, making it 20pt. 22 </p> 23 24 <p style = "font-size: 20pt; color: #0000ff"> 25 This text has the <em>font-size</em> and 26 <em>color</em> styles applied to it, making it 27 20pt. and blue.</p> 28 29 </body> 30 </html> Inline.html
Use the style element to create an embedded CSS. More style properties include font type (font-family) and background color (background-color). A style class named special is created. Style classes inherit the style properties of the style sheet in addition to their own. 1 <?xml version = "1.0"?> 2 <!DOCTYPE html PUBLIC "-//W3C//DTD XHTML 1.0 Strict//EN" 3 "http://www.w3.org/TR/xhtml1/DTD/xhtml1-strict.dtd"> 4 5 <!-- Fig. 6.2: declared.html --> 6 <!-- Declaring a style sheet in the header section. --> 7 8 <html xmlns = "http://www.w3.org/1999/xhtml"> 9 <head> 10 <title>Style Sheets</title> 11 12 <!-- This begins the style sheet section. --> 13 <style type = "text/css"> 14 15 em { background-color:#8000ff; 16 color:white } 17 18 h1 { font-family:arial, sans-serif } 19 20 p { font-size:14pt } 21 22 .special { color:blue } 23 24 </style> 25 </head> 26 Declared.html Styles placed in the head apply to all elements in the document.
The styles associated with the special class are applied to the header and paragraph elements. 27 <body> 28 29 <!-- This class attribute applies the .blue style --> 30 <h1 class = "special">Deitel & Associates, Inc.</h1> 31 32 <p>Deitel & Associates, Inc. is an internationally 33 recognized corporate training and publishing organization 34 specializing in programming languages, Internet/World 35 Wide Web technologyand object technology education. 36 Deitel & Associates, Inc. isa member of the World Wide 37 Web Consortium. The company provides courses on Java, 38 C++, Visual Basic, C, Internet and World Wide Web 39 programming, and Object Technology.</p> 40 41 <h1>Clients</h1> 42 <p class = "special"> The company's clients include many 43 <em>Fortune 1000 companies</em>, government agencies, 44 branches of the military and business organizations. 45 Through its publishing partnership with Prentice Hall, 46 Deitel & Associates, Inc. publishes leading-edge 47 programming textbooks, professional books, interactive 48 CD-ROM-based multimedia Cyber Classrooms, satellite 49 courses and World Wide Web courses.</p> 50 51 </body> 52 </html> Declared.html
Elements that have the special class applied have the class’s styles as well as the CSS styles applied. Program Output Notice the styles defined in the CSS are applied to all paragraphs, headers, and bolded text.
A style class is defined specifically for a elements. The style is applied if the a element’s class attribute is set to nodec. The hover psuedoclass defined for the a element is activated dynamically when the user rolls over the a element with a mouse. The em element for li elements is defined to have bold red font. Elements of an unordered list in another nested unordered list will be underlined and have a left-hand margin of 15 pixels. 1 <?xml version = "1.0"?> 2 <!DOCTYPE html PUBLIC "-//W3C//DTD XHTML 1.0 Strict//EN" 3 "http://www.w3.org/TR/xhtml1/DTD/xhtml1-strict.dtd"> 4 5 <!-- Fig 6.3: advanced.html --> 6 <!-- More advanced style sheets --> 7 8 <html xmlns = "http://www.w3.org/1999/xhtml"> 9 <head> 10 <title>More Styles</title> 11 12 <style type = "text/css"> 13 14 a.nodec { text-decoration:none } 15 16 a:hover { text-decoration:underline; 17 color:red; 18 background-color:#ccffcc } 19 20 li em { color:red; 21 font-weight:bold } 22 23 ul { margin-left:75px } 24 25 ul ul { text-decoration:underline; 26 margin-left:15px } 27 28 </style> 29 </head> 30 31 <body> 32 33 <h1>Shopping list for <em>Monday</em>:</h1> 34 Advanced.html
According to the CSS defined, the three elements listed under bread should be underlined and indented 15 pixels from the left margin when rendered. The text placed between the em tags should be bolded and colored red when rendered. When the user scrolls over the text anchoring the link, the hover class will be activated and the text will change to the style defined by the hover class. 35 <ul> 36 <li>Milk</li> 37 <li>Bread 38 <ul> 39 <li>White bread</li> 40 <li>Rye bread</li> 41 <li>Whole wheat bread</li> 42 </ul> 43 </li> 44 <li>Rice</li> 45 <li>Potatoes</li> 46 <li>Pizza <em>with mushrooms</em></li> 47 </ul> 48 49 <p><a class = "nodec"href = "http://www.food.com"> 50 Go to the Grocery store</a></p> 51 52 </body> 53 </html> Advanced.html
The elements in the nested unordered list are underlined and indented 15 pixels from the left margin. By applying the hover psuedoclass to this anchor, the anchor’s background and text color changes when the use r rolls over it with the mouse. Program Output
1 /* Fig. 6.4: styles.css */ 2 /* An external stylesheet */ 3 4 a { text-decoration:none } 5 6 a:hover { text-decoration:underline; 7 color: red; 8 background-color:#ccffcc } 9 10 li em { color:red; 11 font-weight:bold; 12 background-color:#ffffff } 13 14 ul { margin-left:2cm } 15 16 ul ul { text-decoration:underline; 17 margin-left:.5cm } Styles.css
The link element is used to reference an external style sheet. The type attribute defines the MIME type. The rel attribute is used to define the linking relationship. 1 <?xml version = "1.0"?> 2 <!DOCTYPE html PUBLIC "-//W3C//DTD XHTML 1.0 Strict//EN" 3 "http://www.w3.org/TR/xhtml1/DTD/xhtml1-strict.dtd"> 4 5 <!-- Fig. 6.5: external.html --> 6 <!-- Linking external style sheets --> 7 8 <html xmlns = "http://www.w3.org/1999/xhtml"> 9 <head> 10 <title>Linking External Style Sheets</title> 11 <link rel = "stylesheet"type = "text/css" 12 href = "styles.css" /> 13 </head> 14 15 <body> 16 17 <h1>Shopping list for <em>Monday</em>:</h1> 18 <ul> 19 <li>Milk</li> 20 <li>Bread 21 <ul> 22 <li>White bread</li> 23 <li>Rye bread</li> 24 <li>Whole wheat bread</li> 25 </ul> 26 </li> 27 <li>Rice</li> 28 <li>Potatoes</li> 29 <li>Pizza <em>with mushrooms</em></li> 30 </ul> 31 External.html
32 <p> 33 <a href = "http://www.food.com">Go to the Grocery store</a> 34 </p> 35 36 </body> 37 </html> External.htmlProgram Output The documents rendered with an external CSS should be the same as those rendered with an internal CSS.
6.6 W3C CSS Validation Service Fig. 6.6 Validating a CSS document. (Courtesy of World Wide Web Consortium (W3C).)
6.6 W3C CSS Validation Service Fig. 6.7 CSS validation results. (Courtesy of World Wide Web Consortium (W3C).)
The position property of the style element allows for positioning of an element. The z-index property allows layering of multiple images.The images are layered such that images with lower z-indexes are placed under images with higher ones. 1 <?xml version = "1.0"?> 2 <!DOCTYPE html PUBLIC "-//W3C//DTD XHTML 1.0 Strict//EN" 3 "http://www.w3.org/TR/xhtml1/DTD/xhtml1-strict.dtd"> 4 5 <!-- Fig 6.8: positioning.html --> 6 <!-- Absolute positioning of elements --> 7 8 <html xmlns = "http://www.w3.org/1999/xhtml"> 9 <head> 10 <title>Absolute Positioning</title> 11 </head> 12 13 <body> 14 15 <p><img src = "i.gif"style = "position: absolute; 16 top: 0px; left: 0px; z-index: 1" alt = 17 "First positioned image" /></p> 18 <p style = "position: absolute; top: 50px; left: 50px; 19 z-index: 3; font-size: 20pt;">Positioned Text</p> 20 <p><img src = "circle.gif"style = "position: absolute; 21 top: 25px; left: 100px; z-index: 2" alt = 22 "Second positioned image" /></p> 23 24 </body> 25 </html> Positioning.html In the past, controlling of elements in HTML document was difficult; positioning was basically up to the browser. CCS introduces the position property and a capability called absolute positioning, which gives us greater control over how our documents are displayed.
Program Output The effect of the z-index property is several images layered on top of one another.
Relative positioning places an element relative to a reference point on the page. For instance, when this class is applied the element will be displayed –1cm relative to the left of where it would be placed. 1 <?xml version = "1.0"?> 2 <!DOCTYPE html PUBLIC "-//W3C//DTD XHTML 1.0 Strict//EN" 3 "http://www.w3.org/TR/xhtml1/DTD/xhtml1-strict.dtd"> 4 5 <!-- Fig. 6.9: positioning2.html --> 6 <!-- Relative positioning of elements --> 7 8 <html xmlns = "http://www.w3.org/1999/xhtml"> 9 <head> 10 <title>Relative Positioning</title> 11 12 <style type = "text/css"> 13 14 p { font-size:1.3em; 15 font-family:verdana, arial, sans-serif } 16 17 span { color: red; 18 font-size:.6em; 19 height:1em } 20 21 .super { position:relative; 22 top:-1ex } 23 24 .sub { position: relative; 25 bottom:-1ex } 26 27 .shiftleft { position:relative; 28 left:-1ex } 29 30 .shiftright { position:relative; 31 right: -1ex } 32 33 </style> 34 </head> Positioning2.html
The text in red has the shiftleft class applied, and is shifted left relative to where it would have initially been placed. 35 36 <body> 37 38 <p>The text at the end of this sentence 39 <span class = "super">is in superscript</span>.</p> 40 41 <p>The text at the end of this sentence 42 <span class = "sub">is in subscript</span>.</p> 43 44 <p>The text at the end of this sentence 45 <span class = "shiftleft">is shifted left</span>.</p> 46 47 <p>The text at the end of this sentence 48 <span class = "shiftright">is shifted right</span>.</p> 49 50 </body> 51 </html> Positioning2.htmlProgram Output Since relative positioning keeps elements in the flow of text in your documents, be careful to avoid overlapping text unintentionally.
The background-image property assigns a background to the body of the page. The background–position property assigns a location for the image on the page. If set to repeat, the background-repeat property will tile the image as the background. The value of the background-attachment property determines if the image moves as the user scrolls the page. Scrolling the browser window will not move the image from its set position. The font format specified will be applied to all p elements. 1 <?xml version = "1.0"?> 2 <!DOCTYPE html PUBLIC "-//W3C//DTD XHTML 1.0 Strict//EN" 3 "http://www.w3.org/TR/xhtml1/DTD/xhtml1-strict.dtd"> 4 5 <!-- Fig. 6.10: background.html --> 6 <!-- Adding background images and indentation --> 7 8 <html xmlns = "http://www.w3.org/1999/xhtml"> 9 <head> 10 <title>Background Images</title> 11 12 <style type = "text/css"> 13 14 body { background-image:url(logo.gif); 15 background-position:bottom right; 16 background-repeat:no-repeat; 17 background-attachment:fixed; } 18 19 p { font-size:18pt; 20 color:#aa5588; 21 text-indent:1em; 22 font-family:arial, sans-serif; } 23 24 .dark { font-weight:bold; } 25 26 </style> 27 </head> 28 Background.html
Note that no formatting needed to be set in the p element itself because it has already been defined in the CSS. 29 <body> 30 31 <p> 32 This example uses the background-image, 33 background-position and background-attachment 34 styles to place the <span class = "dark">Deitel 35 & Associates, Inc.</span> logo in the bottom, 36 right corner of the page. Notice how the logo 37 stays in the proper position when you resize the 38 browser window. 39 </p> 40 41 </body> 42 </html> Background.htmlProgram Output
Elements placed between div tags will be set on their own line with a margin below and after it. The width and height attributes of style allow the user to indicate the percentage of the width and height of the screen the element can occupy. 1 <?xml version = "1.0"?> 2 <!DOCTYPE html PUBLIC "-//W3C//DTD XHTML 1.0 Strict//EN" 3 "http://www.w3.org/TR/xhtml1/DTD/xhtml1-strict.dtd"> 4 5 <!-- Fig. 6.11: width.html --> 6 <!-- Setting box dimensions and aligning text --> 7 8 <html xmlns = "http://www.w3.org/1999/xhtml"> 9 <head> 10 <title>Box Dimensions</title> 11 12 <style type = "text/css"> 13 14 div { background-color:#ffccff; 15 margin-bottom:.5em } 16 </style> 17 18 </head> 19 20 <body> 21 22 <div style = "width: 20%">Here is some 23 text that goes in a box which is 24 set to stretch across twenty percent 25 of the width of the screen.</div> 26 27 <div style = "width: 80%; text-align: center"> 28 Here is some CENTERED text that goes in a box 29 which is set to stretch across eighty percent of 30 the width of the screen.</div> 31 Width.html
This will set the overflow attribute to add scroll bars for text that overflows. 32 <div style = "width: 20%; height: 30%; overflow: scroll"> 33 This box is only twenty percent of 34 the width and thirty percent of the height. 35 What do we do if it overflows? Set the 36 overflow property to scroll!</div> 37 38 </body> 39 </html> Width.htmlProgram Output
The float property allows you to move an element to one side of the screen such that other content in the document then flows around the floated element. The margin property specifies the distance between the edge of the element and any other element on the page. 1 <?xml version = "1.0"?> 2 <!DOCTYPE html PUBLIC "-//W3C//DTD XHTML 1.0 Strict//EN" 3 "http://www.w3.org/TR/xhtml1/DTD/xhtml1-strict.dtd"> 4 5 <!-- Fig. 6.12: floating.html --> 6 <!-- Floating elements and element boxes --> 7 8 <html xmlns = "http://www.w3.org/1999/xhtml"> 9 <head> 10 <title>Flowing Text Around Floating Elements</title> 11 12 <style type = "text/css"> 13 14 div { background-color:#ffccff; 15 margin-bottom:.5em; 16 font-size:1.5em; 17 width: 50% } 18 19 p { text-align:justify; } 20 21 </style> 22 23 </head> 24 25 <body> 26 27 <div style = "text-align: center"> 28 Deitel & Associates, Inc.</div> 29 30 <div style = "float: right; margin: .5em; 31 text-align: right"> 32 Corporate Training and Publishing</div> 33 Floating.html
Padding is the distance between the content inside an element and the element’s border. The clear property can be used to interrupt the flow of text around a floating element. 34 <p>Deitel & Associates, Inc. is an internationally 35 recognized corporate training and publishing organization 36 specializing in programming languages, Internet/World 37 Wide Web technology and object technology education. 38 Deitel & Associates, Inc. is a member of the World Wide 39 Web Consortium. The company provides courses on Java, 40 C++, Visual Basic, C, Internet and World Wide Web 41 programming, and Object Technology.</p> 42 43 <div style = "float: right; padding: .5em; 44 text-align: right"> 45 Leading-edge Programming Textbooks</div> 46 47 <p>The company's clients include many Fortune 1000 48 companies, government agencies, branches of the military 49 and business organizations. Through its publishing 50 partnership with Prentice Hall, Deitel & Associates, 51 Inc. publishes leading-edge programming textbooks, 52 professional books, interactive CD-ROM-based multimedia 53 Cyber Classrooms, satellite courses and World Wide Web 54 courses.<span style = "clear: right"> Here is some 55 unflowing text. Here is some unflowing text.</span></p> 56 57 </body> 58 </html> Floating.html
A floating element with 5 em padding. Program Output
6.10 Test Flow and Box Model Margin Border Content Padding Fig. 6.13 Box model for block-level elements.
The border-width property is the width of the border around an element. The border-style property is the style of border used. The border-color property is the color of the border. 1 <?xml version = "1.0"?> 2 <!DOCTYPE html PUBLIC "-//W3C//DTD XHTML 1.0 Strict//EN" 3 "http://www.w3.org/TR/xhtml1/DTD/xhtml1-strict.dtd"> 4 5 <!-- Fig. 6.14: borders.html --> 6 <!-- Setting borders of an element --> 7 8 <html xmlns = "http://www.w3.org/1999/xhtml"> 9 <head> 10 <title>Borders</title> 11 12 <style type = "text/css"> 13 14 body { background-color:#ccffcc } 15 16 div { text-align:center; 17 margin-bottom:1em; 18 padding:.5em } 19 20 .thick { border-width:thick } 21 22 .medium { border-width:medium } 23 24 .thin { border-width: thin } 25 26 .groove { border-style:groove } 27 28 .inset { border-style: inset } 29 30 .outset { border-style:outset } 31 32 .red { border-color:red } 33 34 .blue { border-color:blue } Borders.html
35 36 </style> 37 </head> 38 39 <body> 40 41 <div class = "thick groove">This text has a border</div> 42 <div class ="medium groove">This text has a border</div> 43 <div class = "thin groove">This text has a border</div> 44 45 <p class = "thin red inset">A thin red line...</p> 46 <p class = "medium blue outset"> 47 And a thicker blue line</p> 48 49 </body> 50 </html> Borders.htmlProgram Output A sampling of the different types of borders that can be specified.
Specifying a border directly through the style attribute of the div element. 1 <?xml version = "1.0"?> 2 <!DOCTYPE html PUBLIC "-//W3C//DTD XHTML 1.0 Strict//EN" 3 "http://www.w3.org/TR/xhtml1/DTD/xhtml1-strict.dtd"> 4 5 <!-- Fig. 6.15: borders2.html --> 6 <!-- Various border-styles --> 7 8 <html xmlns = "http://www.w3.org/1999/xhtml"> 9 <head> 10 <title>Borders</title> 11 12 <style type = "text/css"> 13 14 body { background-color:#ccffcc } 15 16 div { text-align:center; 17 margin-bottom:.3em; 18 width: 50%; 19 position:relative; 20 left:25%; 21 padding:.3em } 22 </style> 23 </head> 24 25 <body> 26 27 <div style = "border-style: solid">Solid border</div> 28 <div style ="border-style: double">Double border</div> 29 <div style ="border-style: groove">Groove border</div> 30 <div style ="border-style: ridge">Ridge border</div> 31 <div style = "border-style: inset">Inset border</div> 32 <div style ="border-style: outset">Outset border</div> 33 34 </body> 35 </html> Borders2.html
User Style Sheets • An important issue to keep in mind when adding style sheets to your site is what kind of users will be viewing your site. Users have the option to define their own user style sheets to format pages based on their own preferences – for example, visually impaired people might want to increase the text size on all pages they view. • Possibility of conflicts between user styles and author styles
Author defined style sheets are ones defined within the page. By using absolute measurement (pt in this case) the developer will override user defined style sheets. 1 <?xml version = "1.0"?> 2 <!DOCTYPE html PUBLIC "-//W3C//DTD XHTML 1.0 Strict//EN" 3 "http://www.w3.org/TR/xhtml1/DTD/xhtml1-strict.dtd"> 4 5 <!-- Fig. 6.16: user_absolute.html --> 6 <!-- User styles --> 7 8 <html xmlns = "http://www.w3.org/1999/xhtml"> 9 <head> 10 <title>User Styles</title> 11 12 <style type = "text/css"> 13 14 .note { font-size:9pt } 15 16 </style> 17 </head> 18 19 <body> 20 21 <p>Thanks for visiting my Web site. I hope you enjoy it. 22 </p><p class = "note">Please Note: This site will be 23 moving soon. Please check periodically for updates.</p> 24 25 </body> 26 </html> User_absolute.html
Developer defined class applied to this p element decrease the font size of the text. Program Output Styles set by the author have higher precedence over the styles set by user style sheets.
User defined style sheets are usually external. A user’s style sheet is not linked to a page, they are set in the browser’s options. 1 /* Fig. 6.17: userstyles.css */ 2 /* A user stylesheet */ 3 4 body { font-size: 20pt; 5 color:yellow; 6 background-color:#000080 } Userstyles.css
6.11 User Style Sheets Setting the user’s style sheet in IE. Fig. 6.18 Adding a user style sheet in Internet Explorer 5.5.
6.11 User Style Sheets Fig. 6.19 Web page with user styles applied.
By using relative measurements (in this case, em), the developer will not override user defined style sheet formats. When rendered the font size displayed will be .75 percent times the value of the font size defined in the user style sheet. 1 <?xml version = "1.0"?> 2 <!DOCTYPE html PUBLIC "-//W3C//DTD XHTML 1.0 Strict//EN" 3 "http://www.w3.org/TR/xhtml1/DTD/xhtml1-strict.dtd"> 4 5 <!-- Fig. 6.20: user_relative.html --> 6 <!-- User styles --> 7 8 <html xmlns = "http://www.w3.org/1999/xhtml"> 9 <head> 10 <title>User Styles</title> 11 12 <style type = "text/css"> 13 14 .note { font-size:.75em } 15 16 </style> 17 </head> 18 19 <body> 20 21 <p>Thanks for visiting my Web site. I hope you enjoy it. 22 </p><p class = "note">Please Note: This site will be 23 moving soon. Please check periodically for updates.</p> 24 25 </body> 26 </html> User_relative.html
Program Output Output before relative measurement is used to define the font in the document.
6.11 User Style Sheets Fig. 6.21 Using relative measurements in author styles. Output when relative measurement is used. By using relative measurements the user defined styles are not overwritten.
Internet Resources • http://style.webreview.com • http://www.mako4css.com/index.htm