Download
1 / 53
580 likes | 2.34k Views
This guide provides an overview of GPS (Global Positioning System) technology, explaining how it works and its components. Learn how to operate a Garmin GPS unit, access basic features, and maintain the device. Find details on satellite tracking, GPS operation, and key functions for navigation and positioning, making it a valuable resource for sailors. Discover essential tips for using GPS effectively in your sailing adventures.

E N D
Introduction to GPS American Sailing Institute Prepared by Sherri Gregory Most illustrations copied from Garmin Owners Manuals and Reference Guides Ver 2 2017
What is GPS GPS (Global Positioning System) was developed by the U.S. Department of Defense then made available to the public Allows you to know to a high degree of accuracy where you are Provides exact local time Presents location to your GPS receiver in terms of latitude and longitude.
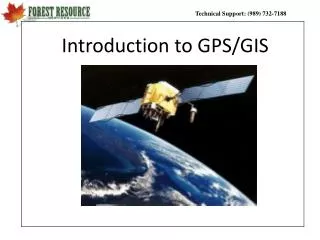
GPS Components • Space – Satellite Constellation • At least 24 active satellites plus spares • Each satellite contains atomic clocks and signals to determine position of itself and other satellites • Operational – Ground based Monitors • Ensures accurate positioning information • User – GPS unit • Contains antenna, amplifier, signal decoding, computer, display screen with controls • No direct communication to satellites
How GPS (Global Positioning System) works • The GPS receiver receives and compares signals from 3 or 4 orbiting satellites that are in the line of sight of the receiver. • Each satellite transmits its exact location along with a time signal. • The GPS receiver uses this data to determine its distance from each of the satellites. • Once the position and distance of each satellite is known, the GPS receiver calculates it’s current location which is the position where all these LOPs cross. Diagram from Ben Levitan and Lawrence Harte: Introduction to Satellite systems
Satellite tracking (shows positions and signal quality) • Presents detailed system status • Displays latitude and longitude • Displays exact time • Shows where you’ve been (track) and speed • Projects required direction, speed and time to a destination • Shows distance and direction to a desired route (Cross track error) • Optionally contains nautical charts BASIC GPS Features
GPS is used to answer these questions* • Where am I now? • What is my course from here to destination? • How far is my destinations? • How fast am I going? • How long will it take to get there? • Am I still on course? If not, what correction is needed? • Are we there yet? *From Power Squadron Introduction to GPS Manual
Activating a Garmin GPS • Press the On button to turn on the unit • Often requires agreeing to warning message • These messages differ depending on unit • Note: This button usually also controls backlight intensity.
GPSMap 78: • Quit – Return to • Previous menu/page • ON/Off/backlight • Find/MOB – Press to • open search menu. • Hold to store current • location as a waypoint and begin navigation to it. • Zoom In, Zoom Out • Page – Scroll through main pages • Menu – Open menu for current page, press twice for main menu • Enter/Mark – Press to select options. Hold to save current location as waypoint • Rocker – selects menu options and moves cursor Buttons
Garmin 72 Buttons (clockwise from lower left) QUIT – Escape from current screen and back to previous – Turn unit on/off and adjust background light intensity GOTO – Provides a menu for selecting waypoint to navigate to. Press twice for MOB (Man Overboard). Directs you back to that location. IN – ZOOM map or highway screen in OUT – ZOOM map or highway screen out PAGE – Cycle though a set of preset screens MENU – Access main menu or menu applicable to current page ENTER – Execute an action. Press for 3 seconds to MARK the current location as a waypoint.
Cleaning the Screen • Cleaners containing ammonia will harm the anti-reflective coating. • The device is coated with a special anti-reflective coating which is very sensitive to skin oils, waxes, and abrasive cleaners. • Apply an eyeglass lens cleaner specified as safe for anti- reflective coatings to the cloth. • Gently wipe the screen with a soft, clean, lint-free cloth.
Main Menu – Can get to everything from here usually by pressing “Menu” key twice GPS 72 GPSMAP 182C
Sometime the Home button brings you to the main menu Home menu: GPSMAP 547 • In the GPSMAP 547/741 Everything can be accessed from Home. • Menu order can be changed. • Scroll up/down to see entire list Navigation Chart Nav Info Man Overboard Gauges Settings Customize Home Combinations Charts
Commonly accessed GPS Pages • Map • Satellites • Compass or Pointer • Highway screen • Various Setup screens • Trip Computer or Gauges or Numbers • Route and Waypoint lists and detail information • Route and Waypoints edit screens • Active Route • Track list Note: In some units some of these can be scrolled using the Page button. In some units you can customize the Page button to just show your favorites.
Pages Most units have a “Page” button to scroll through the most popular pages. Some have a fixed set of pages while in other units you can select what to show. Some units such as the GPSMAP 547/741 don’t have a Page button. (Example below is from the GPSMAP 182C. The pages are fixed.)
MAP PAGE • Contains chart and optional data fields • Use in preparation for your trip: • Change contents and number of data fields • Determine appearance • Determine which charts to use • Create Waypoints and Routes if not imported
MAP PAGE Uses while underway: • View waypoints and routes • Measure distances to objects • Know your location on a chart and see your relationship to landmarks and depth ranges • Create “Goto” routes • Follow tracks • Zoom in and Out
Compass – May be electronic (true compass) or GPS controlled (sometimes called Pointer) • Example: GPSMap 182C • GPS controlled; It only works when you are moving. • Your track is shown at the top of the ring. • The pointer is the bearing or course to your destination. • If the arrow points up you are moving toward your destination. • To use for navigation, travel in the direction of the arrow.
Highway Page • Example from Garmin GPS 72 • This page shows a 3D view of your course, with the waypoint to which you are currently navigating ahead of you. • It also includes user selectable data fields (number and size of fields can also be changed)
Trip Computer, Trip Gauge or Numbers Page A similar page can be found on most GPS Units. In the GPS 72 (seen here) these fields are not changeable. In other units you can determine the number of items to show and which data items (or numbers) to show.
Check or Change: Basic Settings • Simulator mode on/off (simulator mode is also called GPS off or Demo Mode in some units) • North Reference: Magnetic or True • Distance: Nautical Miles or Statute Miles • Depth: Feet, fathoms or meters • Data fields (numbers): How many fields and contents to display on any applicable screen
Check or Change: Map Options • Change orientation North Up/Track Up/Course Up • Change Level of Detail • View and select/deselect Charts • Change Size of Waypoints • Size of Navaid symbols • Display Heading Line/Bearing Line/Course Line • Change text size and zoom range
Check or Change - Alarms • Arrival: Sets an alarm to sound when you are within a specified distance or time from a turn or a destination. • Anchor Drag: Sets an alarm to sound when you exceed a specified drift distance while anchored. • Off Course: Sets an alarm to sound when you are off course by a specified distance (also called cross track error)
Examples of Selectable Data Fields or Numbers • Off Course (distance) • Pointer • Speed • Time of Day • Time to Destination • Time to next • To Course (direction)* • Total Avg Speed • Total Trip Timer • Track (direction)* • Trip Odometer • Accuracy • Bearing (direction)* • Course (direction)* • Depth • Dist to Destination • Dist to Next • ETA at Destination • ETA at Next • Location (lat/long) • Max Speed • Moving Avg Speed
Chart Latitude and Longitude display Caution: In most GPS units the only way to see your current position is to have it displayed as an optional data item or number. The lat/lon that appear on the map screen is generally the lat/lon of the position of the pointer or cursor. Boat position (optional) Pointer (cursor) position
Useful (but sometimes confusing) data fields used for navigation • Bearing – Compass direction from your current location to a destination point • Track – Course the boat has been sailing over ground or COG. • Course – Desired path of travel from the point navigation is initiated to your destination waypoint (also referred to as rhumb line) • Heading – There is no GPS readout for your heading which is the compass course you are steering. GPS doesn’t know or care where your boat is pointed – only where it is actually going.Robert Sweet, the Weekend Navigator pg 101
A course has been established from start to destination (compass directions are for illustration only). North is up. Destination Bearing = 275 To Course = 210 Track = 350 Course = 320 Start
Waypoints are specific locations that you will use on your journey. • They can indicate points along a route as well as your destination. • They can also indicate an obstruction or other danger point. • GPS units have two ways to set up waypoints: directly from a waypoint page, and using the map page to point to the desired location of a waypoint • Most units can also import waypoints from other sources via data chip, direct computer transfer, wi-fi etc. Waypoints
Creating a Waypoint • The easiest way to create a waypoint using a GPS unit is by using the cursor to locate a position on the Map page. • In some units just press “Enter/Mark” to create a waypoint at that position (GPSMAP 182). In some units (GPSMAP 547/741) this is done via the “Nav Info” menu option. • You can also create a new waypoint by editing an existing one. The original waypoint will not be retained.
Waypoints Names • When you create a new waypoint it’s automatically given a name (often a sequential number) by the GPS unit. • It is recommended that you change the name to reflect something meaningful about the location or route.
Man Overboard • All units have a quick way to mark the spot where you are currently and navigate to it. • This is initiated by pressing “MOB”. Caution: Make sure you know where MOB is on the GPS you are using
Proximity Waypoint/Proximity Alarm • Lets you define an alarm circle around a waypoint • Useful for identifying obstructions • You can select the radius of the circle. Example from GPSMAP 182C
GPS Text Editor Can be cumbersome but necessary for some actions such as editing waypoints: Waypoint Name Waypoint Symbol Latitude and Longitude
GPS Text Editors • Each GPS has its own method for text editing. • Two common methods: • For each character scroll through the entire set of letter, numbers and symbols to find the character you want (GPS 72, GPSMAP 182C) • The Edit page displays all available characters and you use the cursor to select the character you want (GPSMAP 78, GPSMap 547/741)
A route is a path that you want to navigate • It’s made up of two or more connected waypoints. • You can create waypoints first then connect them to create a route • or • You can establish the beginning and end waypoints first then fill in the “turns” or waypoints afterward. Routes
Three methods of establishing a route • Create a fixed route to follow • Use for planning or if your route contains multiple waypoints • Use if there are obstacles you need to avoid between your current location and destination. • Use “Go To” • Use when your current location is the starting point and the course is straight to your destination with no obstacles nearby • Easy to use • Follow an existing track Note: Your map page may show your initial course or current bearing to your destination. Check your settings.
“Go To” Cautions • Stay on your initial course if obstacles are in the area • If necessary set the Proximity alarm on obstacles • Know your position and track by plotting fixes on your paper chart at regular intervals. If your bearing (direction to your destination) changes check your chart to make sure that your current bearing will take you safely to your destination.
Creating a Fixed Route Fixed Routes can be established in a number of ways • Directly from a Route Page by selecting existing waypoints that make up the route. • Using the map page to draw a route • Most units can also import routes from other sources via data chip, direct computer transfer, wi-fi etc.)
Route To(Available on GPSMAP 547/741) • A temporary route that enhances “GoTo” • Starts with a straight route from your location to a destination then allows you to add turns along the way. • Makes it easier to avoid obstacles and navigate around land masses. • The route may be saved later if desired.
Activating a Route • If you want to use “Go To”, it’s easiest to just select a destination location on the map screen. Follow the instructions to navigate to that point. • If a stored route or waypoint is desired, use the Find Key (GPS 72, GPSMAP 182C) or Nav Info (GPSMAP 547/741) to select the route or waypoint.
Transferring data from an external source • It is time consuming and cumbersome to set up routes and waypoints directly on handheld GPS units because of size and editing limitations. • You may want to quickly load your own waypoints and routes on an ASI chartplotterfor your timeshare. (GPSMAP 547/741 only) • Most units have a way to import and export data from another source such as a computer, tablet or another GPS unit
Examples of Data Transfer Methods • Direct Transfer of files from Garmin Homeport to a Garmin handheld using a USB cable (GPSMAP 78x) • Load a GPX file or a file from Garmin Homeport onto a MicroSD card and insert card on a chartplotter (GPSMAP 547/741) • Transfer all routes and waypoints from Bluechart Mobile to a chartplotter via local WiFi (GPSMAP 547/741) • Some units use proprietary chips or Bluetooth
Practical uses of GPS How can these waypoints assist in navigation? (“North Buoy” is Fl(2+1)G6S; “South Buoy” is “1”,Fl G4S)
Some reasons to Use a Paper Chart with GPS • Some GPS units don’t include charts (GPS 72 units) • Battery/power source unavailable • Overlapping charts, missing expected charts • Other GPS unit malfunction • GPS signal interruption • Paper chart provides the big view and detail at the same time. • You could have programmed your GPS incorrectly • You could misinterpret your GPS data.
Planning – GPS and Paper Charts • Establish waypoints (and routes) including danger points and enter them on your GPS. (If using your own GPS, it’s easiest to enter them on your computer and then download) • Use short meaningful names • Make a list of waypoints with name, lat, long and description of location • Draw your route on your paper chart including hourly projected DR plots based on your estimated speed and time of departure. Indicate your waypoints on your paper chart as shown below. X • Waypoint symbol/name used on paper chart (USPS) • (Symbol is omitted if waypoint is also a nav aid) SC01