Create Stunning Devil's Eye Effect in Photoshop: Step-by-Step Tutorial
170 likes | 297 Views
Learn how to create a mesmerizing Devil’s Eye effect using Photoshop with this easy-to-follow tutorial. Start by opening a high-resolution image and duplicate the eye layer for experimentation. Utilize the burn tool to enhance the edges of the iris and add shadows for depth. Use color layers to inject vivid hues, and adjust lighting effects to bring your eye to life. Finally, tweak brightness and contrast settings for the perfect finish. Enhance your Photoshop skills and transform your images today!

Create Stunning Devil's Eye Effect in Photoshop: Step-by-Step Tutorial
E N D
Presentation Transcript
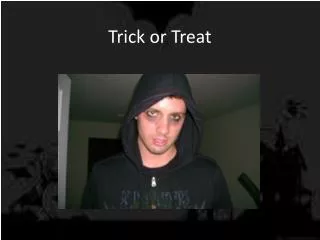
By : KiesheenMartonia & Judy Ann Pauya Photoshop trickDevil’s eye
STEP 1 Open image , you need an eye to work on (get a big and high resolution one).
STEP 2 Duplicatethe eye layer (and work on the duplicated one so you can toggle back and forth later, and see the changes).
Step 3 Select the burn tool and set it's range to midtones and exposure to 35%.
Then burn all around the edges of the iris (the colored part) till it's almost black.
Again use the burn tool around the whole eye (right on the eyelash line) and apply it like eye shadow till it starts to look heavy and dark.
Then create a new layer (name it as the color layer), now get a nice bright color on the foreground color, now click the brush tool and change the blending mode to color, make the mode of the brush normal and set the opacity of it to 100 and the flow to 100 and choose a brush size so that it fits in between the iris and the and paint inside of it (I chose an orange/yellowish color).
Step 5 • With the duplicated layer active, go to "filter-render-lighting effects" and click it, you'll see a diagram of your eye, (like a pacman) now make the light come from the top of your eye, put the mouth/slit above the top of the eye or any direction you think it looks best, you'll see two boxes to the right, pick the top one and change the color to a dark/pale looking color (I chose a dull orange) and hit ok. This is the reaction
With your duplicated layer still active go to "create new fill or adjustment layer" is located right under your background and layers pallet and looks (like a "ying yang“) ,click it and go to hue/saturation and click that, now go to the saturate and decrease it till you have a more likable product and hit ok. You should have something like this now.
STEP 7 • Now go to your color layer and make it active ,with it active hover your hand/arrow over the square (the little picture of your color layer) and hold the control button and click it (you'll see in the main picture) (the big one) that the color you have painted in is now selected with the little ants (the little moving things that make you know that you have selected something), now as before click on "create new fill or adjustment layer" then click on the brightness/contrast one, increase the contrast some and decrease the brightness some till you get something you like and click ok.
Visit our blog: hyperneedykians.wordpress.com • Help yourself by helping others • ”It wasn’t raining when Noah built the ark.”