Download
1 / 39
410 likes | 477 Views
Starting Out with Alice: A Visual Introduction to Programming Third Edition. Chapter 2: Programming in Alice. 2.1. Writing Methods. What is a method? set of instructions that execute create methods by dragging tiles into the Method Editor these tiles are the instructions.

E N D
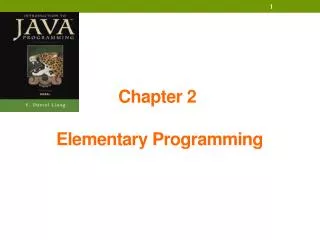
Starting Out with Alice: A Visual Introduction to Programming Third Edition Chapter 2:Programming in Alice
2.1 Writing Methods • What is a method? • set of instructions that execute • create methods by dragging tiles into the Method Editor • these tiles are the instructions my first method
2.1 Naming Conventions the periodis called a “dot” • dot notation • world.my first method • dot (period) separates pieces of information • left side: object that the method belongs toin this case…the method belongs to the WORLD object • right side: name of the methodin this case… “my first method”
2.1 world.my first method Events Editor identifies which method plays or is acted upon when the “Play” button is hit An Error might appear if this section is blank.
2.1 world.my first method Methods play the instructions (tiles) that are dragged into the Method Editor
2.1 Primitive Methods dot notation: hare.move All objects have a common set of built-in method for performing actions. These “primitive methods” all objects to move, turn, change size, and more. Example:Hare has primitive methods to move, turn, roll, resize, say
Tutorial Design Practicing Using Methods Create Tutorial 2-1 on pages 62-64
2.1 Terminology argument argument method object editing tag • Calling the method: • executing a method • Argument: • piece of information that a method needs in order for it to execute • hare.move…which direction?the direction…up, down, left, right…is the argument • Passing the Argument: • the method is called and the arguments are presented
2.1 Editing Tag • Holds additional arguments • What appears depends on the method called • durationspecifies amount of time for action to take placedefault (1 second)
2.1 Deleting Right-click the instruction and select delete Drag the instruction tile to the trash can
2.1 Copying • Right-click the instruction and select copy • Drag the instruction tile to the clipboard • when the clipboard turns green, drop the tile • click on the clipboard and drag it back to the Method Editor
Primitive Methods Task Complete the Exploring Primitive Methods tutorial(2-2) on page 67-69
2.1 Custom Methods What do you think the foottap custom method does? In addition to primitive methods (the things that ALL objects can do)…some objects have custom methods When objects is selectedfrom gallery, a listing ofcustom methods appears Names of the custommethods give clues as towhat the method does
2.2 Naming Conventions Which one coaches the Knights and which one coaches the Cougars? • Names are known as identifiers…because they identify items in a program • Use a name that provides meaning • Name of method shouldindicate the method’s purpose
namingConventions Most programming languages do NOT recognize spaces Alice allows spacesmethod.my first method Since spaces are not allowed, how do you combine more than one word in naming? Capitalize subsequent words Called camelCase 2.2 Notethespace Notethespace Which is easier to read? onehumpcamel or oneHumpCamel
2.2 Class Names • method names begin with a lower case letter • Class names are capitalized • No spaces, so each word is capitalized • This convention is called PascalCase
2.2 Renaming • Objects • Right-click object’s tile inthe object tree and selectrename. • Methods • Select the world object • Select the method’s tab from the Details Panel • Right-click the my first method tile and select rename.
2.3 Designing a Program Design the program Write the methods Test the methods Debug the methods Design requires planning…that follows the above steps Called program development cycle Cycle is repeated until there NO errors appear in the program.
2.3 Designing the Program Design the program Write the methods Test the methods Debug the methods • Determine what the world is supposed to do. • Use problem statementthat describes the objects that will appear
2.3 Designing the Program Design the program Write the methods Test the methods Debug the methods • Break the problem statement down into series of steps • Pseudocode • Flowchart
2.3 Writing the methods Design the program Write the methods Test the methods Debug the methods • Design steps (pseudocode or flowchart) provides model for writing the methods • Drag tiles into Method Editor to assemble instructions • Instructions should follow the order of the Design steps • Pseudocode and flowchart may NOT be at the detail of the final instructions
2.3 Testing Design the program Write the methods Test the methods Debug the methods • Test to make sure it meets the following criteria: • Does it do what it was intended to do? • Does it have any errors? Or undesired results? • Is it efficient? Are there unnecessary steps? • If the criteria are NOT met, then debugging occurs • Debugging means to determine what must be corrected or modified to get the program to work correctly.
2.3 Designing a Program Design the program Write the methods Test the methods Debug the methods • Debugging means to determine what must be corrected or modified to get the program to work correctly • Logical errors(bug) is a mistake that produces an incorrect result, but the program still runs. • Instructions in an incorrect order may produce incorrect results • Passing incorrect values as arguments can cause logical errors
Using The Program Design Cycle • Pay close attention to the instructions along with the problem statement, flowchart and pseudocode found on pages 82-83 before jumping straight into the program. • Complete Using the program design cycle tutorial(2-3) on page 82-87
Custom Program Design Task • Students will design a flowchart and pseudocode that will include at least twenty different changes within a program of his/her choosing. • -After the flowchart and the pseudocode have been approved students should design the program within Alice by taking the flowchart and the pseudocode and turning them into functional parts within a program. • Example 1 Change : White Rabbit moves forward to a position in front of the car
A comment is a note explaining the code Crucial part of the code Makes the code understandable Alice ignores comments when it plays your program 2.4 Comments //comment tile
Comments Please!!!!! Complete the Tutorial 2-4 over inserting comments into Alice.
Use the primitive methods to setup the scene Select the object in the Object Tree, then select a method Use the primitive methods to position the objects Doing so from the Object Tree positions the objects outside of the program 2.5 Tips for Setting Up the Initial Scene
Cinderella Needs Our Help Look at pages 93 and 94. Insert a new Cinderella Object Perform the three steps on pages 93 and 94 to move Cinderella's hands to her side using methods.
2.5 Tips for Setting Up the Initial Scene • Moving an object to the center of the world • Use the move tomethod and choose the entire world as the method’s argument • Places the object’s center point at the world’s center point of (0, 0, 0)
2.5 Tips for Setting Up the Initial Scene • Positioning objects a specified distance apart • Use the move tomethod and choose asSeenBy the other object for the method’s argument • Places the object’s center point at the world’s center point of (0, 0, 0)
2.5 Tips for Setting Up the Initial Scene • Moving the camera to an object • Right-click the object and choose Camera get a good look at this • Camera moves to a position so the object is in plain view
2.6 Executing Instructions Simultaneously By default, instructions are executed one after the order…in the order they appear in the Methods Editor For simultaneous actions, dragDo together into the MethodsEditor Other instructions can be placewithin the Do together tile Make sure the duration for allitems in Do together are the same
2.6 The Do in order Structure By default, all instructions are performed in order they appear in the Methods Editor Do in order structure used when more than one set of actions must occur simultaneously…but has steps that must be done in order
Loops Complete the tutorial 2-5 on pages 98-102 to reinforce the concept of looping within Alice.
Code can be exported to an HTML file Open the file and Print From File – Choose Export Code for Printing YOU must add your name as the author Author’s name is printed with the exported code 2.7 Exporting Code for Printing Author’s name
Exporting an Alice World to Video • An Alice world can be exported to video and shared with others on the Internet • Open the File menu and select Export Video • You are required to save your world by clicking the Save button • Click the Record button to start recording and the Stop Recording button when you are finished • Name your video and click the Export Video button • Video will be created in the same location where you saved the Alice world
Challenge Yourself Students will complete three basic skills program and one challenge program from the exercises at the end of the textbook. Students will choose three(50 points each) of the following to complete from pages 109 – 111. -Exercise 1,3,5,6,10 Students should choose one(100 points) of the following challenge programs 8,10 or 12
Skills Test Students will complete exercise 11 from page 111. - Students will select a scene from their favorite movie(school appropriate) and then use Alice to recreate the scene with the dialog, sound and movement from the movie. -Students will have 4 days to complete the design of the movie scene. -The movie scene will count as a proficiency measure grade(100 point test grade). -An algorithm or flow chart will be required to outline the scene otherwise the scene will not be accepted for a grade.