Running Web Applications with MySQL and PHP
SPARCS Wheel Seminar 08/01/14 심규현 (spotlight). Running Web Applications with MySQL and PHP. 1 of 6 Web Application. A web application is an application that is accessed via web over a network such as the Internet or an intranet. Commonly Structured as a three-tiered application.

Running Web Applications with MySQL and PHP
E N D
Presentation Transcript
SPARCS Wheel Seminar 08/01/14 심규현(spotlight) Running Web Applications with MySQL and PHP
1 of 6 Web Application • A web application is an application that is accessed via web over a network such as the Internet or an intranet. • Commonly Structured as a three-tiered application. • A web browser, an engine using some dynamic web content technology, and a database.
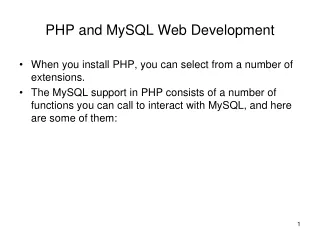
2 of 6 LAMP • Linux • Apache • MySQL (Postgres등 다른 DBMS도 있다.) • PHP (PHP 인터프리터를 웹서버 모듈로 사용시에 CGI 프로그램으로 사용하는 것 보다 성능 향상을 가져온다.)
3.1 of 6 Ubuntu에서 APM 설치하기 1. Apache 설치$ sudo apt-get install apache2 2. MySQL인증을 위한 모듈 설치(optional)$ sudo apt-get install libapache2-mod-auth-mysql 3. MySQL설치$ sudo apt-get install mysql-server mysql-client 4. PHP 설치$ sudo apt-get install php5-common php5 libapache2-mod-php5
3.2 of 6 Ubuntu에서 APM 설치하기 5. PHP와 MySQL연동을 위한 모듈 설치$ sudo apt-get install php5-mysql 6. Apache를 재시작 한다.$ sudo /etc/init.d/apache2 restart 7. MySQL이 정상적으로 작동되는지 확인$ sudonetstat –tap | grepmysql(tcp 0 0 localhost::mysql *:* LISTEN)
3.3 of 6 Ubuntu에서 APM 설치하기 8. PHP가 정상적으로 작동되는지 확인$ sudo vi /var/www/phpinfo.php<?phpprint_r(phpinfo());?> 을 삽입 9. 웹 브라우저를 열고 다음 주소를 입력http://(apm을 설치한 서버 주소)/phpinfo.php
4 of 6 MySQL관리 • $ mysql –u root –p • mysql> SET PASSWORD FOR -> root=PASSWORD(‘new password’);mysql> FLUSH PRIVILEGES; • mysql> GRANT ALL PRIVILEGES ON *.* TO -> spotlight@localhost IDENTIFIED BY -> ‘spotlight_passwd’;mysql> FLUSH PRIVILEGES;
5 of 6 phpMyAdmin • www.phpmyadmin.net/ 에서 다운로드 후웹서버 홈 디렉토리에 또는 그것의 하위 디렉토리에 압축을 푼다.( /SPARCS/www/htdocs/ ) • 설정 파일 : # sudo cp config.sample.inc.phpconfig.inc.php → $cfg['Servers'][$i]['auth_type'] = 'http';
6 of 6 Settings (SPARCS) • /etc/apache/httpd.conf (httpd데몬 설정파일)→ DocumentRoot /SPARCS/www/htdocs(apache2에서는 /etc/apache2/httpd.conf) • /etc/mysql/my.cnf (MySQL설정파일)encoding, port등 설정