Polygonal Texturing for 3D Models: UV Coordinates and Texture Mapping Guide
Learn how to apply textures to polygonal models using UV coordinates and texture mapping techniques. Understand the basics of mapping rectangular images to non-rectangular shapes like characters. Discover how to use the UV Texture Editor and tools to paint textures directly on your 3D model. Follow step-by-step instructions on mapping specific parts like the nose and arms, and creating detailed textures for a realistic look.


Polygonal Texturing for 3D Models: UV Coordinates and Texture Mapping Guide
E N D
Presentation Transcript
Polygonal Texturing CGDD 4113
UV Coordinates(AKA Texture coordinates) (0, 1) (1, 1) (0, 1) (1, 1) Polygon to betextured (0, 0) (1, 0) (0, 0) (1, 0)
UV Coordinates(AKA Texture coordinates) (0, 1) (1, 1) (0, 1) (1, 1) (0, 0) (1, 0) (0, 0) (1, 0)
UV Coordinates(AKA Texture coordinates) (0, 1) (1, 1) (0, 1) (1, 1) (0, 0) (1, 0) (0, 0) (1, 0)
UV Coordinates(AKA Texture coordinates) (0, 1) (1, 1) (0, 1) (1, 1) (0, 0) (1, 0) (0, 0) (1, 0)
What happens now? (0, 1) (1, 1) (0, 4) (4, 4) Polygon to betextured (0, 0) (4, 0) (0, 0) (1, 0)
What happens now? (0, 1) (1, 1) (0, 4) (4, 4) Polygon to betextured (0, 0) (4, 0) (0, 0) (1, 0)
What about now? (0, 1) (1, 1) (0, 0) (1, 0)
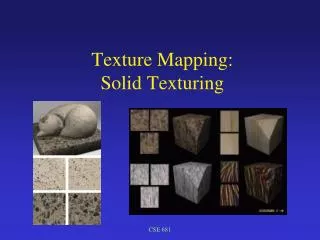
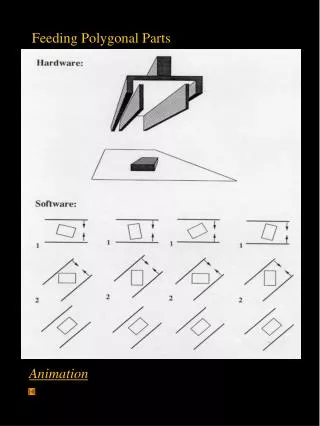
Basic Problem • How to map rectangular images to non-rectangular objects • Usually, there’s built-in: • Cube • Cylinder • Sphere • Flat • What about our character? How do we map that?
The UV Texture editor(Window -> UV Texture Editor) • Select the dog, then open the editor
Planar Mapping(Polygon menu, Create Uvs->Planar Mapping) • Project from the side, not front!
The Nose • Select faces, then Create UVs->Planar Mapping->□ (from Z-axis) • In UV Editor, RMB and select UV, then select the entire nose
The ARMs • Start by selecting the faces from *both* hands • Select the faces on the arms using SHIFT+> • Follow instructions closely – lots of options!
Paint yer doggie • Under the “Rendering” set of menus (Texturing->3D Paint Tool->□) • Make sure the Attribute to Paint is set to Color • Assign/Edit Textures:
Directly paint on the Geometry • Turn on File Textures->Extend Seam Color • Optionally change Radius(U) • Set color to beige and then paint! • Probably want Stroke->Reflection on too! • You should see two brushes…
Paint Effects • In the Brush section, choose Paint Effects, then the GetBrush icon
Eyeballs • Use HyperGraph to create a Phongshader • Use a Ramp for the eyeColor • Make it a U Ramp Click here to make a newgradient point