Download
1 / 24
240 likes | 390 Views
Community. Jamie Horsley ED 417 Dr. Helms Lesson Plan. Websites. “Kids next door” http://www.hud.gov/kids/ “Mc Gruff” http://www.mcgruff.org/ “Mr. Roger’s Neighborhood” http://pbskids.org/rogers/ “What do they do?” http://www.whatdotheydo.com/ “Fun school” http://funschool.kaboose.com/.

E N D
Community Jamie Horsley ED 417 Dr. Helms Lesson Plan
Websites • “Kids next door”http://www.hud.gov/kids/ • “Mc Gruff”http://www.mcgruff.org/ • “Mr. Roger’s Neighborhood”http://pbskids.org/rogers/ • “What do they do?”http://www.whatdotheydo.com/ • “Fun school”http://funschool.kaboose.com/
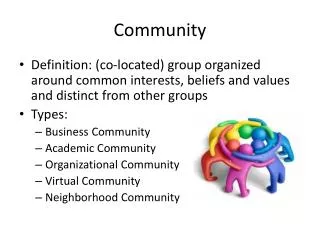
Vocabulary • City- A place with stores, a police and fire departments, homes, schools, etc. • Community- A group of people living in the same area • Community workers- A group of people who work in the same area to keep the area organized • Rules- A set of guidelines people use to stay organized • Time capsule- Container for storing historical items to be opened at a later time • Town- A place, much like a city, but smaller in size
Activities • “Town Guide” • “The greatest community park ever” • “Time Capsule” • “Connecting two communities” • “Creating a classroom community”
Materials(Activity #1) • Map of your town or city • Drawing paper • Crayons, markers, colored pencils
Objectives(Activity #1) At the end of the activity students will be able to: • Define community • Explain a variety of places located in their community • Categorize a variety of places located in their community
Activity #1“Town Guide” • Teacher will discuss with students the importance of making new friends and visitors feel welcome and the definition of community • Teacher will introduce activity with showing a map of their community and explaining to the students that they will be completing a “town guide” to help new friends and visitors find their way around their community • Teacher will list five basic categories on the board (Nature, Places to Play, Stores and Restaurants, Useful Places or places to get help, and Places for Learning) and allow students to brainstorm locations in their area that will fit in the categories
Activity #1 continued • Teacher will divide students into five groups and explain that each group is responsible for one of the categories to place in the town guide • Students will each complete a page for their category to put in the town guide. (Each page will contain a drawing and a sentence describing the place and what the students enjoys about the place. Teacher will allow students to look at the map for ideas) • At the end of the lesson, the teacher and students will assemble all of the pages to create a “town guide” that can be put in the school’s office for new students and visitors
Materials(Activity #2) • Construction paper • Large and small sheets of drawing paper • Colored pencils and markers • Crayons • Rulers • Glue • Tape or staplers
Objectives(Activity #2) At the end of the activity, students will be able to: • Explain the reasons for certain materials within a park (i.e. places for people of all ages) • Design a community park • Explain voting process
Activity #2“The greatest community park ever!” • Teacher will divide students into five or six groups to complete the activity • Teacher will explain to students that they will be creating the best community park ever with their groups • Teacher will have groups write down ideas of what they would like to include in their community park (Remind students there will be people of all ages visiting the park and they will need to accommodate every person)
Activity #2 continued • Once students have completed their list of ideas, they will draw their community park using the materials listed • Allow students to be creative and use as many materials as they can to complete the activity • When students have completed their plans for their community park, the teacher will allow a representative student to explain each plan. The students will then vote on which plan is the best community park ever and the teacher will display the winners’ plan along with the rest of the plans in the hallway
Materials(Activity #3) • Pencils • Paper • Objects from community • Box
Objectives(Activity #3) At the end of the activity, students will be able to: • Define time capsule • Explain materials put into a time capsule • Describe the importance of objects in the community they live in
Activity #3“Time Capsule” • The teacher will introduce the activity by discussing with the students what a time capsule is and the objects that are usually in a time capsule • The teacher will then ask students to make a list of the objects they believe should be in the time capsule that represent the community and time • The teacher and students will compile the lists on the board and decide on ten items they would like to put in their time capsule and decide how to obtain the items
Activity #3 continued • The teacher and students will work together to obtain the items and decorate the box the items will go into (Students can also write letters to the people who will be opening the time capsule) • The teacher and students will then decide where the time capsule should be stored and when the time capsule should be opened • The teacher will store the time capsule in the place decided and open the capsule when the class decides for the future class to enjoy (The teacher can do the activity with every class and the activity can be everlasting)
Materials(Activity #4) • Visitor from another community (with objects from his/her community) • Pencils • Paper • Letter home to parents asking if they know anyone to come talk to the class • Art materials to make a “welcome” banner for visitor
Objectives(Activity #4) At the end of the activity, students will be able to: • Compare two communities • Contrast two communities • Express feelings about two different communities • Write thank you notes
Activity #4“Connecting two communities” • The teacher will prepare for the lesson by inviting a person from another community to talk to the class (Sending home a letter to parents for ideas is a great way to accomplish this goal) • Before the visitor comes to the class, the teacher and students will compile a list of questions to ask the visitor (The students can make a “welcome” banner to make the visitor feel comfortable) • When the visitor comes to talk to the class and share objects from his/her community, the teacher will make the environment as comfortable as possible for the visitor and delegate which students will ask what questions (The teacher will also have one student writing the answers to the questions. The teacher should write her own notes, as well)
Activity #4 continued • After the visit, the teacher and students will discuss with the students how the visitor’s community is the same and different from their own (The students and teacher can make a Venn diagram to show their ideas) • The students will write thank you notes to the visitor • The students can also write a letter to the teacher explaining which community they like better and why
Materials(Activity #5) • Chart paper • Pencils and paper • Markers, crayons, colored pencils • Poster board (4-5 sheets)
Objectives(Activity #5) At the end of the activity, students will be able to: • Define community • Explain a variety of components of a community • Explain the rules a community needs in order to succeed • Make connections between a community and the classroom
Activity #5“Creating a classroom community” • The teacher and students will discuss the definition of community and the various people that make a community work • The students will compile lists of people and places in a community to share with the teacher • The students and teacher will compile a list on chart paper describing a community and how it works
Activity #5 continued • The teacher and students will discuss how to use how a community works to create a classroom community • The teacher and students will come up with rules, jobs, responsibilities, etc. for their classroom community and make posters to hang on the walls for students to refer to when confused