1 / 7
70 likes | 74 Views
Since you want to display your Shopify products on your WordPress website, it is important to connect them with each other. In order to do that you will need to generate some Shopify API keys. To generate the API keys I have discussed the process below: First off, go to the Apps tab in Shopify and then click on Manage private apps. Once you have done that, you need to create a new private app. Read more on https://bit.ly/2Fte1VU

E N D
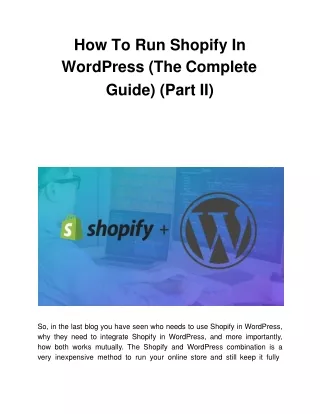
How To Run Shopify In WordPress (TheComplete Guide) (PartII) So, in the last blog you have seen who needs to use Shopify in WordPress, why they need to integrate Shopify in WordPress, and more importantly, how both works mutually. The Shopify and WordPress combination is a veryinexpensivemethodtorunyouronlinestoreandstillkeepitfully
secured. From the third step where we left in the previous blog, we have continued furtherhere. In case, you are looking to hire a professional designer to give an eye catchy look to your shopping site, let our Los Angeles web design company know about it. We will listen to your design expectations carefully and provide you with a gorgeous-looking webdesign. 4. Generate API Keys To Connect Shopify With WordPress Since you want to display your Shopify products on your WordPress website, it is important to connect them with each other. In order to do that you will need to generate some Shopify APIkeys. To generate the API keys I have discussed the processbelow: First off, go to the Apps tab in Shopify and then click on Manage private apps. Once you have done that, you need to create a new private app. Then name the app you have created and start giving it various permissions. Remember, you have to give your app Read and write permission for everything, leaving just the payment-related permission. Once you have done that, you need to select the latest Webhook API Version to generate the API keys to link your Shopify and WordPress website. Also remember to check the box to allow the app to access the data for yourstorefront. Next, click on the Save button to display the API keys you have created. And then make another click on the message displaying on the screen to confirm your appcreation.
After that, note down your API keys and store it somewhere because you will need them in furthersteps. In case you have any doubts about the API key generation or permission granted to the app, connect with ourweb design company in Los Angeles. 5. Install The WP ShopifyPlugin Now the most important thing you need to do is install and activate the WP Shopify plugin on your WordPress website. As I have cleared it earlier that it is available in free and premium versions both, we have chosen the former option for this tutorial. However, you can also use its premium version for the job that’s priced at $80 for one year. In case you want to know what features you will get in the free version and what not, it’s better to visit its pricing page before making any purchase relateddecision. Post the activation of this plugin, you need to head over WP Shopify > Connect. Here you have to enter your API details that you have created a couple of minutesbefore. Be mindful, if you want to know the Storefront Access Token for your online store, it can be found at the bottom of the samepage. Once you have entered all the required information on the page, save the details and continue. As soon as you press the Save button, you will get a success message on your screen including the next steps that you need to perform. Be informed that it is recommended to turn on the option to Create Product Detail Pages. Because when you do this, the plugin will create separate pages for every product on your WordPress website. This will allow youto
rank those individual pages in Google and sell your products easily. Here you need to remember one more thing that when you are creating individual pages for your products, you will also have to set the Product Link to your WordPress website using the drop-downmenu: And when you will go to the next page, you will get some basic layout options that you canconfigure. After that you can also configure the working method of your cart or the checkout page. For example, if you want to send visitors directly to your Shopify site to check out their order, you can do that by skipping the shopping cart. You are offered all the options to make yourdecision. 6. Sync Your ShopifyProducts In addition to all of the above, one more thing you need to bear in mind is that if you are building specific product pages for your items in the WordPress, you will have to manually sync them. For doing this you will have to head to WP Shopify > Tools and then press the Sync Detail Pages button. Once you have done that, you will be able to see all of your Shopify products by going to WP Shopify >Products. Note: When it comes to editing your product description, you can do that right from your WordPress dashboard. But you should refrain from doing that because it can be erased when you will sync the product details the next time. To avoid getting into such a situation you should make the changes to your products through your Shopify dashboard and then sync it again.
In case you want to beautify your individual product pages to tempt customers and boost sales, have a word with our web design company in LosAngeles. 7. Customize Your Store According To YourWill Now that your Shopify store is integrated with WordPress, it’s time for your creativity to shine. You can change the layout of your store by going to WP Shopify > Settings and then experimenting with a bunch of additional options. Now your Shopify-powered WordPress store is ready to go live on the internet and sell yourproducts. FinalThoughts So there you have it! You have seen how to integrate Shopify with WordPress and sell your products with ease. While this WordPress-Shopify combination could not be the right choice for every store but it is the best for smaller ones. As I have told you before, the major reason for using Shopify with WordPress is that you get the opportunity to leverage the simplicity of Shopify and flexibility of WordPress. In short, you will get the best of both worlds - WordPress will handle the frontend and Shopify will take care of the backend. What’s more, you need to pay just $9 per month to get a Shopify Lite plan and in turn they will also fulfill the security and maintenance requirements of your website. Isn’t that enough to run your e-storeeffortlessly? Do you have any questions about how to use Shopify on WordPress? Let us know in the comments section below! Apart from that, if you run into any issue while connecting your WordPress website with Shopify, you can also inform us about that and we will provide you with the immediateresolution.
Don’t forget SFWPExpertsis a client-focused web design company in Los Angeles that offers WordPress web design, web development, and website support and maintenance services all across the globe. However, this is not the end of the list and you can also communicate with us to avail SEO, PPC, and online marketingservices. Read First Part Of ThisBlog: How To Run Shopify In WordPress (The Complete Guide) (Part1) ContactDetails: 213-277-9177 la@sfwpexperts.com Visit Reference ProfileWebsites: https://bit.ly/2NbYY3b https://bit.ly/3hw96BJ https://bit.ly/2C3BMS5 https://bit.ly/2YB1Zz1 https://bit.ly/2AsMrWj https://bit.ly/3d54lve https://bit.ly/3ftrBoC
https://bit.ly/2UJaoiO https://bit.ly/3e5JaKPh ttps://bit.ly/2zxUTmuh ttps://bit.ly/36PtE38 https://bit.ly/2UnZyi3 https://bit.ly/3bAPCcq https://bit.ly/3ibbUUu https://bit.ly/33qA5IH https://bit.ly/3e4z0KF https://bit.ly/37vo3PL https://bit.ly/2UNo64p https://bit.ly/3j85oxZ https://bit.ly/2B64Wzw https://bit.ly/2w3ttDg https://bit.ly/2Qy4vT6


![Step by Step Dropshipping Business with Shopify [Tutorial]](https://cdn4.slideserve.com/8255389/are-you-planning-to-start-up-your-online-store-dt.jpg)