Download
1 / 10
100 likes | 174 Views
Learn how to disassemble and reassemble the LF870 valve efficiently. Detailed steps for cover removal, spring module disassembly, disc replacement, and seat removal. Helpful tips for valve reassembly to ensure proper alignment and functionality.

E N D
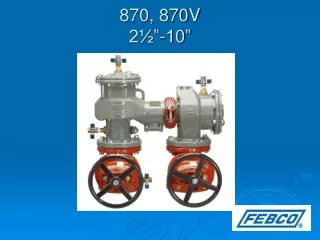
Modification Overview • Production of the 2½” – 10 sizes began in 1993. • The original 870 was “N” pattern only. • Lead free version (LF870) was introduced in 2011. Parts do not interchange with original versions.
Check Cover Removal • Cover is bolted and o-ring sealed. • There is a slight spring load on cover.
Disassemble Spring Module • The spring module is held in position by the cover. • Spring module is captured. • Remove the retaining clip and hinge pin from the arm assembly.
Check Disc Replacement • The check disc is a vulcanized clapper plate. • Remove jam nut and washer from the back of the disc plate. ** When jam nut is tight, check disc is designed to “wobble”.
Check Seat Removal • The seat and arm must be removed as one piece. • The seat and arm assembly is bolted “through” the body and sealed by a gasket.
Check Seat Removal • Locate and remove the four lock nuts on the “outside” of the body. • Pull the seat and arm assembly straight out of the body.
Disassemble Seat Assembly • Remove retaining clip and hinge pin from arm assembly. • Inspect bushings and hinge pins for wear.
Check Valve Reassembly Notes • Reassemble in reverse order. • The seat assembly, disc plate, and spring module can be assembled together and placed into the body as one component. • The seat ring will only fit into body one way, check the alignment of gasket and studs.
Check Valve Reassembly Notes • The spring module is positioned by the cover. • Make sure the pivot bearing is resting in the pivot socket on the cover.