Download
1 / 29
290 likes | 385 Views
Web Foundations. Wednesday, November 20, 2013 LECTURE 32 : Dreamweaver Slide Show and Google Map. Inserting a Slideshow. Inserting a Slideshow: Steps. 1. Open the HTML file that will be used for the slideshow in Dreamweaver. The "Plain Page" file below can be used for this example.

E N D
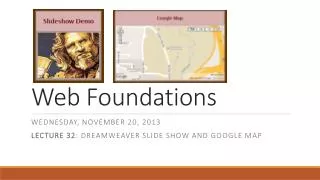
Web Foundations Wednesday, November 20, 2013 LECTURE 32: Dreamweaver Slide Show and Google Map
Inserting a Slideshow: Steps 1. Open the HTML file that will be used for the slideshow in Dreamweaver. The "Plain Page" file below can be used for this example. Find the <section> or <div> that will contain the slideshow, and click in the space that will house the slideshow. 2. Plain Page: http://faculty.cascadia.edu/cduckett/foundations/test/slideshow.html Images for Slideshow: http://faculty.cascadia.edu/cduckett/foundations/test/images/ JavaScript: http://faculty.cascadia.edu/cduckett/foundations/test/slideshow.js Alternative Online Slideshow Builder: http://www.barelyfitz.com/projects/slideshow/wizard/
3. From the menu bar, select Insert, then Layout Objects, then Div Tag
4. In the Insert Div Tag popup select the New CSS Rule button.
5. In the New CSS Rule popup, change the contextual selector type to ID, and name the selector slideshow.
6. In the CSS Rule Definition for #slideshow popup, select the boxcategory from the left-hand column, and enter the following: Width: 246 px Height: 187 px Padding: 2px (Same for all)
7. Now select the Bordercategory and enter the following: Style: solid (Same for all) Width: 1 px (Same for all) Color: #666 (Same for all) Click on OK, and then OKagain. 8.
9. Examine the page in Designview. Delete the "dummy" text that Dreamweaver has entered into the box. 10.
11. In <div id="slideshow"> enter the following script: <script type="text/javascript"> varshow = new SlideShow("", ["dude1.jpg","dude2.jpg","dude3.jpg","dude4.jpg","dude5.jpg","dude6.jpg", "dude7.jpg"], 240, 181); document.write(show.getHTML()); show.run(); </script>
12. Save and test your slideshow page in the browser. If the pixel width or height is off, the images may appear to overrun the slideshow by one image.
13. This can be fixed by manually resizing your various pixelwidthand heightin the code until the overrun issue is repaired, or else you can simply add overflow:hidden; to #slideshow in the CSScode. Easy-peasy!
Finished Slideshow: http://faculty.cascadia.edu/cduckett/foundations/test/slideshow/slideshow1.html
Inserting a Google Map 1. Open the HTML file that will be used for the Google map in Dreamweaver. The "Plain Page" file below can be used for this example. Find the <section> or <div> that will contain the Google Map, and click in the space that will house the map. 2. Plain Page: http://faculty.cascadia.edu/cduckett/foundations/test/map.html
3. As before, from the menu bar, select Insert, then Layout Objects, then Div Tag
4. Also as before, in the Insert Div Tag popup select the New CSS Rule button.
5. In the New CSS Rule popup, change the contextual selector type to ID, and name the selector LocationMap.
6. In the CSS Rule Definition for #LocationMappopup, select the boxcategory from the left-hand column, and enter the following: Width: 600 px
7. Now select the Bordercategory and enter the following: Style: solid (Same for all) Width: 1 px (Same for all) Color: #666 (Same for all) Click on OK, and then OKagain. 8.
9. In your browser, go to maps.google.com and start typing Cascadia Community College in the search bar to bring up a map of Cascadia's location, then click on the little linkicon (circled in redbelow)
10. This will bring up a URL that can be pasted into a browser, but instead click on Customize and preview embedded map
11. In the new popup window, select Customthen enter the following: Width: 600 Height: 300 Next, select all the HTML code from the lower code window and copy it which is going to be pasted into the <div id="LocationMap">
12. Return to Codeview and highlight the "dummy" text that Dreamweaver put in
13. Now paste in the HTMLcode you previously copied from the Google Map popup
14. Return to Designview to examine your map container. If you want, you can delete the View Larger Map link if you don't care to have it.
15. In my example I deleted the View Larger Map link. Save your work, then examine the page in the browser.
Finished Google Map: http://faculty.cascadia.edu/cduckett/foundations/test/slideshow/map1.html