Download
1 / 9
90 likes | 113 Views
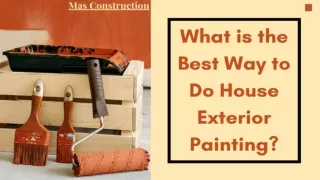
When doing house painting, there are lots of things involved in this process. How clean the exterior, how to repair, applied primer, best paint for exterior and many more. To everything about the house exterior painting process read the PPT here. For more visit at https://www.mascons.ca/exterior-painting/<br>

E N D
Examination of the exterior for load-bearing capacity • At a glance • In-deep check the load bearing capacity • If necessary, remove exterior defects • That's how it is done. • Swipe the exterior. If the plaster trickles or the old exterior paint is peeling off easily, remove the defective areas over a large area before repainting. • You can also check the load-bearing capacity of the exterior using an adhesive tape test. • To do this, you carve the test area with a utility knife, a lightweight, most minor masking tape firmly on it and rip the tape off sharply.
Thoroughly clean the substrate before Exterior painting • At a glance • Sweep the exterior and clean it with a high-pressure cleaner • Remove moss and algae growth • Collect wastewater and dispose of it properly • That's how it is done • All substrates must be clean, dry and dust-free before priming and painting with the paint. To do this, you first roughly sweep the exterior and clean the outer wall thoroughly with a high-pressure cleaner. • You also remove the growth of moss and algae carefully - the high-pressure cleaner also provides valuable support here. • It is a legal requirement that you collect all wastewater, paint residues, blasting sand and debris and dispose of them properly. To do this, shield the workplace on all sides and in total height with a suitable tarpaulin. You can obtain precise information on correct disposal from your responsible environmental authority.
Repair the exterior and mask off sensitive areas • At a glance • Repair cracks and holes • Apply new plaster to defective areas if necessary • Mask off sensitive areas with masking film • That's how it is done. • Plaster over the defective parts of an exterior wall. Then you tape off doors, windows and other sensitive areas of the exterior (e.g. outside lights, bells and ventilation flaps) with adhesive tape and protective film to protect them from dirt and damage.
Test absorbency and prime if necessary • At a glance • Test absorbency with a wet sponge • Apply primer if necessary • That's how it is done • You can test the absorbency of the exterior substrate with a wet sponge. If the exterior absorbs moisture, carefully prime the house wall. Apply the primer generously with a surface brush. Be careful not to work in direct sunlight. • As soon as the primer has been applied according to the manufacturer's instructions, you start painting the exterior.
Pre-paint corners and angles of the house exterior • At a glance • Pre-paint corners and angles with the brush • If necessary, delete specific details or elements • That's how it is done • The actual exterior painting begins with painting the corners and angles of the exterior. Here you apply the paint with the brush. • You can also paint architectural details, particular elements or surfaces on the house wall with the brush - especially if these later appear in a contrasting colour.
Pre- and intermediate coats • At a glance • Carry out a primer with thinned paint • It is followed by at least one intermediate coat • If necessary, use anti-mould concentrate and algae • That's how it is done • You use the exterior paint for the preliminary and intermediate coats. Depending on the manufacturer's instructions, you can dilute the primer with 5% to 15% water. The exterior paint diluted with water reduces consumption when painting. • To better protect the paint and plaster, add a fungicide (anti-mould concentrate) and an algicide to the paint, if necessary. The concentrates effectively prevent the formation of mould and algae.
Final coat: exterior painting • At a glance • Apply a final coat of paint with undiluted paint • Stroke lengthways, crossways and again lengthways • That's how it is done • The final coating of the exterior is carried out with undiluted paint in three steps: The paint on the paint roller is first painted lengthways, then crossways and then again lengthways. • Finally, you roll the individual strips with the paint wet on wet. It is how you achieve the highest opacity for the exterior of your house.
Contact todayExterior Painter Toronto Mas Construction Painting Contractor Amos Crescent, Toronto, ON City - NORTH YORK Zip - M3H 3X8 +1 647-835-0590 Info@Mascons.Ca www.mascons.ca