Download
1 / 20
200 likes | 224 Views
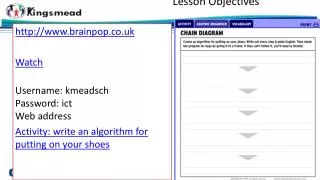
This lesson covers how to enter labels, change the document theme, and select cell ranges in Excel. It also teaches how to modify column width and row height, enter values and dates, save a workbook, and enter basic formulas.

E N D
Lesson Objectives LESSON 2 OBJECTIVES • Enter labels. • Change the document theme. • Select cell ranges. • Modify column width and row height. • Enter values and dates. • Save a workbook. • Enter basic formulas.
Entering Labels ENTERING LABELS • Data that begins with a letter is recognized as a label. • Labels are aligned at the left edge of the cell and are not used in calculations. • Data appears in the active cell and the formula bar as it is being keyed. • To start over for an entry, press . • To edit the entry, press .
Changing the Document Theme THEMES • A theme includes 2 fonts, 12 colors, and special effects. • The default theme for workbooks is Office. It uses Calibri as the Body font and Cambria as the Headings font. • You can change theme to any theme in the Gallery. • Live Preview displays the new colors before they are applied.
Selecting Cell Ranges CELL RANGE • A range is a group of cells that forms a rectangle. • The range address is the upper-left cell address, a colon, and the lower-right cell address.
Modifying Column Width and Row Height CHANGING COLUMN WIDTH, ROW HEIGHT • Columns are 8.43 spaces (64 pixels) wide with the Office document theme. • Rows are 15.00 points (20 pixels) high. • A ScreenTip helps you size columns/rows when you drag a border. • You can also use the Column Width and Row Height dialog boxes.
Modifying Column Width and Row Height Resizing a Column Resizing a Row
Entering Values and Dates VALUES AND DATES • Excel assumes an entry that starts with a number or an arithmetic symbol is a value. • A value is right-aligned in the cell and is included in calculations. • Values are formatted in General style as a default. • Dates have special formats and can be used in date arithmetic.
Using Number and Date Formats • Right-clicking the cell or range and choosing Format Cells from the shortcut menu. • On the Home tab in the Cells group, clicking the Format button and then choosing Format Cells. NUMBER AND DATE FORMATS Some number formats are available as buttons on the Ribbon. Many more formats are available in the Format Cells dialog box. You can open the Format Cells dialog box by:
Renaming a Worksheet TabChanging the Tab Color RENAME AND COLOR WORKSHEET TABS • You can rename a worksheet with a descriptive name that is 31 or fewer characters. • You can choose a color for the worksheet tab.
Entering Basic Formulas FORMULAS • A formula is an equation that performs a calculation and displays the results in the cell. The formula is visible in the formula bar. • A formula is keyed into a cell, or it can be built by pointing. • Formulas begin with an = sign and use arithmetic operators.
Copying Formulas • COPY FORMULAS • Formulas are copied using regular Copy/Paste procedures. Excel automatically adjusts the copied formula to its new location on the sheet.
Using Built-in Functions FUNCTIONS Common business and personal calculations are built-in and known as functions. They start with an = sign like any formula.
Saving a Workbook SAVING A WORKBOOK • To save a workbook, give it a descriptive filename. • Try to keep filenames as short as possible, although they can be up to 255 characters. • Do not use these characters in a filename \ ? : * “ < > | • Excel filenames are followed by a period and a four-letter extension, XLSX.
Summary SUMMARY • In a blank workbook, you can key values, labels, dates, or formulas. Excel recognizes data by the first character you key in the cell. • Labels are aligned at the left edge of a cell. If they are longer than the column width, they spill into the next column if it is empty. Otherwise, they appear cut off on the screen. • To complete a cell entry, press [Enter], [Tab], or any arrow key or click another cell.
Summary SUMMARY • New workbooks use the Office theme. The default font is 11-point Calibri. You can change the font, the font size, the color, and the style. • Many commands require that you first select a range of cells. You select a range of cells by using the mouse or keyboard shortcuts. • The default row height matches the default font size in the document theme. The row height adjusts if you choose a larger font.
Summary SUMMARY • Common formats, such as Accounting, can be applied to cells from the Number group on the Home tab. Many other formats are available in the Format Cells dialog box. • The default worksheet tab name can be changed to a more descriptive name. You can also change the tab color. • You must save a new workbook to keep your work. For a new workbook, you can use the Save or the Save As command.
Summary SUMMARY • To create a formula in a cell, you can key it or you can construct it by pointing to the cells used in the formula. All formulas begin with the = symbol. • When you copy a formula, Excel adjusts it to match the row or column where the copy is located. • Excel has functions (shortcuts) for common calculations such as Sum, Average, Maximum, Minimum, and Count.