Download
1 / 3
30 likes | 49 Views
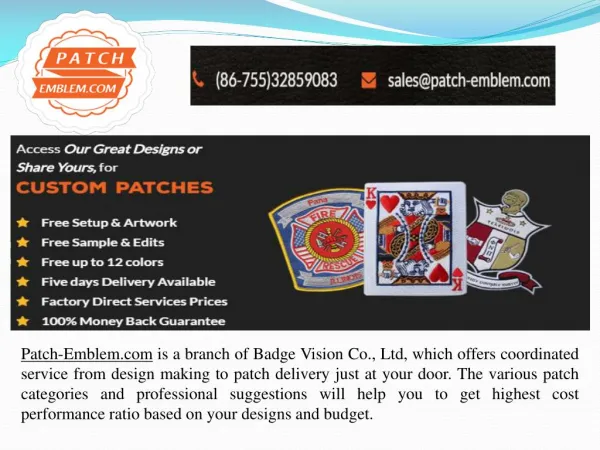
Success with Supply Layouts for CUSTOM-MADE EMBROIDERED PATCHES

E N D
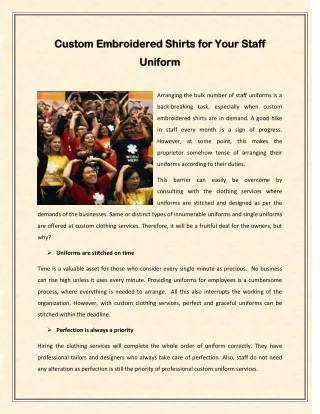
Success with supply layouts for custom embroidered V236 Success with Supply Layouts for CUSTOM-MADE EMBROIDERED PATCHES Get good art work to digitize for supply styles as well as additionally improve your product offerings. Developing stock styles supplies you the freedom to disclose yourself and also the process can be satisfying. Nonetheless, there are constraints to that flexibility. As a digitizer, when you develop a customized format for a customer, you are provided a design to copy, told what dimension is required and likewise the garment kind on which the design will absolutely be used. In developing a supply design, you have hundreds-- if not thousands-- of customers and also each may have different needs for CUSTOM EMBROIDERED PATCHES. Supply makes not only should be attractive, however they additionally have to be digitized as if they can be sized by end users to fit their work. These designs have to take care of any type of type of textile without editing as well as enhancing, and look great whatever shade garment inevitably is used. And, of course, they need to run well without string breaks in order to get return company. When you are picking the subject for a supply layout, see to it you have excellent art work that will absolutely provide you the necessary information needed to replicate it. For beginners, it requires to be 300-350 dpi. If it's not as clear as you 'd such as, get better art or be prepared to modify it to draw out the information. This may suggest acquiring a good graphics program. Remember, digitizing is duplicating, as well as your sewn thing just will be equally as good as the art you duplicate. Also, ensure that your design is appropriate for your market, that it is from a reliable source and that you are permitted to replicate it without limitations. I like to use images as opposed to illustrations or illustrations. If there is a problem with the art, it will really show up in the stitched variation. However, every photo has actually been "authored" by an individual. This suggests, by regulation, you call for a launch to utilize it. If you have actually selected to take advantage of an animal, try to find the light as well as also dark locations of the picture. If you take a look at the photograph of the dog (page 52), for instance, you will instantaneously see the light and dark locations. When you can see them, you can replicate them in your embroidered variant. The light areas are where you will certainly discover the info. They likewise are where you will find the expression that makes this pet special. In the darkness, there will be little to no information, to ensure that recommends there are fewer stitches to stress around. If the pet you are stitching has sections that are either actually light or extremely dark-- as well as they hop on the edge of the design-- you need to assume that at the very least among your end users will definitely either select a garment that might be either dark sufficient that parts of the format will disappoint, or is light sufficient for these components to lose interpretation. Be prepared to consist of darkness around the side of the lighter section, as well as highlight around the darker location so that they both can be seen. These require to be placed with like make the ended up image look natural.
Having a look at the sewn version of the pooch, you will certainly see that the grey under his white chest is reached define the breast location. Though it is not at the actual side of the white location, your eye lots it in. Additionally, in considering the ears, the highlights are strong enough so that they aren't shed versus a dark background. OBTAIN GOOD SOFTWARE When you are developing a supply design, purchase software program application that will permit you to change it and additionally wait in numerous styles. Why? Allow's assert you market a stock format to be sewn on a jacket back. Unless the stitches are split, cushionings in addition to your pull settlements ought to be become deal with the larger measurement. Also, the stitches in your fill patterns will absolutely be a little a lot longer in a larger design than in a left-chest as well as also hat-sized variant. The longer the stitch, the more correct it is to pull in addition to cause layout distortion. Each of these embroidered design measurements-- the coat back, left top body as well as also hat size-- will certainly be a various design, as there will definitely be substantial alterations in their structures. In an increased format, such as DST, your client should have the capability to scale backwards and forwards, between 10% and also 15%. As the layout is scaled up, the stitches are much longer and in addition apart. This totals up to extra anxiety and additionally, as a result, even more pull. There's additionally a likelihood that your info will not straighten properly. Likewise, when you lower the style by 10% or 20%, the stitches will absolutely be much more described with each other as well as fighting for area. This will certainly develop that rolling look, as well as to avoid thread breaks, erase all stitches much shorter than 0.5 mm. Furthermore, to avoid a clumpy look, shorten the stitch in your fills up as the style is minimized. If you were to run the little instance of the child (websites 52) with the exact very same stitch length as you see in the big variant, the proportionately longer sew in the little version would get rid of from the vital information. As you scale down, you will uncover that you have to change your pull payment and additionally cushionings as well as, sometimes, a column stitch must be changed to an uncomplicated running stitch for quality. Similar to the dimension, transforming fabrics in addition calls for changing extra paddings and likewise draw settlement unless you layer the fill in your designs. The lovely stock style you have actually established will certainly transform considerably when you see it on wovens or fleece, in contrast to piqué. To preserve premium quality, you have to modify the format to make it function. The rules below synchronize when you are doing an individualized design, currently you need to anticipate your clients' demands. Remember, much more consumers recommends even more demands. LAYERING FILLS Preferable, eye-catching stock layouts normally have a number of things alike, among which is split fills. If you have actually reviewed my previous write-ups, you currently recognize that by taking down your fill one-third at the same time, you will certainly acquire no pulling in or pushing out of the product. You simply need a running stitch for your carpet, along with you can include information in addition to the absolutely filled up location without the stitches protecting area.
When it concerns the "push-pull" experience, program the filled place as typical to layer your tons. Guarantee you have no carpet stitches. After that, analyze the stitch matter of that things. Next-- and also you will certainly need software program that allows this-- reduced the number of stitches due to the fact that packed place to one-third. That implies if the things is 1,500 stitches, afterwards it must be decreased to 500 stitches. The stitches need to run flat as a result of the reality that it will certainly cause the most effective color consistency. Next, replicate the 500-stitch things two times to make sure that you have 3 items with 500 stitches each, finishing 1,500 stitches as soon as all 3 layers are stitched. If your first things starts on the top as well as ends at the bottom, after that all three products will do the precise very same. So for comfort of running, the 2nd points need to start where the really initial one finishes. With the appropriate software program, you need to have the ability to relocate the begin point to all-time low of the 2nd things in addition to the stop indicate the top. Analyze the third thing and additionally you ought to locate that it starts at the top, especially where the 2nd things presently finishes. If you want a clean edge or you intend to explain this three-layered points with a fill, the final action is to include an edge-walk or running stitch carpet under the second fill layer. This will certainly make certain that you hold the type which it will certainly secure any kind of type of synopsis you could include. With this strategy, you will absolutely have no distortion, drawing or pressing, as well as your cushioning will absolutely be the same in spite of the measurement. You likewise can scale the format backwards and forwards as long as you like, as well as it can be efficiently stitched on any type of product. To assure you can satisfy the requirements of numerous customers, attempt utilizing this method with the outstanding artwork you have in fact chosen. You will absolutely find you have no string breaks, a far better looking style along with happy consumers who like your job and also will certainly return for even more.