
환경변수의 설정
환경변수의 설정. Makelocal User option /opt/tinyos-1.x/tools/make/Makelocal. PFLAGS += -DCC2420_DEF_CHANNEL=26 PFLAGS += -DCC2420_DEF_RFPOWER=3 DEFAULT_LOCAL_GROUP=0x2. 환경변수의 설정. Makelocal PFLAGS += -DCC2420_DEF_CHANNEL=26 : Channel 설정 PFLAGS += -DCC2420_DEF_RFPOWER=3 : RF Power 설정

환경변수의 설정
E N D
Presentation Transcript
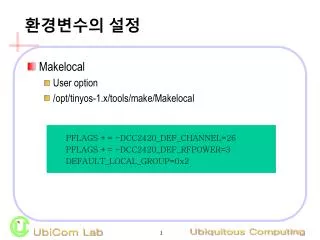
환경변수의 설정 • Makelocal • User option • /opt/tinyos-1.x/tools/make/Makelocal • PFLAGS += -DCC2420_DEF_CHANNEL=26 • PFLAGS += -DCC2420_DEF_RFPOWER=3 • DEFAULT_LOCAL_GROUP=0x2
환경변수의 설정 • Makelocal PFLAGS += -DCC2420_DEF_CHANNEL=26 : Channel 설정 PFLAGS += -DCC2420_DEF_RFPOWER=3 : RF Power 설정 DEFAULT_LOCAL_GROUP=0x2 : GroupID 설정
실습.1 • Node.1 • CntToLedsAndRfm • Node.2 • RfmToLeds
make docs telosb • Text Source Graphic • Result: in tinyos-1.x\doc\nesdoc\telosb • Type: GIF, HTML, Word files • Ex.
강의.2 TinyOS 커널 이해 및 소스 분석
TinyOS • Developed at University of California in Berkeley • Professors David Culler & Kris Pister • David Culler TinyOS & Intel Research Lab. @ Berkeley • Kris Pister Dust networks (Smart Dust) • Key Engineer Jason Hill, etc. • Use more than 300 academic groups & industrial organizations • Open-source software development • Simple operation system
TinyOS Architecture • Running One Application • nesC : pre-processor • nesC output is a c program file that is compiled and linked using gnu gcc tools.
Configuration • Application starts from Configuration • But could not find main() function • StdControl • Inserted to main() • StdControl.init(); • StdControl.start(); • StdControl.stop(); • Main() • Is not the mainstream of Application • Interrupt is Mainstream • easy to use Timer Interrupt
BlinkTask.nc * http://cvs.sourceforge.net/viewcvs.py/tinyos/
RealMain.nc * http://cvs.sourceforge.net/viewcvs.py/tinyos/
Task Scheduler • Task • thread • Only one Application running • sched.c • simple fifo scheduler • Bounded number of pending tasks • When idle, shuts down node
Post Task * http://cvs.sourceforge.net/viewcvs.py/tinyos/
Task Scheduler * http://cvs.sourceforge.net/viewcvs.py/tinyos/
TinyOS Application 구조-1 • Sample Application • Blink • Basic application that toggles the leds on the mote on every clock interrupt • files • BlinkM.nc • Contains a module • Blink.nc • Contains configuration • Makefile • Links to ../Makerules
TinyOS Application 구조-2 • Blink.nc BlinkM.nc module BlinkM{ provides{ interface StdControl; } uses{ interface Clock; interface Leds; } } implementation{ bool state; command result_t StdControl.init(){ call Leds.init(); return SUCCESS; } command result_t StdControl.start(){ return call Timer.start(TIMER)REPEAT,1000); } command result_t StdControl.stop(){ return call Timer.stop(): } event result_t Clock.fire(){ call Leds.redToggle(); return SUCCESS; } configuration blink{ } implementation{ components Main, BlinkM, SinglerTimer, LedsC; Main.StdControl->BlinkM.StdControl; Main.StdControl->SinbleTimer.StdControl; BlinkM.Timer->SingleTimer.Timer; BlinkM.Leds->LedsC; }
TinyOS Application 구조-3 • Main.nc • TinyOS/tos/system/ configuration Main{ uses interface StdControl; } implementation{ components RealMain, PotC, HPLInit, HPLInterrupt; StdControl = RealMain.StdControl; RealMain.hardwareInit->HPLInit; RealMain.Interrupt->HPLInterrupt; RealMain.Pot->PotC; }
TinyOS Application 구조-4 • RealMain.nc • TinyOS/tos/system/ module RealMain{ uses{ command result_t hardwareInit(); interface Interrupt; interface StdControl; interface Pot; } } Implementation{ int main() __attribute__ ((C, spontaneous)){ call hardwareInit(); call Pot.init(10); TOSH_sched_init(); call StdControl.init(); call StdControl.start(); call Interrupt.enable(); while(1){ TOSH_run_task(); } } }
TinyOS Application 구조-5 HPLinit.nc in tos/platform/avrmote and tos/platform/atemega8 module RealMain{ uses{ command result_t hardwareInit(); interface Interrupt; interface StdControl; interface Pot; } } Implementation{ int main() __attribute__ ((C, spontaneous)){ call hardwareInit(); call Pot.init(10); TOSH_sched_init(); call StdControl.init(); call StdControl.start(); call Interrupt.enable(); while(1){ TOSH_run_task(); } } } • RealMain.nc • TinyOS/tos/system/ Module HPLInit { Provides command result_t hardwareInit(); } Implementation { command result_t hardwareInit() { TOSH_SET_PIN_DIRECTIONS(); return SUCCESS; } } Hardware.h in tos/platform/atmega8 void TOSH_SET_PIN_DIRECTIONS(void){ TOSH_MAKE_RED_LED_OUTPUT(); outp(0x0F, DDRC); outp(0x00, DDRD); TOSH_MAKE_INT0_INPUT(); TOSH_MAKE_INT1_INPUT(); TOSH_MAKE_PW9_OUTPUT(); TOSH_MAKE_PW7_OUTPUT(); TOSH_MAKE_PW6_OUTPUT(); TOSH_MAKE_PW2_OUTPUT(); TOSH_MAKE_PW1_OUTPUT(); TOSH_MAKE_PW0_OUTPUT(); }
TinyOS Application 구조-6 • RealMain.nc • TinyOS/tos/system/ Interrupt.nc in tos/interface module RealMain{ uses{ command result_t hardwareInit(); interface Interrupt; interface StdControl; interface Pot; } } Implementation{ int main() __attribute__ ((C, spontaneous)){ call hardwareInit(); call Pot.init(10); TOSH_sched_init(); call StdControl.init(); call StdControl.start(); call Interrupt.enable(); while(1){ TOSH_run_task(); } } } interface Interrupt { async command bool disable(); async command result_t enable(); } HPLInterrupt.nc in tos/platform/atemega8/ Module HPLInterrupt{ provides interface Interrupt; } Implementation{ command result_t Interrupt.enable(){ sei(); return SUCCESS; } command bool Interrupt.disable(){ bool result=(inp(SREG) & 0x80) != 0; cli(); return result; } :
TinyOS Application 구조-7 • RealMain.nc • TinyOS/tos/system/ Tinyos standard control interface. All components that require initialization or can be powered down should provide this interface. On boot, the init() of all wired components must be called. module RealMain{ uses{ command result_t hardwareInit(); interface Interrupt; interface StdControl; interface Pot; } } Implementation{ int main() __attribute__ ((C, spontaneous)){ call hardwareInit(); call Pot.init(10); TOSH_sched_init(); call StdControl.init(); call StdControl.start(); call Interrupt.enable(); while(1){ TOSH_run_task(); } } } StdControl.nc in tos/interface interface StdControl { command result_t init(); command result_t start(); command result_t stop(); } }
TinyOS Application 구조-8 • RealMain.nc • TinyOS/tos/system/ The Pot interface allows users to adust the Potentimeter on the input to the RFM radio which controls the RF transmit power or connectivity range. module RealMain{ uses{ command result_t hardwareInit(); interface Interrupt; interface StdControl; interface Pot; } } Implementation{ int main() __attribute__ ((C, spontaneous)){ call hardwareInit(); call Pot.init(10); TOSH_sched_init(); call StdControl.init(); call StdControl.start(); call Interrupt.enable(); while(1){ TOSH_run_task(); } } } Pot.nc in tos/interface interface Pot { command result_t init(uint8_t initialSetting); command result_t set(uint8_t setting); command result_t increase(); command result_t decrease(); command uint8_t get(); } PotC.nc in tos/system/ Configuration PotC{ provides interface Pot; } Implementation{ components PotM, HPLPotC; Pot=PotM; PotM.HPLPot->HPLPotC; }
TinyOS Application 구조-9 PotM.nc in tos/system/ Module PotM{ provides interface Pot; uses interface HPLPot; } Implementation { unit8_t potSetting; void setPot(uint8_t value){ uint8_t i; for (i=0;i<151;i++) call HPLPot.decrease(); for(i=0;i<value;i++) call HPLPot.increase(); call HPLPot.finalise(); potSetting=value; } command result_t Pot.init(uint8_t initialSetting){ setPot(initialSetting); return SUCCESS; } command result_t Pot.increase(){ ..} command result_t Pot.decrease(){..} command uint8_t Pot.get(){..}
TinyOS Application 구조-10 • RealMain.nc • TinyOS/tos/system/ module RealMain{ uses{ command result_t hardwareInit(); interface Interrupt; interface StdControl; interface Pot; } } Implementation{ int main() __attribute__ ((C, spontaneous)){ call hardwareInit(); call Pot.init(10); TOSH_sched_init(); call StdControl.init(); call StdControl.start(); call Interrupt.enable(); while(1){ TOSH_run_task(); } } } sched.c in tos/system : void TOSH_sched_init(void) { TOSH_sched_free=0; TOSH_sched_full=0; } : void TOSH_run_task() { while (TOSH_run_next_task()) mk} :
강의.3 NesC 복습
nesC Structure Module oooM.nc Code file Configuration ooo.nc/oooC.nc Wiring of components Interface ooo.nc Commands/Events 31
Basic Concept Application Component Module Configuration Interface Command Event Provides Uses Task post 32
nesC Concept • NesC Concept • Tasks • Non-time Critical • Background Computation • Events • Time Critical • External Interrupts • Command • Function Call to Another Component Call 33
Basic Concept: Interface File name: ooo.nc Bi-directional: Provider & User No actual code or wiring Declare commands and events Provider: Implement & execute all commands User: Implement & execute all events Parameterized Interfaces Ex. 34
Interface Ex. 35
Basic Concept: Module Syntax Name File: oooM.nc Interface.command(or event) Command Implement in all the ‘provides’ interfaces Prefixed with ‘call’ Event Implement in all the ‘uses’ interfaces Prefixed with ‘signal’ 36
Module Ex. Module Interface Command Event 37
Basic Concept: Configuration Syntax File name: Top-level configuration: ooo.nc (in each application) General configuration: oooC.nc Wire only 2 components together at a time Using with ‘’ and ‘=’ 38
Configuration Ex. Top-level configuration 39
Configuration Ex. General configuration 40
Wiring Syntax Ex. End-point1End-point2 End-point1End-point2 End-point1=End-point2 41
Task Ex. Task can be posted in command, event and task task void taskname() {………} Post taskname(); 42
강의.4 어플리케이션 실습 및 이해
Basic Lesson.0 Requirements : 1) LED를 초기화한다. 2) 모든 LED를 ON 한다. 44
Test.nc configuration Test{ } implementation{ components Main, TestM, LedsC; Main.StdControl -> TestM; TestM.Leds ->LedsC; }
TestM.nc implementation{ command result_t StdControl.init() { call Leds.init(); return SUCCESS; } command result_t StdControl.start() { call Leds.redOn(); call Leds.greenOn(); call Leds.yellowOn(); return SUCCESS; } command result_t StdControl.stop() { return SUCCESS; } } module TestM{ provides { interface StdControl; } uses { interface Leds; } }
Basic Lesson.1 Requirements : 1) LED를 초기화한다. 2) User 버튼(Port27)을 누르면, Red LED가 Toggle 한다. Msp430InterruptC Component 이용 (in tos/platform/msp430/) 47
Test.nc configuration Test{ } implementation{ components Main, TestM, LedsC, MSP430InterruptC; Main.StdControl -> TestM; TestM.Leds ->LedsC; TestM.MSP430Interrupt -> MSP430InterruptC.Port27; }
module TestM{ provides { interface StdControl; } uses { interface Leds; interface MSP430Interrupt; } } implementation{ command result_t StdControl.init() { call Leds.init(); call MSP430Interrupt.enable(); //call MSP430Interrupt.edge(FALSE); call MSP430Interrupt.edge(TRUE); return SUCCESS; } command result_t StdControl.start() { return SUCCESS; } command result_t StdControl.stop() { return SUCCESS; } async event void MSP430Interrupt.fired(){ call MSP430Interrupt.disable(); call MSP430Interrupt.clear(); call Leds.redToggle(); call MSP430Interrupt.enable(); } } TestM.nc
Basic Lesson.1-1 Requirements : 1) LED를 초기화한다. 2) GIO2 입력을 떼면, Red LED가 Toggle 한다. Msp430InterruptC, MSP430GeneralIOCComponent 이용 (in tos/platform/msp430/) 50