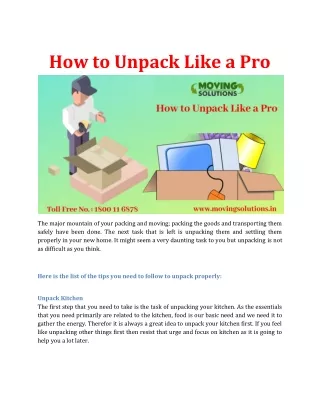
Download

1 / 4
0 likes | 10 Views
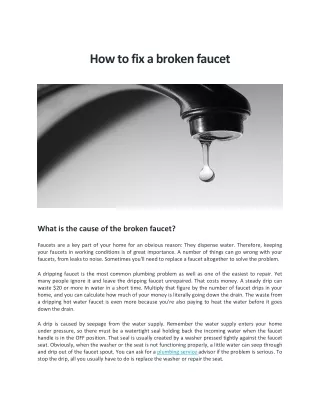
A leaking pipe will prevent damage to your home and the growth of mold

E N D
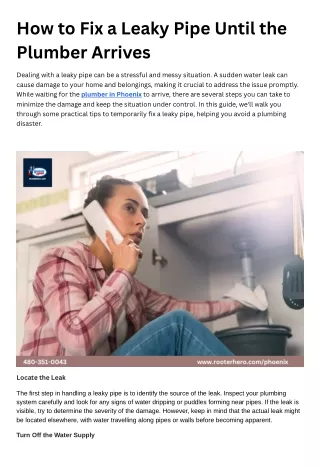
Introduction Are you tired of the constant dripping sound of a leaky faucet? Do you cringe at the thought of your water bill skyrocketing due to a simple plumbing issue? Well, worry no more! In this comprehensive guide, we will walk you through the step-by-step process of fixing a leaky faucet like a pro. Whether you're a seasoned DIY enthusiast or Homepage have never picked up a wrench before, this article will equip you with the knowledge and skills to tackle this common home repair issue. So let's roll up our sleeves and get started! Table of Contents Understanding the Anatomy of a Faucet Identifying the Type of Faucet Gathering the Necessary Tools Turning Off the Water Supply Disassembling the Faucet Inspecting and Cleaning the Components Replacing Faulty O-Rings Replacing Worn-Out Washers Fixing a Dripping Cartridge Faucet Repairing a Leaky Ball Faucet Addressing Issues with Ceramic Disc Faucets Reassembling and Testing the Faucet Common Mistakes to Avoid Frequently Asked Questions (FAQs) Conclusion 1. Understanding the Anatomy of a Faucet #anatomy Before diving into the repair process, it's crucial to familiarize yourself with the various components of a faucet. This will help you better understand how they work together and identify any potential issues. A typical faucet consists of the following parts: Spout: The part where water flows out. Handle: Used to control the water flow and temperature. Cartridge/Valve: Regulates the water flow within the faucet. O-Rings: Prevents leaks by creating a watertight seal. Washers: Seals the connection between the valve and stem. 2. Identifying the Type of Faucet #identifying There are four main types of faucets commonly found in homes: Compression Faucets: Identified by separate hot and cold handles and a stem that moves up and down to control water flow. These faucets are prone to leaking due to worn-out washers. Cartridge Faucets: Operated by a single lever or handle that moves side-to-side or rotates. Leaks in cartridge faucets are often caused by faulty cartridges or O-rings. Ball Faucets: Distinguished by a single handle attached to a rounded cap above the spout. Leaks in ball faucets typically occur when the rubber seals wear out. Ceramic Disc Faucets: Equipped with two ceramic discs that slide against each other to control water flow. Leaks in ceramic disc faucets can be caused by damaged discs or O-rings. Identifying the type of faucet you have is essential as it will determine the specific repair steps you need to take.
3. Gathering the Necessary Tools #tools To successfully fix a leaky faucet, you'll need a few basic tools: Adjustable wrench Screwdriver (Phillips or flat-head, depending on your faucet) Allen wrench set Pliers Penetrating oil (such as WD-40) Plumber's tape Replacement parts (O-rings, washers, cartridges, etc.) Having these tools readily available will ensure a smooth repair process and save you from unnecessary trips to the hardware store. 4. Turning Off the Water Supply #water-supply Before starting any plumbing repair, it's crucial to turn off the water supply to avoid accidental flooding. Locate the shut- off valve under your sink or near the main water line in your home. Turn the valve clockwise until it is fully closed. 5. Disassembling the Faucet #disassembling Now that the water supply is shut off, it's time to disassemble the faucet. Follow these steps: Remove any decorative caps or handles covering the screws. Use an appropriate screwdriver or Allen wrench to loosen and remove the screws. Carefully lift off the handle and set it aside. Unscrew and remove the bonnet nut or retaining ring that holds the cartridge or valve in place. Gently pull out the cartridge, valve, or ball assembly. 6. Inspecting and Cleaning the Components #cleaning-components With all components removed, take a moment to inspect them for any signs of damage or wear. Look for cracks, corrosion, mineral deposits, or torn O-rings. Clean each component thoroughly with a mild detergent and warm water to remove any debris or built-up sediment. Use a toothbrush or soft-bristle brush to scrub hard-to-reach areas. 7. Replacing Faulty O-Rings #o-rings If you've noticed damaged O-rings during your inspection, they will need to be replaced. Follow these steps: Carefully remove the old O-rings using pliers or a small screwdriver. Take your new O-rings and coat them with plumber's grease to ensure a proper seal. Slide the new O-rings onto their respective positions on the cartridge or valve. Reassemble the faucet, making sure everything is aligned correctly. 8. Replacing Worn-Out Washers #washers For compression faucets, worn-out washers are often the culprit behind leaks. Here's how to replace them: Remove the old washer by unscrewing the valve stem from the faucet body. Take your new washer and coat it with plumber's grease. Screw the new washer onto the valve stem, ensuring a snug fit. Reassemble the faucet, making sure everything is aligned correctly. 9. Fixing a Dripping Cartridge Faucet #cartridge-faucet Dripping cartridge faucets are typically caused by faulty cartridges or worn-out O-rings. Follow these steps to fix them: Remove the cartridge by unscrewing or pulling it out, depending on your faucet model. Inspect the cartridge for any cracks or damage and replace if necessary. If the cartridge appears fine, replace the O-rings instead. Coat the new cartridge or O-rings with plumber's grease before reassembling. 10. Repairing a Leaky Ball Faucet #ball-faucet
Leaky ball faucets are often fixed by replacing worn-out seals within the assembly. Here's how: Carefully remove the ball assembly along with its springs and seals. Inspect all components for signs of wear or damage and replace as needed. Apply plumber's grease to the new seals before reassembling. 11. Addressing Issues with Ceramic Disc Faucets #ceramic-disc-faucets Ceramic disc faucets rarely leak but can develop issues over time. To fix them, follow these steps: Remove the ceramic discs by unscrewing or lifting them out, depending on your faucet model. Inspect the discs for any cracks or damage and replace if necessary. If the discs appear fine, replace the O-rings instead. Coat the new discs or O- rings with plumber's grease before reassembling. 12. Reassembling and Testing the Faucet #reassembling-testing Once you've replaced any faulty components, it's time to reassemble the faucet. Follow these steps: Place the cartridge, valve, or ball assembly back into their respective positions. Screw in the bonnet nut or retaining ring to secure the assembly in place. Slide the handle back onto the stem and tighten the screws or cap. Turn on the water supply gradually and check for any leaks. Test the faucet by turning it on and off, ensuring smooth operation. 13. Common Mistakes to Avoid #common-mistakes While fixing a leaky faucet may seem straightforward, there are a few common mistakes to avoid: Over-tightening: Be careful not to over-tighten any components as it can lead to damage or leaks. Using incorrect parts: Ensure you have the correct replacement parts for your specific faucet model. Ignoring professional help: If you're unsure about any step or encounter complications, don't hesitate to consult a professional home repair contractor. 14. Frequently Asked Questions (FAQs) #faqs Q1: Can I fix a leaky faucet without turning off the water supply? A1: It is highly recommended to turn off the water supply before attempting any faucet repairs to avoid potential flooding. Q2: How long does it take to fix a leaky faucet? A2: The time required to fix a leaky faucet depends on the type of faucet and the extent of the issue. Simple repairs can be completed within an hour, while more complex ones may take longer. Q3: Can I use regular grease instead of plumber's grease? A3: Plumber's grease is specifically designed for plumbing applications and provides a home repair contractor better seal. It is recommended to use plumber's grease for optimal results.
Q4: Do I need to replace all the components if only one is faulty? A4: It is not necessary to replace all components if only one is faulty. However, it is good practice to inspect all parts and replace any worn-out or damaged components during the repair process. Q5: Should I hire a professional for faucet repairs? A5: If you're uncomfortable with DIY repairs or encounter difficulties during the process, it's wise to seek professional help from a home repair contractor specializing in plumbing. Q6: How often should faucets be inspected for leaks? A6: It is recommended to inspect faucets for leaks at least once every six months as part of routine home maintenance. 15. Conclusion #conclusion Fixing a leaky faucet doesn't have to be a daunting task. With the right tools, knowledge, and a little patience, you can tackle this common home repair issue like a pro. Remember to identify the type of faucet you have, gather the necessary tools, and follow the step-by-step instructions provided in this guide. By addressing leaks promptly and effectively, you'll not only save water but also prevent potential damage to your home. So don't let that dripping sound drive you crazy any longer – take action and become a master of faucet repairs!