Download
1 / 26
260 likes | 419 Views
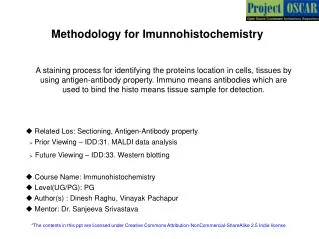
Methodology for Imunnohistochemistry. A staining process for identifying the proteins location in cells, tissues by using antigen-antibody property. Immuno means antibodies which are used to bind the histo means tissue sample for detection. . Related Los: Sectioning, Antigen-Antibody property

E N D
Methodology for Imunnohistochemistry A staining process for identifying the proteins location in cells, tissues by using antigen-antibody property. Immuno means antibodies which are used to bind the histo means tissue sample for detection. • Related Los: Sectioning, Antigen-Antibody property > Prior Viewing – IDD:31. MALDI data analysis >Future Viewing – IDD:33. Western blotting • Course Name: Immunohistochemistry • Level(UG/PG): PG • Author(s) :Dinesh Raghu, Vinayak Pachapur • Mentor: Dr. Sanjeeva Srivastava *The contents in this ppt are licensed under Creative Commons Attribution-NonCommercial-ShareAlike 2.5 India license
Definitions and Keywords 1 • Immunohistochemistry: is a method for identifing the presence and locating the proteins of interest in tissue sections. • Antibodies: are very specific, recognize the targets and binds to protein of interest. • Fixing: the process by which the cut sections are fixed on to the slides with the help of fixative solution like paraformaldehyde or formalin. Formation of methylene bridge, helps tissue to get fixed to the slides. Fixing is the important step in imunnohistochemistry. • Antigen retrievel: the excess formalin used for tissue fix needs to be removed before staining step. The formation of methylene briddge mask antigen sites, this bridge is broken down by heat treatment. • Microtome: instrument used for sectioning of tissues. 2 3 4 5
Learning objectives 1 • After interacting with this learning object, the learner will be able to: • Perform cutting and mounting of the sections • Define rehydrating of the sections • Choose antigen retrieval process • Carry out immunohistochemical staining process • Infer the sections under microscope • Assess the troubleshooting steps involved in the experiments. 2 3 4 5
Master Layout 1 Fixing the tissues (Slide:5-6) • Cutting into sections (Slide:7-8) 2 • Rehydrating the sections (Slide:9-10) • Antigen retrieval (Slide:11-12) 3 • Staining of sections (Slide:13-17) 4 • Dehydrating the sections (Slide:18) • Microscope viewing (Slide:19-20) 5 Display the steps along with images next to them
Description of the action/ interactivity Audio Narration (if any) Step 1: • T1:Fixing the tissues 1 2 3 Show a small piece of pink color like substance, user should keep the cursor to know it as “tissue”.The tissue must be placed in the petriplate. Now let user pick up fixing solution, pour into the plate till the tissue is completely covered with solution. Let user close the petriplate lid. Keep the setup for18-24hrs at room temperature. Animate a clock The tissues can be obtained from the hosipital, fixing is the important step, depending upon the tissue size the fixation time changes but ideal is around 18-24hrs. The fixation process helps the cells to fix, with the help of fixative such as neutral buffer formalin or paraformaldehyde solution available from the vendors. 4 5
Description of the action/ interactivity Audio Narration (if any) Step 1: • T1:Fixing the tissues 1 2 tissue blocks 3 Instruct user to take out the tissue from petriplate and place it in the tissue blocks. Place the tissue exactly in the middle of the block. Let user click on paraffin solution and take it and add paraffin solution to the blocks. Now for a time period, make the paraffin solution getting solidified. Display the block embedded in paraffin like shown in the figure above. Please re-draw the figure. The fixed tissue must be embedded in paraffin wax. The tissue blocks with paraffin wax can be used for tissue embedding. This tissue block will provide support and paraffin will hold the tissue at the time of sectioning. 4 5
Description of the action/ interactivity Audio Narration (if any) Step 2: • T2:Cutting into sections 1 2 microtome embedded tissue block tissue blocks 3 Let user take the embedded tissue block next to microtome instrument. Let user place the tissue block onto the microtome. Let user start the sectioning the tissue, by setting 5microns thickness parameters. The sectioning can be carried out manually. Animate user making a clockwise movement on the handle, with tissue block moving vertically up and down and sections coming out in the form of film.(show like thin white color plate like thing with pink tissue sections in the middle) The embedded tissue block must be placed onto the microtome. User must define the sectioning thickness. 4 5
Description of the action/ interactivity Audio Narration (if any) Step 2: • T2:Cutting into sections 1 2 Tissue section on slide water bath 3 Instruct user to pour water and set the temperature to 35’C of water bath. Let user takes out the tissue sections from the microtome with help of forceps. Transfer the sections into water bath. Animate the sections floating on the water bath, let user with help of forceps cut the sections. Once the sections expands, let user take a slide, dip in water bath to take out the sections on the slide. Now keep the slide at room temperature for drying. Display the final figure of tissue section on the slide. Events must happen when the user clicks on it Once the sections are produced from microtome, they must be transferred on to water bath, so that the paraffin wax gets melted and sections are expanded. Now take the section exactly in the middle of the slide. Tissue sections must be mounted on positive charged slides. 4 5
Step 3: • T3:Rehydrating the sections 1 100% ethanol 70% ethanol 30% ethanol Ethanol 1:1 Xylene:ethanol 95% ethanol 2 50% ethanol Xylene Water 3 Description of the action/ interactivity Audio Narration (if any) Instruct user to take out ethanol, xylene and water bottle from the rack and keep it on table. Instruct user to prepare 1:1 xylene and ethanol solution, let user take the xylene bottle and pour to measure 10ml and follow same for 10ml ethanol, mix and transfer the solution to 1:1 bottle. Let user measure 20ml ethanol and transfer it to 100% ethanol bottle. Now for 95% ethanol, let user measure 9.5ml of ethanol and make up to 0.5ml by adding water(done by setting the pipette to 500ul and take water to add to the ethanol). Similarly for 70% (7ml ethanol+3ml water) 50% (5 ml ethanol +5 ml water) for 30%(3ml ethanol +7 ml of water) prepare accordingly and transfer to the bottles. The ethanol and xylene solution must be prepared for the rehydrating the sections. The ethanol must be prepared in decreasing concentration of grades. 4 5
Description of the action/ interactivity Audio Narration (if any) Step 3: 1 T3:Rehydrating the sections 30% ethanol 50% ethanol 70% ethanol 90% ethanol 100% ethanol 1:1 Xylene:ethanol 100% Xylene 2 3min 3min 3min 2X3min Tissue section on slide 3min 3min 3min 3 Instruct user to take out the slide which is kept for drying using the forceps . Now dip the slide in 100% xylene solution for 3min for 2 times. Animate for 4min to take out the slide and keep it in 1:1 bottle for 3min. From there let user transfer the slide to decreasing alcohol grades for 3min each. Animate user taking the slide from each bottle and place in the next bottle by user control. After last step of 30% ethanol, let user place the slide in distilled water. Please re-draw the figure. The xylene solution treatment helps to remove the paraffin wax and alcohol treatment rehydrate any water content from the tissue sections. This step exposes the binding property of the cells. 4 5
Description of the action/ interactivity Audio Narration (if any) Step 4: T4:Antigen retrieval 1 EDTA buffer EDTA 2 3 Instruct user to prepare EDTA buffer. Let user take out EDTA, water bottle from the rack. Let user takes a paper, tare it over the balance to weigh 0.037g, transfer it to beaker, to this let user measure 100ml of distilled water and add to the beaker. Let user shakes the bottle to dissolve the powder into the solution. Animate powder getting into the solution and user labelling the bottle as “EDTA Buffer”. Prepare 1nm EDTA buffer, it is used in antigen retrieval step. For tissue for higher pH user need to adjust pH or u can use Tris-EDTA of pH 9.0 also 4 5
Description of the action/ interactivity Audio Narration (if any) Step 4: T4:Antigen retrieval 1 EDTA buffer 2 Tissue section on slide coupling jar Oven 3 Instruct user to take out slide from the water by forceps, with help of tissue let user take out the excess water from the slide. Transfer EDTA buffer to coupling jar, around 20ml. Now place the slide into the jar and keep it in microwave Oven. Let user set the temperature and time for oven. Animate user control to set the temperature for 40’C for 15-20min. During heating animate the buffer getting boiled, instruct user to stop the oven. Let user take out the jar from oven, removes the slide and place it in water jar. Use sufficient volume of buffer in order to cover the slide. Be sure to watch for evaporation and for boiling to avoid slides from dry out. Less time may leave the antigens under-retrieved and more time may leave them over-retrieved, user must take a call. Now user can proceed to immunostaining step. 4 5
Description of the action/ interactivity Audio Narration (if any) Step 5: T5:Staining of sections 1 Sodium azide TBS Tris Nacl 2 3 Instruct user to prepare TBS (Tris buffered saline), let user take out tris free base, NaCl, sodium azide and distilled water from the rack and place it over the table next to balance. Now let user tare the balance with paper, take out spatula to weigh 0.61g of Tris, 0.88g of NaCl and pipette out 5ml of sodium azide, transfer all these to beaker. Let user measure 90 ml distilled water and pour to the beaker, to mix everything into the solution. And transfer to the measuring cylinder and reading should be 95 ml ,click on water to add to the cylinder to make to 100ml. Let user label the bottle as TBS. Use sufficient volume of buffer in order to cover the slide. Be sure to watch for evaporation and for boiling to avoid slides from dry out. Less time may leave the antigens under-retrieved and more time may leave them over-retrieved, user must take a call even with the pH of TBS buffer. Now user can proceed to immunostaining step. 4 5
Description of the action/ interactivity Audio Narration (if any) Step 5: T5:Staining of sections 1 TBS 2 primary antibody Secondary antibody working stock 3 Instruct user to dilute BSA, primary and secondary antibodies. let user take out the primary and secondary antibody from the -20’C freezer, keep it on ice for 5min to thaw, now set the pipette to 1ul, take out the 1ul of primary antibody, transfer it into a fresh tube. To the fresh tube add 1ml of TBS, vortex it properly, user label it as working stock. Animate user preparing for secondary antibody and BSA with similar steps. Place back the antibodies back to freezer. Events must happen as and when the user clicks on the hand image. The concentration of working stock depends on user experiment. The working solution must be prepared in TBS depending on the concentration required for staining. 4 5
Description of the action/ interactivity Audio Narration (if any) T5:Staining of sections Step 5: 1 2 primary antibodies BSA Tissue section on slide Tissue section on slide 3 Let user take out humidifier chamber, wet some tissue with water, place the wet tissue on the sides of chamber. Instruct user to take out the slide from the water jar, with tissue let user take out excess water from the slide. Let user add 500ul of BSA with pipette onto the slide, keep it on humidifier chamber for 2hours incubation at room temperature. Now take out the slide, wipe around the section with tissue paper. Now let user apply 500ul of primary antibody on to the slide and keep it in chamber for overnight at 4’C freezer. Animate the pipetting action as per the instructions The sections must be treated with BSA to block unspecific binding, later add primary antibody and place it for incubation for overnight at 4’C. Incubation must be done in humidifier chamber to avoid drying of sections. 4 5
Description of the action/ interactivity Audio Narration (if any) T5:Staining of sections Step 5: 1 2 secondary antibodies 1hours Tissue section on slide 3 Let user take out slide from humidifier chamber, do wash with TBS for 3 to 3 times. Instruct user to take out the slide from the TBS jar, with tissue let user take out excess TBS from the slide. Let user add 500ul of Secondary antibody with pipette onto the slide, keep it on humidifier chamber for 1hours incubation at room temperature. After primary treatment, wash the slides with TBS to remove unbound primary antibodies. User can even go for TBST buffer for better result. Now after addition of secondary antibody incubate for 1hour depending upon the experiment requirement and the concentration required for secondary antibody. 4 5
Description of the action/ interactivity Audio Narration (if any) Step 5: T5:Staining of sections 1 Stain 2 Tissue section on slide 3 Let user take out slide from humidifier chamber, do wash with TBS. Instruct user to take out the slide from the TBS jar, with tissue let user take out excess TBS from the slide. Let user add 500ul of Stain with pipette onto the slide, keep it on humidifier chamber for 2-3min. The staining process depends on the user requirement, tissue used and the setup of microscope. Commonly used counterstains are hematoxylin (blue), nuclear fast red or methyl green. Once staining is done the slide must go through dehydration step before viewing under microscope. 4 5
Description of the action/ interactivity Audio Narration (if any) T6: Dehydrating the sections Step 6: 1 30% ethanol 50% ethanol 70% ethanol 90% ethanol 100% ethanol 1:1 Xylene:ethanol 100% Xylene 2 3min 3min 3min 3min Tissue section on slide 3min 3min 3min 3 Instruct user to take out the slide which is kept on humidifier chamber. From chamber let user transfer the slide to increasing alcohol grades for 3min each. Animate user picking the slide from each bottle and place in the next bottle by user control. Now dip the slide in 100% xylene solution for 3min, followed by 1:1 bottle for 3min and final wash in 100% xylene. After xylene wash, take out the slide, remove excess liquid from the slide with tissue paper. Please re-draw the figure. The dehydrating step is carried out to remove excess stain if any present in the slide. 4 5
Description of the action/ interactivity Audio Narration (if any) Step 7: T7: Microscope viewing 1 Mounting solution 2 3 Let user take out mounting solution and cover slip from the rack and place it on the table. Let user take out mounting solution around 10ul with the pipette, and drop it over the slide. Now let user take out the cover slip, place it over slide, the cover slip must cover the tissue like shown in the figure. The mounting solution like organic mounting media have better refractive index than aqueous mounting media. Now the slide is ready for viewing under microscope. 4 5
Description of the action/ interactivity Audio Narration (if any) Step 7: T7: Microscope viewing 1 2 Tissue section on slide 3 Let user take the slide and mount it on microscope, let user ON the microscope. Let user do the controls over making adjustment on keeping the side on the platform, placing the clips over it, adjusting the focusing, fine tuning of zoom-in, zoom-out. Animate the user adjustment with change in appearance of the display. Display the final image of tissue, once user is done with adjustment. For better image, do proper adjustment and fine tuning on the microscope. Once the final image comes up, save the image. The confirmed protein expression images can be published in the research articles. 4 5
Button 01 Button 02 Button 03 Slide 7-8 Slide 11-12 Slide 13-17 Slide 18 Slide 4-6 Slide 9-10 Slide 19-20 Slide 1-4 Introduction Tab 01 Tab 02 Tab 03 Tab 04 Tab 05 Tab 06 Tab 07 Name of the section/stage Animation area In slide-16: depending upon user input for antibody, five some options for user to select the secondary antibodies. • Instruction: if the primary antibody is raised in rabbit, then the secondary antibody could be goat anti-rabbit provide options accordingly. Interactivity area Instructions/ Working area Credits
Questionnaire: APPENDIX 1 1. What is the meaning of Histo? A) Antibody B) Tissue C) Antigen D) All of above 2. For better and sharper microscopic image, use? A) Xylene. B) ethanol. C) DHAPI. D) Organic mounting media.
Questionnaire: APPENDIX 1 3. Hematoxylin stains? Blue color Red color Green color Yellow color 4. Antigen retrieval step breaks? A) methylene bridge B) Glycine bidge C) Alaninebridge D) Glutamine bridge
Questionnaire: APPENDIX 1 Question 5 BSA wash is given to block? a) Non-specific binding b) Specific binding c) Methylene binding d) None of above Answer: a) Non-specific binding
APPENDIX 2 Links for further reading • www.abcam.com/technical Books: • Proteomics: A cold spring harbor laboratory course manual by Andrew J L and Joshua L, 2009. • Immunocytochemistry: a practical guide for biomedical research by Richard burry, 2010.
APPENDIX 3 Summary To study the section, main step is to optimize the antibody concentration required for specific binding and observation to check the paraffin sections/tissues. Use of antibodies with all stepwise protocol helps to obtain better result. Some of the stains are harmful in nature, need to used under proper and safe laboratory protocols. Drying of slides need to avoided during the process.