Download
1 / 28
280 likes | 390 Views
Homepage. To learn about eLOMA click on the ‘Learn about eLOMA’ link under the Tools For Professionals. What is eLOMA.

E N D
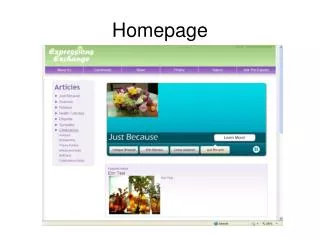
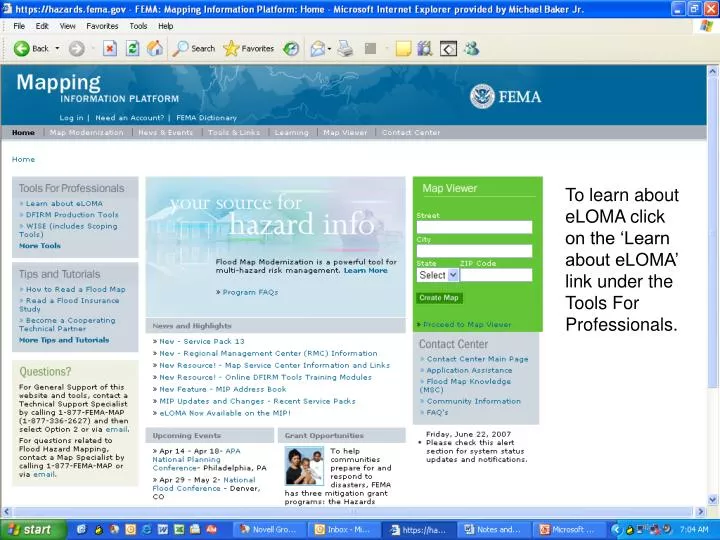
Homepage To learn about eLOMA click on the ‘Learn about eLOMA’ link under the Tools For Professionals.
What is eLOMA Clicking the ‘Learn about eLOMA’ link will bring the user to this screen. It explains what eLOMA is and how to become an eLOMA Licensed Professional (LP). There are links to the eLOMA Licensed Professional registration form and Frequently Asked Questions. A user can download the eLOMA Fact sheet or access the eLOMA Flash Movie for a demonstration of how eLOMA works.
What is eLOMA 2 The bottom of the ‘Learn about eLOMA’ screen provides a link to the registration form and a link to login if the LP is already registered.
Login Screen The user can get to this login screen from the ‘Learn about eLOMA’ screen or from the Log in link in the upper left of the screen.
Welcome Screen After logging in, to start an eLOMA or continue with a saved eLOMA the LP first clicks the eLOMA tab. This will bring them to the Welcome screen which explains what types of requests can be processed using eLOMA.
Welcome 2 The bottom of the Welcome screen allows the LP to start a new eLOMA application or continue a previously entered application using the Tracking Number.
Qualifying Questions The Qualifying Questions ensure that the application meets the criteria for the eLOMA process. If the application does not meet the eLOMA criteria a notification appears that informs the LP that they need to submit their request using the standard LOMA (MT-1) process.
Answering the Qualifying Questions To find out if there are any current or previously issued LOMAs for the subject property or if there any LOMRs that affect the subject property the LP should use the Public Reports under Tools & Links. If the LP is unsure about using the reports or about answering any of the qualifying questions they should contact the FEMA Map Assistance Center at 1-877 FEMA MAP (1-877-336-2627).
Property Description The LP enters the street address of the subject property. Appropriate capitalization should be used for the Street, Lot, Block, Subdivision, and Legal Description entries.
Legal & Lat/Long The LP enters the Lot, Block, and Subdivision of the subject property, if applicable. If there is a Section number associated with the Subdivision it can be entered in the Block Number field. For example, if the Block Number for the subject property is B and the Section Number is 5 the entry would be B/5. The Legal Description should be written using the guidelines found by clicking the “How to write a legal description” link. The Latitude and Longitude should be entered using decimal degrees to the third decimal place (e.g. 45.786, -78.648). The Source of Lat/Long should be the name of the program or method used to determine the Latitude and Longitude.
Certifier Info The LP enters their contact information. The email address displayed is the address on file for the LP. If the email address is incorrect the LP should contact MIP Help at miphelp@mapmodteam.com and have their profile updated.
Property Owner The LP can enter information about the property owner but it is optional.
Subject of eLOMA The LP indicates what the subject of the eLOMA application is, structure or property. The date of construction for a structure is optional but it can be useful. If the date of construction is known it should be entered here.
Construction Type If the Subject is a structure the LP enters information about the construction type.
Confirm Lat/Long The LP confirms the Lat/Long and Property information.
Community Info The LP enters the Community that the Subject is located in on the effective FIRM. They can either use the dropdowns or the CID free text field. The county and community choices are based on the State that the LP entered on the Property Description screen.
Panel & Elevations The LP selects the FIRM panel number that the Subject is located on and enters the elevation information for the Subject. The LP must indicate how they determined the BFE. For more information on how the BFE should be determined the LP can click the link in the BFE Method section or contact the FEMA Map Assistance Center at 1-877 FEMA MAP (1-877-336-2627). The LP needs to make sure that the elevation datum used for the Subject elevations is the same as the elevation datum used on the effective FIRM.
Subsidence? The LP must answer the question about Subsidence or Uplift. If the LP is unsure about the answer to this question they can contact the Floodplain Administrator in the subject community for assistance.
Flood Zone Info The LP selects the Current and Resultant Flood Zones. The Resultant Flood Zone choices are based on the elevations entered by the LP on the FIRM Info screen. If the LP enters a BFE that is below the LAG or LLE, the Resultant Flood Zones choices will be B, X (shaded), C, and X (unshaded). The LP needs to make sure that the Resultant Zone they select appears on the effective FIRM. Subjects should not be removed to Zone C if the zone is labeled X (unshaded) on the effective FIRM. If the LP enters a BFE that is above the LAG or LLE, the Resultant Flood Zones choices will be AE, A1-A30, and AH.
Flooding Source To add a Flooding Source enter the name in the field and click the Add Flood Source button. The screen will refresh and the added Flooding Source will appear at the bottom of the screen. The LP may Modify or Delete the flooding source if they choose.
Confirm Elevations The LP must re-enter the elevation information for the Subject exactly as it was entered on the FIRM Info screen to continue.
Review The LP should review the information they entered and return to a specific screen using the Edit button to make corrections if necessary.
Review 2 Once the LP has reviewed all of the information they entered and they are sure is it accurate they should click the Continue button.
Tracking Number The LP receives their Tracking Number for this eLOMA application. The LP should keep the tracking number with the supporting data for the eLOMA. It is a FEMA requirement that the LPs retain copies of their supporting data for two years for all eLOMAs, whether they are selected for Audit or not.
Ready? The LP must check the Penalty Clause box indicating that the information they provided in the application is accurate. At this point the LP should view the draft versions of the eLOMA Determination Letter and Cover Letter to ensure the information they entered appears properly on the documents.
Audit Required If the LP sees this screen they must submit copies of their supporting data for the eLOMA Audit. The required documents are detailed in the automated audit notification email that the LP receives but if they are unsure about what is required they can call the FEMA Map Assistance Center at 1-877 FEMA MAP (1-877-336-2627) for help. The supporting data must be sent to the attention of the eLOMA Coordinator.
Create eLOMA If the LP sees this screen they can click on the letter buttons to get their eLOMA Determination Letter and Cover Letter. Both must be printed and provided to the property owner.
eLOMA Letter The letters popup in a new window for the LP to print.