Interactive Events Tutorial for Ballerinas in Alice
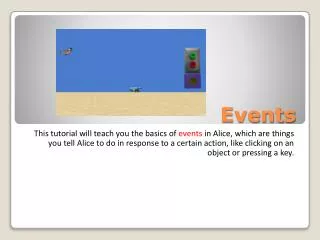
Learn to create engaging events for spinning ballerinas in Alice programming platform with step-by-step instructions and explanations.

Interactive Events Tutorial for Ballerinas in Alice
E N D
Presentation Transcript
Try this • Start Alice and create a blank world using the grass template. • Add an instance of a BlueBallerina. • Add an instance of a PinkBallerina. • Move the ballerinas apart from each other and turn them to face the camera. • Exit Scene Editor mode.
Continuing… • Create a world-level method called bothSpin to make both ballerinas spin at once. • You’ll need a do together tile • Turn each ballerina left 1 revolution
Setting up a recognized event • Drag the tile for bothSpin to the event area and replace world.my first method in the When the world starts tile. • We no longer need world.my first method; throw it away. • Play the world and you should see both ballerinas spin together. • Save your world; name it bothBallerinas1
Save your world as blueBallerinas2 • Click the create new event button and then click When the world starts. • Change the form of the newly added event. • Right-click the newly added event tile. • Select change to then click While the world is running.
Events interacting • Play the world • Note two behaviors: • First, the pink ballerina continues to spin while the world is running. • Second, when the world starts, she spins more quickly. • Play the world a couple of times until you see this.
Events interacting, cont’d • Why does she spin more quickly when the world starts? • This is a side effect of two event handlers running at the same time. • The default event handler causes pinkBallerina to spin one time at one revolution per second. • Combined with the spin from the new event (also one rev./sec.) , she spins twice as fast for one revolution.
Side effects • Change the direction of the spin to the right in the while the world is running event tile. • Play the world
Side effects • Change the direction of the spin to the right in the while the world is running event tile. • Play the world • Now what happens?
Side effects • pinkBallerina does not spin at all this time • The two method calls triggered by the two events cancel out each other. • After the first method stops, she spins to her right. • Two events or methods that overlap might sometimes cause unintended results known as side effects.
The BDE event • Begin, during, and end event • Makes use of up to three event handlers
Begin • When the trigger condition first becomes true call the Begin method once.
During • While the trigger condition continues to hold, continue to call the During method
End • When the trigger condition becomes no longer true, call the End method.
When a key is typed event • The event trigger is the press of a key • The event handler can be almost anything that can be coded in Alice.
When a key is typed event • Add a “when a key is typed” event to your ballerinas world. • Click on “any key” in the event tile • Select letters from the menu and then B • Drag a blueBallerina turn method tile from the Details area and drop in on “Nothing”. Select right and 1 revolution.
When a key is typed event • Play the world. • Try the b key a few times. • Note that if you hold b down blueBallerina will not continue to spin. • When a key is typed will call the event handler only once per key press.
While a key is pressed event • You can change the form of the When a key is typed event to make an event handler run continuously as long as the triggering key is held down.
While a key is pressed event • Right-click the When B is pressed tile’s blue background. • Select change to then While a key is pressed. • Drag and drop a blueBallerina turn tile into place after “During” (right, 1 revolution).
While a key is pressed event • Play the world. • Note that blueBallerina continues to turn while the b key is held down. • She stops when the key is released, even if in mid-turn.
When the mouse is clicked on anything event • In your ballerinas world, click the create a new event button and select when the mouse is clicked on something. • Let’s make blueBallerina roll one revolution whenever the mouse is clicked on her. • Select blueBallerina and the entire blueBallerina as the target object. • Drag the blueBallerina roll tile from the methods tab and drop it to replace “Nothing” in the event tile (right, 1 rev.).
More mouse events • Changing When the mouse is clicked on something to While the mouse is pressed on something by right clicking on the event tile. • Let the mouse move <object> is a little beyond us at the moment. We need to know about Lists first.
Building a flying machine • Remember the program development cycle: design, code, test, debug?
Initial specifications Initial specifications for our world: • It should contain a flying machine in a somewhat realistic environment. • The flying machine should be able to fly throughout the world. • There should be user controls to turn the object up, down, left, and right while the flying machine is in motion • The user should be able to find the flying machine if it moves off camera.
Refining specifications • Beginning with #1: It should contain a flying machine in a somewhat realistic environment. • First, let’s find objects that can serve as a flying machine. • How about a seaplane with a water template? • We also need some realism.
Revised specification #1 • Create a water world with a seaplane in it • Select the water template. • Add a seaplane to the world. • Add a few more items – perhaps an island or two, and a sailboat.
Refining specification #2 2. The flying machine should be able to fly throughout the world. • This means it needs to be able to move along the x, y, and z axes • Let’s not worry about moving backward. • Planes don’t move backward while in the air. • We need to be able to turn left, right, up, down • We also need to be able to go forward.
Refining specification #2 2. The flying machine should be able to fly throughout the world. • How about if we just make the plane move forward continuously so that the user simply needs to drive it? • Let’s make the following refinement: • Create an event – while the world is running do: seaplane move forward one meter
Refining specification #2 2. Create an event – while the world is running do: seaplane move forward one meter • The specifications don’t for the user to be able to modify the seaplane’s speed, let’s assume the speed to be constant.
Revised specifications • Create a water world with a seaplane in it • Select the water template. • Add a seaplane to the world. • Add a few more items – perhaps an island or two, and a sailboat. • Create an event – while the world is running do: seaplane move forward one meter
Refining specification #3 3. There should be controls to turn the object up, down, left, and right while the flying machine is in motion. • Left and right are easy • Is turning up, turning the object backward or forward? • We also need to decide by how much to turn when a turn is requested.
Refining specification #3 3. Create four turn control events: • When the left arrow key is pressed, turn left 1/8 revolution • When the right arrow key is pressed, turn right 1/8 revolution • When the up arrow key is pressed, turn backward 1/8 revolution. • When the down arrow key is pressed, turn forward 1/8 revolution.
Revised specifications • Create a water world with a seaplane in it • Select the water template. • Add a seaplane to the world. • Add a few more items – perhaps an island or two, and a sailboat. • Create an event – while the world is running do: seaplane move forward one meter • Create four turn control events: • When the left arrow key is pressed, turn left 1/8 revolution • When the right arrow key is pressed, turn right 1/8 revolution • When the up arrow key is pressed, turn backward 1/8 revolution. • When the down arrow key is pressed, turn forward 1/8 revolution.
Revising specification #4 4. The user should be able to find the flying machine if it moves off camera. • Several ways to do this. • A simple way is to point the camera at the seaplane. • Should be easy to do; let’s use the spacebar.
Revising specification #4 4. Create an event: When the spacebar is pressed, point the camera at the seaplane.
Revised specifications • Create a water world with a seaplane in it • Select the water template. • Add a seaplane to the world. • Add a few more items – perhaps an island or two, and a sailboat. • Create an event – while the world is running do: seaplane move forward one meter • Create four turn control events: • When the left arrow key is pressed, turn left 1/8 revolution • When the right arrow key is pressed, turn right 1/8 revolution • When the up arrow key is pressed, turn backward 1/8 revolution. • When the down arrow key is pressed, turn forward 1/8 revolution. • Create an event: When the spacebar is pressed, point the camera at the seaplane. Let’s code this specification. Test and debug after each step