0 likes | 7 Views
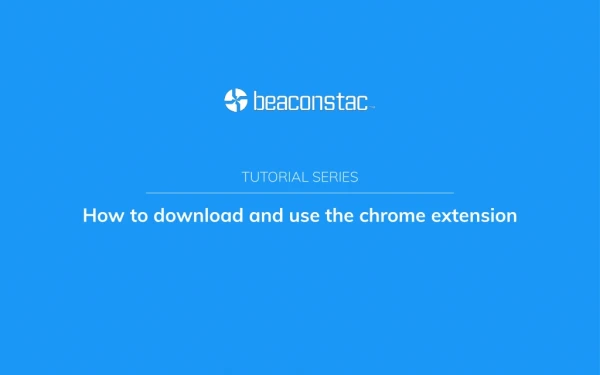
Looking to automate page refreshes in Chrome? Follow this quick tutorial to create a custom extension with auto-refresh features. Perfect for beginners and web developers!
E N D
How to Build a Chrome Extension with Auto-Refresh Functionality Chrome extensions allow users to enhance their browser experience in endless ways, from managing tabs to automating web interactions. One popular functionality is auto-refreshing web pages, often used to keep dynamic pages up-to-date (e.g., live sports scores, stock tickers, or social media feeds). In this blog, we’ll walk you through the step-by-step process of building a Chrome extension with auto-refresh functionality. Table of Contents 1. 2. Use Cases for Auto-Refresh Extensions 3. Prerequisites and Tools Needed 4. Step-by-Step: Building an Auto-Refresh Chrome Extension 5. Testing Your Extension 6. Publishing the Extension on the Chrome Web Store 7. Best Practices for Auto-Refresh Extensions What is a Chrome Extension? 1. What is a Chrome Extension? A Chrome extension is a small software program that customizes the browsing experience by adding features or modifying existing behavior. It consists of HTML, CSS, and JavaScript files, along with a manifest.json file that defines the extension’s permissions and metadata. 2. Use Cases for Auto-Refresh Extensions Social Media Feeds: Keep Twitter, Instagram, or Facebook feeds updated automatically. Live Score Websites: Refresh sports or stock market sites periodically. Development and Debugging: Reload web pages to check for design or code updates in real-time. ● ● ●
3. Prerequisites and Tools Needed Before building the extension, make sure you have the following: Code Editor: VS Code, Sublime Text, or any preferred editor. Google Chrome Browser: Ensure it’s up-to-date. Basic Knowledge of HTML, JavaScript, and JSON. ● ● ● 4. Step-by-Step: Building an Auto-Refresh Chrome Extension Step 1: Create the Project Folder 1. 2. Inside it, create the following files: ○ manifest.json ○ popup.html ○ popup.js Create a new folder named auto-refresh-extension. Step 2: Write the Manifest File (manifest.json) The manifest.json file defines the extension’s metadata and permissions. Here's what it should look like: Json { "manifest_version": 3, "name": "Auto Refresh Extension",
"version": "1.0", "description": "Automatically refreshes web pages at a set interval.", "permissions": ["tabs", "storage"], "action": { "default_popup": "popup.html", "default_icon": { "16": "icons/icon16.png", "48": "icons/icon48.png", "128": "icons/icon128.png" } }, "background": { "service_worker": "background.js" } } Explanation: manifest_version: Version 3 is the latest. permissions: The extension needs access to tabs and storage to refresh pages. default_popup: This is the user interface that appears when the extension icon is clicked. ● ● ●
Step 3: Create the Popup UI (popup.html) This file contains the HTML for the popup interface, where users can set the refresh interval. html <!DOCTYPE html> <html lang="en"> <head> <meta charset="UTF-8"> <meta name="viewport" content="width=device-width, initial-scale=1.0"> <title>Auto Refresh</title> </head> <body> <h2>Auto Refresh Settings</h2> <label for="interval">Refresh Interval (seconds): </label> <input type="number" id="interval" min="1" value="5"> <button id="start">Start</button> <button id="stop">Stop</button> <script src="popup.js"></script> </body> </html>
Explanation: This simple popup lets users input the refresh interval and start/stop the auto-refresh feature. ● Step 4: Add JavaScript Logic (popup.js) This script contains the functionality to start and stop the auto-refresh. javascript let intervalId; document.getElementById('start').addEventListener('click', () => { const interval = parseInt(document.getElementById('interval').value) * 1000; chrome.tabs.query({ active: true, currentWindow: true }, (tabs) => { const tabId = tabs[0].id; intervalId = setInterval(() => { chrome.tabs.reload(tabId); }, interval); }); });
document.getElementById('stop').addEventListener('click', () => { clearInterval(intervalId); }); Explanation: chrome.tabs.query: Identifies the active tab. setInterval: Refreshes the page at the specified interval. clearInterval: Stops the auto-refresh when the user clicks "Stop." ● ● ● Step 5: Test Your Extension Locally 1. 2. Enable Developer Mode (toggle on the top-right). 3. Click "Load unpacked" and select your project folder (auto-refresh-extension). 4. Your extension should now appear in the list. Click the icon to test the popup functionality. Open Chrome and navigate to chrome://extensions/. 5. Testing Your Extension 1. 2. Set the refresh interval using the popup interface. 3. Click Start to begin refreshing. 4. Verify that the page reloads every few seconds. 5. Test the Stop button to ensure the refreshing stops. Open a webpage (like a news site or social media feed).
6. Publishing the Extension on the Chrome Web Store 1. Package Your Extension: Use the "Pack Extension" option on the chrome://extensions/ page. 2. Create a Developer Account: Register at the Chrome Web Store Developer Dashboard. 3. Submit Your Extension: Upload the packaged ZIP file, fill out the required information, and submit it for review. 7. Best Practices for Auto-Refresh Extensions Use Clear Permissions: Ensure that your extension only requests the necessary permissions. Respect User Privacy: Avoid refreshing tabs without the user’s consent. Provide Feedback: Include a visual indicator when the extension is active. Avoid Overloading: Set reasonable refresh intervals to avoid performance issues on slower websites. ● ● ● ● Conclusion Creating a Chrome extension with auto-refresh functionality is a great way to dive into browser development. By following this guide, you’ve built a simple yet powerful extension that can reload web pages automatically. With further customization, you could add features like conditional refresh based on content changes or notifications for updates.