Download
1 / 28
280 likes | 501 Views
Instructional guide for Yersinia pestis module. This series of slides serve as a resource for using Mauve, BLAST, Snippy, and the ASAP database to work on your individual projects. Mauve. To work with the 5 Yersinia pestis alignment, you will need to follow a few steps

E N D
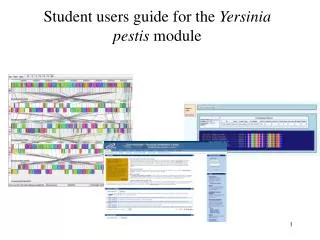
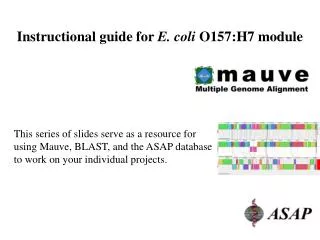
Instructional guide for Yersinia pestis module This series of slides serve as a resource for using Mauve, BLAST, Snippy, and the ASAP database to work on your individual projects.
Mauve To work with the 5 Yersinia pestis alignment, you will need to follow a few steps #1) download progressive Mauve (version 2.3.0 or later) at http://gel.ahabs.wisc.edu/mauve/download.php #2) download the compressed folder called Yersinia pestis alignment 5 genome.zip at http://gel.ahabs.wisc.edu/~baumler/ #3) extract (uncompress) all files from the folder
In your start menu under programs go to Mauve, and start up the program. Notice there is a users guide in pdf form in this folder, this will contain useful information and commands to navigate. Note: your computer may need to update Java, since mauve uses a Java platform for the alignment. You should see a window for Mauve appear
Next double click on the uncompressed Yersinia pestis alignment 5 genome folder, it should contain the following files, take the one (yersinia_pestis_alignment_5genomes), and drag and drop it into the mauve window It should start to say reading sequences here, and in a few seconds the alignment will appear, note computers with less than 512MB RAM may not be able to open the file
Your alignment should look like this Organism name notice the first is CO92, the second is KIM,the third is 91001, the fourth is Antiqua, and the fifth is Nepal516 Using the up or down arrows, you can switch the position of the genomes
Your tool bar is at the top on the left, the tools you will use are in the View pulldown, and also the buttons Returns the viewer back to home Search for features Zoom in/out, you can also hold down the ctrl button and use the arrows on the keyboard Move left or right, you will find this useful to center a region of interest in the middle of the screen prior to zooming in
Top strand Bottom strand The colored blocks are called local colinear blocks (LCB’s), and represent regions of the genome that Mauve has identified as conserved. The lines connect the LCBs, notice that some are in different positions in the other genomes, and some are inverted and appear on the bottom strand of the double stranded genome
When you move you mouse over a region of one genome it will show a box with a black border and also show the corresponding region (boxes) in the other four genomes, try scrolling left to right on one genome.
You may find it easier to view the 5 genome alignment without the connecting lines:on your keyboard press Shift L (pressing this again makes them reappear)
When viewing the LCB’s, mauve displays regions that are highly conserved/identical as full color. Areas that are unique/variable to one genome appear in white, and represent unique islands.
Notice, that when you scroll (slowly) over a white region (island) the black boxes pause in the other genomes, then comes back once you have passed over the island and back into conserved regions.
If you would like to look at all five LCB’s, even though one is in a different position, scroll over one LCB and click the mouse button.
Lets use the zoom function, press the home button to restore the alignment to original view Now click on the green LCB in the top genome, and using the right button bring it to the center of the screen, now start to zoom in multiple times until boxes start to appear under the LCBs. You will start to see the genes that are predicted to encode proteins otherwise known as Open Reading Frames (ORFs). Scroll over an ORF and pause, then a window will pop-up and provide information for the product annotation. With this approach, you can view what ORFs are present in a genomic island or other region of interest.
Now place you mouse over one of the genes, Click your mouse once on a gene, and a window will pop-up, scroll down and select View CDS in ASAPdb. This will open the page in the ASAP database for that gene, containing all of the annotations. You can look to see if any of the annotations provide some evidence to suggest it may be involved in virulence. (note you may be prompted to a log-in screen, click on the button that says “Enter ASAP”)
To use the search feature to find the genes glpD, napA, and araC #1) Click on the search feature #2) Choose a genome or search all of the genomes #3) Type in a gene name (For example glpD) #4) Click on search
Looking for mutations in glpD, napA, and araC Notice that it has found the glpD gene (highlighted in blue), and also a corresponding gene in each genome. Although each genome contains the glpD gene, not every gene may encode a functional protein. You need to determine which of the five ORF’s produce the full-length functional protein, and there are numerous methods to address this. Method #1: click on each ORF and go to the view CDS in ASAPdb, look at the length and if any are labeled as pseudogenes. If so, look for a note annotation that describes why it is thought to be a pseudogene. Pseudogene (Definition): A DNA sequence that resembles the ORF of a gene but has been mutated thus affecting the ORF to yield a truncated protein that most likely does not function correctly.
Looking for mutations in glpD, napA, and araC cont. Method #2: from the feature page in ASAP Scroll down to the feature context part of the page This is a list of all features that are neighboring your gene in the genome, notice some are upstream, downstream, or contained within. Notice that contained within your glpD gene there are polymorphic sites (otherwise known as Single Nucleotide Polymorphisms’s or SNP’s) For SNP analysis, you will use a new tool called “Snippy”
For SNP analysis, In a new tab or web browser window go to http://asap.ahabs.wisc.edu/~cabot/aep/snippy.php It should look like this: From the ASAP database, highlight and copy all feature ID’s for polymorphic sites contained within glpD and paste them into the Snippy interface and click GO feature ID’s
In the middle of each region you will see the polymorphic site (in this case capitol G’s) and the corresponding base in each genome, note you are interested in variations in YPKIM, YPCO92, YP91001, YPNepal, and YpAntiqua. In this case there is no difference in the 5 genomes in this analysis (there may be differences in the genomes for other Y. pestis strains not included in your analysis). Scroll down and search the remaining polymorphic sites and see if there is any difference in the various polymorphic sites in the 5 genomes, if not it probably is a larger deletion or insertion event that has occurred.
Some nucleotide changes do not affect the amino acid that it encodes for, these are called synonymous. In your SNP analysis, you want to look for SNP’s that cause a change in the amino acid that it encodes for, or a nonsynonymous change. In some cases the change results in a premature stop-codon, which may generate a truncated non-functional protein. #1) note Snippy shows you if the SNP variation results in a amino acid change, in this case A (Alanine) to T (Threonine) #2) In this second SNP, the change resulted in a stop codon
Using the DNA sequence obtained from the dental pulp from three corpses (found in the file called Ypestis corpse and CA88-4125YPE genes.doc), conduct a BLASTN search within the ASAP database with each sequence against the 91001,Nepal, Kim, Antiqua, and CO92 genomes. For each of the three ancient corpse DNA samples, which biovar is has the most similar sequence to the strains that caused the 1st and 2nd pandemics? From the ASAP database home page you can select to run a Blast search here (http://asap.ahabs.wisc.edu/asap/home.php)
First, paste the first nucleotide sequence from corpse #1. Next, select entire genomes. Then, select the genomes to query, check the boxes for Y . pestis genomes 91001, Antiqua, CO92, KIM, and Nepal. Finally, click on the Search button, repeat with the other two ancient corpse DNA sequences.
Next repeat the BlastN process using the gene sequences from a known North American ancestor (Y. pestis CA88-4125/YPE) for glpD, napA, and araC. Of the 5 genomes (91001, Antiqua, CO92, KIM, and Nepal) representing the three biovars, which is most similar to the known North American ancestor? Based on your analysis do you think Y. pestis arrived in North America via shipping routes over the Atlantic or Pacific? Pacific? (Biovar Orientalis or Mediaevalis of Asian origin) Atlantic? (Bioovar Antiqua of African origin) Courtesy of education.usgs.gov
One last feature you can use in Mauve To find an island that is in 4 out of 5 strains you will use the backbone view Press the home button first Then go to the View pull down select color scheme then backbone color
Your alignment should look like this in backbone color, regions in all five appear in light purple color ( ) , there will be regions that are different colors that will correspond to 2, 3, 4 out of 5 genomes (you may have to zoom in a bit to see these regions) Look for a region in the lightest blue color ( ) that is present in CO92, KIM, Antiqua, and Nepal, but absent in the 91001 strain. Analyze the contents and determine if any of the genes may contribute to human infection of Y. pestis.
Some genes from Y. pestis have been characterized, and are thought to be involved in virulence. Your instructor will provide you each with one or more virulence factor gene(s). Note some have gene names, while some do not, and in the latter case you will use the “locus tag” identifier. In this case to search for the gene in Mauve: #1) First, click on the search button. #2) Next, from the pull down bar choose locus tag #3) Then, enter the locus tag which consists of 3 capitol letters followed by 4 numbers(ie YPO1234) #4) Finally, click on the search button
. You can also conduct Blast searches against all Y. pestis genomes including draft genomes in the ASAP database. From the left side of a feature page for a gene, (in this case hmsH in Y. pestis CO92), you can run BLASTN and BLASTP against all other Y. pestis genomes in ASAP. First, you will be prompted to a Blast page, you will need to select the database you would like to query (i.e Entire Genomes) Then, choose the genomes to query; for example check all of the Y. pestis genomes, and then click the search button
Congratulations, you should be able to work on your individual assignments with your newfound knowledge using Mauve and the ASAP database. One other useful commands in mauve: To export the current view as an image file press Ctrl+E (for presentations or to make illustrations for your assignment) Additional information is available in the Mauve users guide