Download
1 / 29
1.01k likes | 4.65k Views
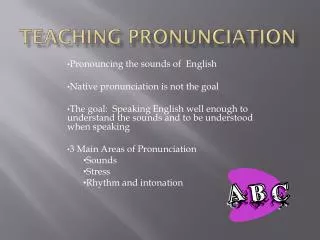
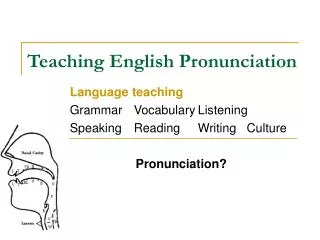
Teaching Pronunciation. Pronunciation involves far more than individual sounds. Word stress, sentence stress, intonation , and word linking all influence the sound of spoken English.

E N D
Pronunciation involves far more than individual sounds. • Word stress, sentence stress, intonation, and word linking all influence the sound of spoken English.
English pronunciation involves too many complexities for learners to strive for a complete elimination of accent, but improving pronunciation will: • boost self-esteem, • facilitate communication, and possibly lead to a better job or a least more respect in the workplace.
A student's first language often interferes with English pronunciation. Sometimes the students will be able to identify specific problem sounds and sometimes they won't.
Another challenge resulting from differences in the first language is the inability to hear certain English sounds that the native language does not contain.
For problems such as these, listening is crucial because students can't produce a sound they can't hear. • Descriptions of the sound and mouth position can help students increase their awareness of subtle sound differences.
Here are some ideas for focusing on specific pronunciation features. • VoicingVoiced sounds will make the throat vibrate. For example, /g/ is a voiced sound while /k/ is not, even though the mouth is in the same position for both sounds.
Have your students touch their throats while pronouncing voiced and voiceless sounds. • They should feel vibration with the voiced sounds only.
Aspiration • Aspiration refers to a puff of air when a sound is produced. • Many languages have far fewer aspirated sounds than English, and students may have trouble hearing the aspiration. • The English /p/, /t/, /k/, and /ch/ are some of the more commonly aspirated sounds.
To illustrate aspiration: • have your students hold up a piece of facial tissue a few inches away from their mouths and • push it with a puff of air • while pronouncing a word containing the target sound.
Mouth Position • Draw simple diagrams of tongue and lip positions. • Make sure all students can clearly see your mouth while you model sounds. • Have students use a mirror to see their mouth, lips, and tongue while they imitate you.
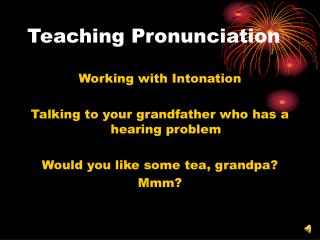
Intonation • Word or sentence intonation can be mimicked with a kazoo (mouth organ), or alternatively by humming. • This will take the students' attention off of the meaning of a word or sentence and help them focus on the intonation.
LinkingWe pronounce phrases and even whole sentences as one smooth sound instead of a series of separate words. 'Will Amy go away,' is rendered 'Willaymeegowaway.' • To help learners link words, try starting at the end of a sentence and have them repeat a phrase, adding more of the sentence as they can master it.
For example, 'gowaway,' • then 'aymeegowaway,' • and finally 'Willaymeegowaway' without any pauses between words.
Vowel LengthYou can demonstrate varying vowel lengths within a word by stretching rubber bands on the longer vowels and letting them contract on shorter ones. • Then let the students try it.
For example, • the word 'fifteen' would have the rubber band stretched for the 'ee' vowel, but the word 'fifty' would not have the band stretched because both of its vowels are spoken quickly.
Syllables • Have students count syllables in a word. • Illustrate syllable stress by clapping softly and loudly.
For example, • the word 'beautiful' would be loud-soft-soft. • Practice with short lists of words with the same syllabic stress pattern ('beautiful,' 'telephone,' 'Florida') and • then see if your learners can list other words with that pattern.
Specific Sounds • Minimal pairs, or words such as 'bit/bat' that differ by only one sound, are useful for helping students distinguish similar sounds. • Tongue twisters are useful for practicing specific target sounds.
Techniques • Exercise should be simple, accessible, fun and combine reception and production. • Some students do feel embarassed to pull ridiculuous faces when practising vowel sounds • but this soon passes and students enjoy the pronunciation work. • Where possible, exercises should be communicative.
Exercise • After having taught or exposed the students to long and short vowels through listening and oral work, the teacher can check recognition, retention and ability to discriminate in the following way. • This could also be used simply for teaching.
Stage 1: • The teacher writes a variety of words containing the target sounds (long and short vowels) on the board. The following is just one possible set. • PORT PIT PAT PERT PET POT PUTT PUT PART PEAT • 0 1 2 3 4 5 6 7 8 9 • Here, the only difference in sound is that of the vowel. • As in these examples, the word should begin and end with the same consonant. 0, 3, 8, and 9, are long vowels and the rest are short.
Stage 2: • The teacher then models each word and individal repetition follows. • The vowel sound can be isolated and the procedure repeated until the teacher is reasonably sure that there are no major problems.
He or she then tells the students that they are going to hear one of the words and must write the number which corresponds to the word they hear. • What the students have written is then checked and compared.
This automatically leads into a discussion of what they heard and what sounds they are confusing. • If student X heard 1 when the teacher said 9, they are confusing the short vowel / I / with the long vowel / i: / . • The teacher gives feedback and the sounds may then be modelled again and practised.
Stage 3: • Two or three words are then presented together and the procedure repeated. • The teacher then tells the class they are going to hear six words and that the numbers correspond to an important telephone number. • The teacher delivers the words and asks , "What's my number?". Again there will be differences in what was heard.
This allows a focus on which sounds are not being discriminated effectively by which students and where their problems lie. • Later discussion may revolve aroud what strategies students may employ to improve their discrimination skills - songs, minimal pair games with friends, movies, radio, etc.
Stage 4: • Learners are then invited to model the telephone number. • This stage usually generates much discussion and disagreement along the lines of • - "You said ...... ", "No I didn’t ", "Say it again" and so on and is usually very lively. The teacher is, of course, the final arbiter of what was really said.
The important thing is that the learners are thinking actively about their pronunciation and how to repair it if necessary. • They also begin to hear themselves (often for the first time) and this is of immeasurable importance in the retention of sounds.