Download
1 / 18
210 likes | 628 Views
Learn essential techniques for precision shooting in supported positions using a pneumatic air rifle. This comprehensive guide covers sight alignment, breath control, trigger control, sight adjustment, target scoring, and rifle marksmanship. Practice dry firing and live firing exercises to improve your shot technique and sight adjustment skills.

E N D
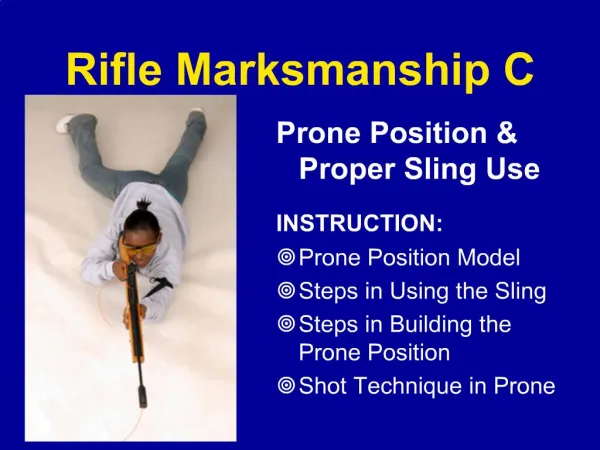
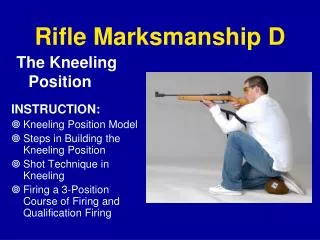
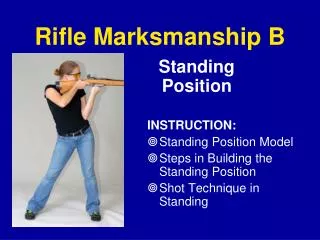
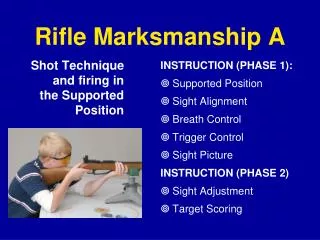
Shot Technique and firing in the Supported Position INSTRUCTION (PHASE 1): Supported Position Sight Alignment Breath Control Trigger Control Sight Picture INSTRUCTION (PHASE 2) Sight Adjustment Target Scoring Rifle Marksmanship A
Charging & Loading 1) Open action--pull bolt to rear 2) Charge pneumatic air rifle by opening and closing charging lever 3) Load air rifle by placing pellet in loading port and closing bolt To Dry-Fire: Open and close bolt without charging air or loading a pellet
Supported Position—Table or Bench Sit behind the rifle and rest--hold the rifle with both hands Keep butt up in shoulder so you can look straight ahead through the rear sight Let the rifle lay on the rest--allow the rest to support and steady the rifle
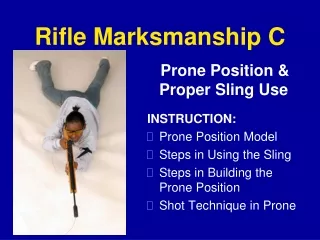
Prone Supported Position Support
Sight Alignment Rear sight aperture Front sight with ring insert Rear sight aperture Rest your cheek on the stock and look through the aperture (opening) in the rear sight Look through the rear sight aperture—see the front sight in the center of the aperture
Breath Control Stop breathing during aiming To hold the rifle steady while aiming, you must stop breathing. Breathe normally, when aiming begins, exhale and stop breathing (hold your breath) until the shot is fired.
Aiming--Sight Picture • To aim, point the aligned sights at the bull's-eye on the target • The bull’s-eye will not sit perfectly still—center the front sight movements over the bull’s-eye!
Trigger Control Trigger Control: The smooth release of the cocked trigger while aiming at the target. • TRIGGER CONTROL TIPS: • Place finger on trigger and take up the trigger slack when first starting to aim • When the sights are properly aligned, press the trigger straight to the rear as smoothly as possible • Trigger release must be STEADY & SMOOTH—takes 2-4 seconds • Dry firing is a great way to practice trigger control
Shot Technique – In Order • Shoulder Rifle and Align Sights • Breath—exhale and bring sights onto target • Start to Aim and Take up Trigger Slack • Center Sight Movements andSqueeze the Trigger
Range Firing Exercises • Supported Position, with blank target • Dry firing • Live fire, 5-shot groups • Supported Position, with bull’s-eye target • Dry firing or aiming exercise (holding) • Live fire, 5-shot groups--try to shoot smallest possible group
PHASE 2 INSTRUCTION Sight Adjustment Scoring
How Sights Work Elevation Knob: Turning this knob moves the shot group up or down on the target--direction of movement is indicated by the direction arrow on the knob Windage Knob: Turning this knob moves the shot group left or right on the target Elevation and Windage changes are made in increments called “clicks” Daisy sights: 6 clicks per ring on BMC target, 2 clicks per ring on competition target El Gamo sights: 12 clicks per ring on BMC target, 4 clicks per ring on competition target
Calculating Sight Adjustments Find shot group center--draw lines through shot group center Vertical adjustment--count scoring rings distance to target center--multiply by 6 (clicks per ring)--apply elevation change Horizontal adjustment--count scoring rings distance to target center--multiply by 6--apply windage change 2 scoring rings distance X 6 = 12 clicks down 1 2/3 scoring rings distance X 6 = 10 clicks left
Exercise: Sight Adjustment Calculations Group #2 Group #3 Group #1 Adjustments: BMC Target = 6 (or 12) clicks per ring Competition Target: 2 (or 4) clicks per ring
How to Score Targets Scoring Rule: Shots receive the value of the highest scoring ring they break or touch Shot is partly in 6 ring and partly in 7 ring, counts 7 points Shot is in 8 ring, counts 8 points Shot is mostly in 9 ring, but breaks 10 line, counts 10 points Shot is in 9 ring, but outside edge “touches” 10 ring, counts 10 points Shot is outside of all scoring rings, counts 0 points
Exercise: Scoring Targets What is the score for the 5-shot series on the left? What is the score for the 10-shot series on the right?
Range Firing Exercises • Supported Position, with bull’s-eye target • Dry firing or aiming exercise • Live fire, 5-shot group--calculate and make sight adjustment • Live fire, 5-shot groups--make additional sight adjustments as needed