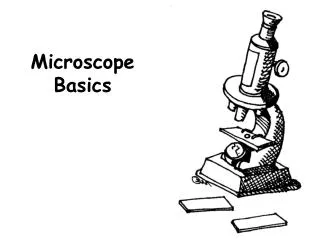
Microscope Basics pages 140 - 147
Microscope Basics pages 140 - 147. Parts and focusing Cell Theory History. Label the Compound Light Microscope ( Handout ). Ocular lens Body Tube Coarse Adjustment Knob Fine adjustment Knob Revolving nosepiece Objective lenses (4x, 10x, 40x) Arm Stage Stage Clips Diaphram

Microscope Basics pages 140 - 147
E N D
Presentation Transcript
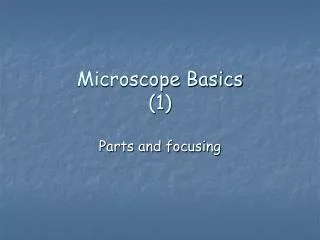
Microscope Basicspages 140 - 147 Parts and focusing Cell Theory History
Label the Compound Light Microscope(Handout) Ocular lens Body Tube Coarse Adjustment Knob Fine adjustment Knob Revolving nosepiece Objective lenses (4x, 10x, 40x) Arm Stage Stage Clips Diaphram Light source Base
Focusing with a Microscope • Plug in and turn on. • Lower stage completely. • Turn nosepiece to low objective. • Raise stage with coarse objective until specimen is seen. (Big knob) • Fine focus the specimen. • Centre specimen in the field of view. • Rotate nosepiece to medium power objective. • Refocus with fine adjustment. • Re-centre the specimen. • Refocus with fine adjustment. (Be careful not to break the slide.) • Adjust the condenser. (Light) • Start over to look at another specimen. • Carrying and storage instructions.
Microscope and Cells Microscope Demonstration Microscope Introduction http://www.youtube.com/watch?v=2xdMaeLJ2Mg&feature=related Preparing a plant and animal cell slide http://www.youtube.com/watch?v=GHnndVuaync&feature=related
Onion Cell http://www.youtube.com/watch?v=Tdch3mxQ4oU&feature=related
Microscope History and Development Field of view and Magnification
Early Microscopes - Anton Van Leeuwenhoek • The father of microscopy, Anton Van Leeuwenhoek of Holland (1632-1723). • Anton Van Leeuwenhoek was the first to see and describe bacteria (1674), yeast plants, the teeming life in a drop of water, and the circulation of blood corpuscles in capillaries.
Robert Hooke • In 1665, the English physicist Robert Hooke looked at a sliver of cork through a microscope lens and noticed some "pores" or "cells" in it. • Hooke was the first person to use the word "cell" to identify microscopic structures when he was describing cork.
Compound Light Microscopes • Uses light • Has two lenses • Magnification limited to 2000x (400x at LHHS)
Transmission Electron Microscope (TEM) • Uses beams of electrons • Magnification of 2 000 000x • Has two limitations: • Good only for thin specimens • Only dead cells can be observed
Scanning Electron Microscope (SEM) • Electrons are reflected from the surface of the specimen • Produces a 3-d image • Good for the thicker specimens • Lacks the magnification and resolution of the transmission electron microscope
Magnification Magnification = Objective lens X Ocular lens (4x, 10x, 40x) (10x)
Calculating the size of a specimen • binder
Calculating the size of a specimenExample under med. objective Object size = Size of field of view Number of objects across field of view Object size = 1.72 mm 14 Object size = 0.1 mm
Cell Basics (3) Microscope question sheet (HO) Do in class, distribute and go over together. The Cell – Need to know Basics Animal and Plant Organelles (colour HO) Compare Animal and Plant cells (Venn HO)
The Cell – Need to know Basics • Cells are the “building blocks” of the human body. • Every part of your body – bones, skin, nerves, hair, and muscle – is made if cells. • Different cells do different jobs and have different shapes and sizes. • Cells contain smaller “insides” called organelles– all with different jobs.
Organelles • The largest and most important organelle is the nucleus. • The nucleus controls everything that happens inside the cell. (Like the cells brain.) • All cells are surrounded by a protective layer called the cell membrane. • The cell membrane is semi-permeable, which means that it lets some substances pass through it, but not others. • The rest of the cell is called cytoplasm. Cytoplasm is a liquid containing chemicals needed to keep the cell alive as well as hold the floating parts of the cell together.
Venn Comparison of Animal and Plant Cells • What are the two main types of cells? • What is an organelle? • What organelles are common to both types of cells? • What are the organelles found only in plant cells? • Why do you think that scientists refer to cells as the ‘basic” unit of life? Animal Cell Plant Cell
Organelles and their Functions (4) Organelles and their Functions sheet pages 142-143 (HO) – Go over How does a cell relate to your school? (HO) Cells – How it works – video (HO)
Cells – How it works (video) • Question sheet - HO • Cells Vocabulary Quiz - tomorrow
Biological Drawings (5) Cells Vocabulary Quiz Rules for Biological Diagramming (HO) Epithelial cell example Rubric for Biological Diagramming Biological Drawing Lab (HO)
Rules for Biological Diagramming • Use unlined white paper and a sharp HB pencil. • Leave an empty margin of about 1 cm all around your page. • Print your name at the top right hand corner. (Use a ruler.) • When drawing cells, choose only one cell and show the edge of neighboring cells to show the connection. • Title your drawing. (ex. Figure 1 – Epithelial Cell.) • Draw the outline of your subject with clear and unbroken lines. Your drawing should be about half the page. When possible, your drawing should be vertical. • Use lines to show the out of visible structures. Do not shade or colour your drawings in any way. Keep the objects in proportion to one another. • Use a ruler to draw horizontal lines from the structures to the right of the drawing to label (print). No crossing lines! • Measure (in cm or mm) your diagram at its longest point; show measure on the left side of the diagram. • At the bottom right corner, print the subject drawn, the magnification of the drawing, and the scale.
Rubric for Biological Drawings Only pencil used 2 Leave a 1 cm margin 2 Name printed on top right 2 Ruler used for horizontal labeling 4 Labels are printed to the right 4 No shading is used 2 Stipples are used appropriately 2 Clear and unbroken lines 2 Total Mark 20
Biological Drawing Lab The first specimen you draw will take up this entire side of paper (handout). On the other side, divide your sheet into 4 squares each representing one biological drawing (total of 5). Be sure to follow all the steps properly and be NEAT!
Microscope Lab 1 (6) Preparing a wet mount notes. Lab
Preparing a wet mount • Obtain a slide, cover slip, and water bottle. • Place a drop of water in the middle of slide. • Obtain specimen. • Place specimen in the drop of water. • Holding the cover slip at a 45 degree angle to the slide, drag the cover slip into the water and gently lower until cover slip covers specimen and pushes air our from the specimen. To darken specimen: • Obtain a bottle of iodine. • Place a drop of iodine at the edge of the cover slip. • Allow for iodine to move under the cover slip. Do MICROSCOPE LAB!
Microscope and Cell Theory Test (7) Microscope Test Importance of Cell Division Reproduction and Cell Division How do cells divide
Importance of Cell Division Have you ever wiped out on your skateboard or bike? Imagine how terrible it would be if every scratch or flaw on your skin remained. Cells come from pre-existing cells through the process of cell division.
Functions of Cell Division • Healing and tissue repair. • To increase the number of cells (therefore increase the size of the organism). • To replace dead and worn out cells. • To create life (in unicellular organisms such as bacteria, and multicellular organisms such as humans).
Why don’t cells just expand so we can grow, rather than divide? If the cell became too large, there would not be enough room to exchange materials through the cell membrane and the nucleus would get smushed therefore not allowing messages to be relayed efficiently. In short, cell division allows an organism to grow, while still maintaining a cell size that keeps the organism healthy. Cell division is one of the most studied, yet least understood areas of biology.
Reproduction and Cell Division Organisms of all species reproduce. They may reproduce asexually or sexually. • In asexual reproduction a single organism gives rise to offspring with identical genetic information. Ex. the cells of the human body, other than those found in the male testes and female ovaries and bacteria use asexual reproduction to produce offspring by the process of mitosis. Mother (46) Daughter (46) Daughter (46) Mitosis
In sexual reproduction, genetic information from two cells is combined to produce a new genetically unique organism. Usually, sexual reproduction occurs when two specialized sex cells unite to form a fertilized egg called a zygote. Egg cell (23) Sex Cells Sperm Cell (23) Zygote (46)
Reproduction and Cell Division (8) Cells Vocabulary Quiz Rules for Biological Diagramming (HO) Epithelial cell example Rubric for Biological Diagramming Biological Drawing Lab (HO)
(9) Cells Vocabulary Quiz Rules for Biological Diagramming (HO) Epithelial cell example Rubric for Biological Diagramming Biological Drawing Lab (HO)
(10) Cells Vocabulary Quiz Rules for Biological Diagramming (HO) Epithelial cell example Rubric for Biological Diagramming Biological Drawing Lab (HO)
(11) Cells Vocabulary Quiz Rules for Biological Diagramming (HO) Epithelial cell example Rubric for Biological Diagramming Biological Drawing Lab (HO)
(12) Cells Vocabulary Quiz Rules for Biological Diagramming (HO) Epithelial cell example Rubric for Biological Diagramming Biological Drawing Lab (HO)