Mastering Mail Merge in Microsoft Word: A Comprehensive Guide
Dive into the fascinating world of Mail Merge with our detailed agenda from the ETT 229 course, Fall 2004. This session includes a quiz, insightful lectures on Word, practice notes, and email management tips. Learn step-by-step how to set up Mail Merge, select recipients, and write personalized letters using a new or existing list. We’ll guide you through recipient list creation, letter previewing, and finalizing your merged documents, ensuring you're well-equipped for your final portfolio review. Don't forget to prepare for the upcoming quiz and submit your Word Project 2!

Mastering Mail Merge in Microsoft Word: A Comprehensive Guide
E N D
Presentation Transcript
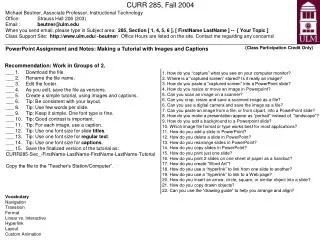
ETT 229Fall 2004 Microsoft Word Part 4
Agenda • 10:00-10:05 – Quiz • 10:05-10:50 – General Word Lecture • 10:50-11:15 – Practice
Notes • Email issues • Forwarding your NIU email • Bouncing Criminals • pezarr@hotmail.com • Sharesse@hotmail.com • Portfolios • Save Projects for final Portfolio
Reviewing • Function of reviewing • Inserting comments • Student application – file sharing • Teacher application – online grading
Mail Merge • Definition – the combining of a Word document and materials in a database to create personalized mass mailings • Six Steps in Process
Step 1 • Setting Up • Opening up Mail Merge task pane • Under Tools Letters and Mailings Mail Merge • It is recommended by not required to open the Mail Merge toolbar • Select what type of document to work with
Step 2 • Choosing your starting document • Current document • Template • Existing document
Step 3 • Selecting Recipients • Use an existing list – best if in Microsoft Access (.mdb file) • Select from Outlook – Contact list in Microsoft Outlook (address book) • Type a new list – use if new or special list of recipients
Step 3a – Creating a New List • If in step 3 you choose Type a New List, a Create option appears. • Select Create and begin entering data for recipient list • Select New entry for every new recipient you enter • Enter in only fields you you want to use • When you are finished, select close
Step 3b – Saving the Recipient List • After entering recipients into the data fields and selecting close, a save window will appear • Name the file and save in an appropriate location • This file will be saved in Access format (.mdb) • If you need to edit your list, select the edit option • If you are satisfied with your list, go to step 4: Write your letter
Step 4 – Write your Letter • In this step, select the information that you want Mail Merge to insert in the letter • Address Block – will enter all standard address material • Greeting Line – Various options for formal/informal greetings • More items – Allow you to enter any data fields you created into the letter
Step 5 – Preview the Letter • Allows you to go through each letter and make sure formatting is correct • DO THIS for EVERY letter! • You may also edit the recipient list from this page if you need to
Step 6 – Complete the Merge • Print – Prints letters to all recipients selected • Edit individual letters – exports all letters into one new document to allow for editing
Envelope Mail Merge • Same Process with different shape • Type sender address in upper left corner • Insert Address block in recipient area
Now and Later • Download Word Project 2 and begin work on it • For Next week • Review Lectures • Read PowerPoint chapter in Office • pages 164-232 • Prepare for Quiz • Have Word Project 2 in by end of Monday