Download
1 / 20
220 likes | 467 Views
Design. Content. Delivery. Giving an Interesting Oral Presentation. The Anatomy of an Oral Presentation. (Title) Introduction Hypothesis Purpose Methods Results Summary Conclusion Acknowledgments. General guidelines. For a 10 minute presentation, no more than 10 slides

E N D
Design Content Delivery Giving an Interesting Oral Presentation
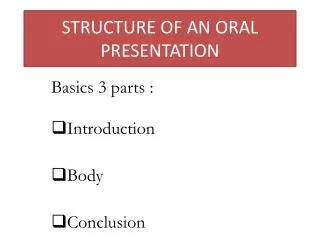
The Anatomy of an Oral Presentation • (Title) • Introduction • Hypothesis • Purpose • Methods • Results • Summary • Conclusion • Acknowledgments
General guidelines • For a 10 minute presentation, no more than 10 slides • The distribution will depend on how many figures you need to present for your results
Grab attention with your title • Make it assertive, clear and interesting • Questions often work well • For example: Why do dogs scratch flea bites? • Not so good: Studies of the effects of Siphonaptera bites on canine motor neurons. • A title slide in a PowerPoint presentation is acceptable IF YOU DO NOT TAKE THE TIME TO READ IT. Have it on screen during your introduction, then be ready to move to your first slide.
Introduction • No more than 2 slides • 1st slide gives overall hypothesis • Put your research into context; why might it be important to your audience? • Diagrams are good for this • 2nd slide gives background • Use bullets for major evidence (the authors who did the work, and the date)
Purpose/Aims • Transition from Introduction to Purpose • We know all this…but we don’t know this… • Purpose • The specific problem that you tested (“We tested for the presence of a specific protease in the ovulatory process.”)
Methods • No more than 2 slides (1 is preferable) • Animals • Treatment groups • Timelines • Doses • Lab Techniques (just list, no diagram, don’t explain how the technique works, unless this was your research project) • Real-time PCR (Better to use diagram of the primer sequences as they are positioned in the entire sequence. DO NOT LIST THE SEQUENCES!) • ICC • Statistical Analysis (Just say what you did.)
Results • Report your major findings (This is what we came to hear!) • Number of slides depends upon how many figures you have to show. You won’t have time to present everything; pick the major points, not the background experiments. • This is not a time for excuses (“We didn’t have enough time to…”). Just present the data you have! • Use graphs, pie charts or other good visual presentation methods • Avoid tables, period. • Orient the audience to your slide (The x-axis shows…the y-axis shows…and the result.) • Never say, “As you can see here…” YOU MUST EXPLAIN WHAT YOU ARE SHOWING!
Summary • Reiterate the major point from each figure you presented. Use bullets. • Okay to read this slide word for word.
Conclusions • How did your findings address your hypothesis (conceptual rather than descriptive) • What is the BIG PICTURE (clinical relevance, etc.)? • You may use the same diagram you used on your Introduction slide here, and show where your research fits in. • Two to four bullets max. (i.e., overall concept and clinical relevance)
Acknowledgments • List as bullets/may include photos, if desired (and with permission). • BRIEFLY acknowledge your mentor, any lab technicians who worked with you, animal technicians. • Anyone who donated reagents, protocols by name and affiliation • Funding sources (Murdock Trust, NIH grants, Saturday Academy, etc.) • Any personal acknowledgments (not usually included in scientific meetings).
Design Essentials • Dark background with lighter color lettering is best in a dark room. • Bold all text. • Use the largest font possible that looks pleasing (Arial, Times New Roman are good fonts for PowerPoint presentations). • Minimize prose on your slides. • Minimize animation. • Double-check for typos!
Harmonious colors areeasy on the eye • Use analogous colors (they are side by side on a color wheel)…
Or complementary colors …(any two colors which are directly opposite each other on the color wheel, such as red and green and red-purple and yellow-green)…
Except… • Do not use green and red (or orange and blue) side-by-side, as color-blind individuals will not be able to read your slides.
Presentation Demeanor • Face the audience (pointer protocol). • Make eye contact. • Speak naturally (but slower than you think you should), speak loud enough to be heard. • Don’t fidget. • Try not to say, “Um,” or “Uh.” Practice, practice, practice. • Be enthusiastic and have fun!
Resources • http://www.kumc.edu/SAH/OTEd/jradel/Preparing_talks/TalkStrt.html • http://www.asp.org/education/presguidelines.html