Download
1 / 33
330 likes | 529 Views
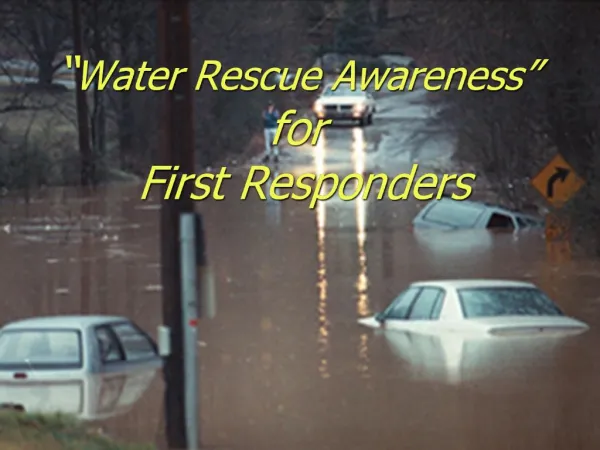
Water Awareness. Water Safety for RFES . Always wear a properly fitting and secured PFD when within 10’ of water. No Bunker gear or fire helmets near water. Use river helmets located in Dive 12 when on the river banks. In cool temperatures wear Mustang suits located on Dive 12.

E N D
Water Safety for RFES • Always wear a properly fitting and secured PFD when within 10’ of water. • No Bunker gear or fire helmets near water. • Use river helmets located in Dive 12 when on the river banks. • In cool temperatures wear Mustang suits located on Dive 12. • Bring Throw bags with you. • Work in teams of 2 or more.
Responding To A Water Incident • Any call involving water if Dive 12 hasn’t already been dispatched add them. • During any type of rescue call for a Zone 3 Response and indicate what type of response you need. • Zone 3 Dive Response. • Zone 3 Swift Water Response. • Zone 3 Surface Water Response. During a Zone 3 Response most jurisdictions in the zone will send trained personnel.
First Arriving Unit Responsibilities To A Lake or Pond (Static Water). • Call for additional resources. • Locate witnesses and separate them, this will prevent them from working together to create a Last Seen Point. • Determine a Last Seen Point - Triangulate. • Establish access points for entry and operations for Dive technicians. • Keep in mind Rescue Mode is 90 minutes of submersion in cold water. • Have crews ready to assist Divers and haul gear.
A Good Last Seen Point Is Crucial In A Successful Operation.
First Arriving Unit Responsibilities To A River Or Stream. • Call for additional resources. • Determine if this is a surface or Dive Rescue. If you can’t see or hear the victim it may be undetermined. • Send units Down stream of the incident. • Locate witnesses and separate them. • Determine a Last Seen Point – Triangulate. • Establish access points for River Technicians. • Establish upstream lookouts. • Establish Down stream containment with throw bags.
Witness Interviews • Have the witness stand where they were standing when they saw the victim go down. • Have them use a reference point (a fixed object) to indicated where the victim went down. • Ask for their Driver’s License to keep them at the scene. • Kids make great witnesses, don’t discredit them because of their age.
The Safety Tank • This is an essential item for all dive calls. • It is located in the Left Front compartment with the spare cylinders.
Weight Belts • These are essential on every dive call. • Each diver will need a weight belt. • Find out what weight each diver wears. • When in doubt bring several in each weight. • The sizes are 20 25 30 and 35 lbs.
Buoyancy Compensation Device • Also known as BC or System. • A red triangle at the top indicates an XL.
Dive Fins • These are essential for every dive call. • The size is indicated on the top of each fin. • Each diver will need a pair of fins.
Comm. Lines • These are essential for every dive call. • We need to have 2 Comm. lines for every dive. • The Comm. lines are different colors for the safety and rescue diver. • These are located in the rear of the rig.
The Rig Scene Case • This is essential for every dive. • The Rig Scene Case is located in the Rear of the rig.
Hardwire Comm. Kit • This is essential for every dive call. • It is located in the back of the rig.
Throw Bags and Cinch Collar • These are throwing devices that anyone can use to rescue a victim. • These are located in the rear of the rig.
Awareness level items • Spare PFD’s • Mustang suits • River helmets Items you may be asked to retrieve. • River fins • Spare BC’s • Recovery systems • TIC
Gear Carts • These carts are used to haul dive gear. • Use caution when assembling and disassembling these carts, there are places that can be a pinch hazard.
Machette This is often used during river calls.
River Raft Tie Downs • There are three tie down locations for the raft. • This is the center tie down. • Loosen the strap, release the carabiner and pull the strap from the opposite side.
The Rear Strap • Loosen the strap and release the carabiner.
The Front Strap • This is a fixed strap. • Slide the raft to the rear just enough to release the carabiner. • The raft is ready to be removed from the rack. • Do not remove the raft alone.
Open the bag completely. • Hold the rope in your non throwing hand. • The red Kong is not a handle, it’s a second chance throw device. • For hand placement on the rope place the rope over the top of your hand with the Kong on the inside of the hand hanging a few inches below. The rope continues around through the palm of the hand. Grasp both the line running through the palm and the part connected to the Kong. This will be easy to release if necessary.
With the Rope in hand toss the bag underhand to your target. • The finishing position should be your hand pointing at your target when releasing the bag. • Aim directly over the target. • In swift water error upstream of the victim. • Water on the surface travels faster then water below the surface and the rope will flow to the victim. • When the victim grasps the rope, walk down stream while pulling them in to lessen drag.
Always have multiple throw bags incase of missed throws. • If you run out of throw bags recoil the rope and re-deploy. • The Kong allows the rope to deploy easily on a second chance throw. Kong