Fingerprints
Fingerprints. Chapter 14 Criminalistics. History of Fingerprinting. First systematic attempt at personal identification Alphonse Bertillon in 1883 Anthropometry : system of precise body measurements Included detailed descriptions of the subject Full-length and profile photographs

Fingerprints
E N D
Presentation Transcript
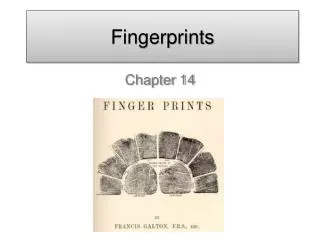
Fingerprints Chapter 14 Criminalistics
History of Fingerprinting • First systematic attempt at personal identification • Alphonse Bertillon in 1883 • Anthropometry: system of precise body measurements • Included detailed descriptions of the subject • Full-length and profile photographs • Accuracy of measurements were disproved by the William West Case
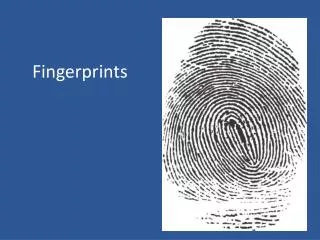
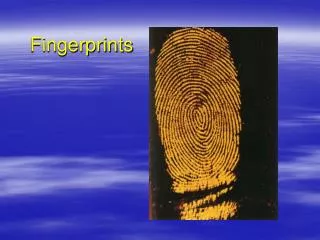
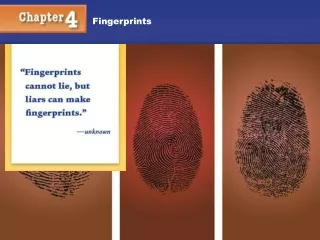
History of Fingerprinting • Francis Galton • 1892: Published Finger Prints • Described the anatomy of fingerprints and suggested methods for recording them • Acknowledged that no two prints are alike and do not change throughout a lifetime • Three pattern types • Loops, Arches, and Whorls
Fundamental Principles of Fingerprints • First Principle • A fingerprint is an individual characteristic. No two fingers have yet been found to possess identical ridge characteristics • Individuality of a fingerprint is not determined by its general shape or pattern but by careful study of ridge characteristics or minutiae • Examples: bifurcation, enclosures, islands, ridge endings, short ridges, ridge crossings, deltas
Fundamental Principles of Fingerprints • Second Principle • Fingerprints have been designed by nature to increase grasp and to resist slippage and are formed in the fetal stage of development. • Fingerprints are formed by: • Hills (Ridges): raised portions of the epidermis • Valleys (Grooves): lowered portions of the epidermis • IT IS THE RIDGES THAT ARE INKED WHEN FINGERPRINTS ARE TAKEN
How are Fingerprints Formed? • The Dermal Papillae is the boundary between the epidermis (outer skin) and the dermis (inner skin). • The shape of this boundary is wavy. This wave pattern determines the pattern of the fingerprint and remains unchanged throughout your lifetime.
Leaving Your Mark • Skin ridges have a single row of pores that open from the sweat glands. • Perspiration is discharged through the pores and oils from the body collect in the ridges and valleys. • Impressions from the fingertips are transferred onto a surface, leaving a fingerprint. • Latent fingerprints are deposited in this manner and cannot be seen with the naked eye.
Fundamental Principles of Fingerprints • Third Principle • Fingerprints have general ridge patterns that permit them to systematically classified.
Taking Fingerprints • Fingers are rolled in ink left-to-right, careful not to adhere too much ink to the fingertips • The fingertips are then rolled left-to-right on a Ten-Print Card in the appropriate place for each finger • A straight down print is then taken for each of the four fingers simultaneously and for each thumb and recorded on the Ten-Print Card
This is the original Ten-Print Card of Rosa Parks after the Montgomery Bus Boycott
Three Classes of Fingerprints • Loops, Whorls, and Arches • Loops: 65% of world’s population • Whorls: 30-35% of world’s population • Arches: 5% of world’s population
Loop Patterns • One or more ridges entering from one side of the print, recurving, and exiting from the same side
Types of Loop Patterns • Ulnar Loop: loop opens toward little finger • Radial Loop: loop opens toward the thumb • Type Lines: pattern area of the loop surrounded by two diverging ridges • Delta: the point directly in front of the diverging ridges—loops MUST have at least one delta • Core: the center of pattern
Types of Whorl Patterns • Four types of patterns • Plain Whorl • Central Pocket Loop Whorl • Double Loop Whorl • Accidental Whorl All whorl patterns must have type lines and a MINIMUM of two deltas.
Types of Whorl Patterns • Plain and Central Pocket Loops • Plain whorl and central pocket loops have AT LEAST one ridge that makes a complete circuit • Ridge may be a spiral, oval, or any variant of a circle
Types of Whorl Patterns • Plain Whorl: an imaginary line is drawn between TWO deltas and the spiral is crossed • Central Pocket Loop: spiral is not crossed when imaginary line is drawn
Types of Whorl Patterns • Double Loop: has two loops in one fingerprint • Accidental Loop: has two or more patterns or is not classified into any other category
Types of Whorl Patterns Figure 14-6
Arch Patterns • Plain arch: ridges entering one side of the fingerprint and exiting the other side • Tented arch: this pattern risessharply in the center
Arch Patterns Figure 14-7
Classification of Fingerprints • Original System: Henry System • Developed by Scotland Yard in 1901 • Converted ridge patterns on all 10 fingers into a series of letters and numbers arranged into a fraction • Problem: could only classify fingerprints up to 100,000 files • Evolved into the FBI System of Fingerprint Classification
FBI System • Primary System of Classification based on the Henry System • All fingerprints in the world can be classified into 1,024 groups
How the FBI System Works • Fingers are given numbers based on whorl patterns being present on each finger R. IndexR. RingL. ThumbL. MiddleL. Little1 R. Thumb R. Middle R. Little L. Index L. Ring 1 16 8 4 2 0 Whorl Values Zeros are assigned for loops and arches Fraction gives individualized result for each person + + + + +
Problems with FBI System • 25% of population falls into the 1/1 category • Only useful when all 10 prints are available • Cumbersome and Time Consuming to look through cards • Often only one or two prints found at a crime scene
AFIS • Automated Fingerprint Identification System • Computer-scans and digitally encodes fingerprints based on minutiae of ridge endings and bifurications • List of prints is generated then a fingerprint examiner confirms match
Benefits of AFIS • Computer can make thousands of accurate fingerprint comparisons in a second • Can filter out imperfections in latent prints found at a crime scene • Suspect lists are generated faster and investigators can spend more time focusing on suspects
Types of Crime Scene Prints • Three Types: • Visible Prints • Plastic Prints • Latent (Invisible) Prints
Visible Prints • Can be seen with the naked eye • Made by fingers touching a surface after ridges have been in contact with a colored material such as blood, paint, grease, ink, etc.
Plastic Prints • Can be seen with the naked eye • Made by ridge impressions left on a soft material such as putty, wax, soap, dust, wet paint surfaces, etc.
Latent Prints • Cannot be seen with the naked eye • Made by impressions caused by transfer of body perspiration or oils present on finger ridges to the surface of an object
Detection of Prints • Latent prints must be developed (found) through different methods • The method used is dependent on the surface being examined
Surface Conditions • Hard, nonabsorbent surfaces (glass, mirrors, tile, painted wood): Powders or SuperGlue Fuming • Absorbent surfaces (paper, cardboard, cloth): One or more specific chemicals
Fingerprint Powders • Non-absorbent surfaces only • Applied with a camel’s hair or fiberglass brush • Color of powder chosen contrasts with surface color • Powder adheres to oils and perspiration left by ridges • Print can be lifted off the surface and preserved
Iodine Fuming • Oldest chemical method for developing latent prints • Iodine is a solid crystal that, when heated, is transformed into a gas through sublimation • Material is placed in a chamber and iodine is heated and latent prints are revealed • Iodine prints are not permanent and must be photographed immediately or fixed with starch solution, which can last about 1 month
Ninhydrin • Chemical used to develop prints on porous material by reacting with amino acids in perspiration • Developed prints appear purple-blue in color • Prints appear within an hour or two and fully developed in 24-48 hours • Commonly used on paper products
Physical Developer • Silver-nitrate based chemical • Useful for detecting prints that cannot be found by other methods or on objects that have been wet at one time • Application of Physical Developer washes away any protein that may be present and MUST be used last
SuperGlue Fuming • Used on nonporous surfaces such as metal, electrical tape, leather, and plastic bags • Active ingredient: cyanoacrylate ester • Evidence is placed in a fuming chamber and the cyanoacrylate is heated and covers the object and produces a white latent print
Laser Light • Perspiration contains a variety of components that fluoresce when illuminated by laser light • Because of the fluorescence, latent prints can be seen with the naked eye • Almost never used anymore with the invention of alternate light source latent print examination
Alternate Light Source • Works because perspiration fluoresces under different wavelengths of light • Can adjust the wavelength of light to be aimed through a fiber optic cable • More commercially available than laser light setups
Preservation of Prints • Common fingerprint methods do not interfere with further DNA analysis • However, when biological material remains, fingerprints should be developed at the crime lab instead of at a crime scene
Preservation of Prints • After prints have been found, photos must be taken • If object is small enough to be transported without destroying the print, it should be preserved intact • Cellophane should cover the print to protect from damage