Download

1 / 27
270 likes | 280 Views
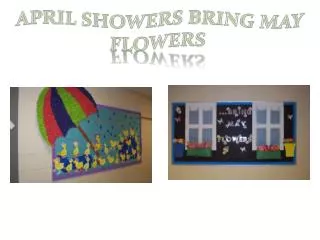
April Showers Bring May Paper Flowers. What You Will Learn. By the end of class, you will be able to make a pink paper hyacinth. You will watch me make one, and then you will make one on your own. You will also learn: various materials for making paper flowers

E N D
What You Will Learn • By the end of class, you will be able to make a pink paper hyacinth. • You will watch me make one, and then you will make one on your own. • You will also learn: • various materials for making paper flowers • resources for learning how to make paper flowers
Three Levels of Flowers • Beginner – construction paper flowers made in elementary school • Intermediate – tissue paper “roses” made in high school and later for events like parties and bridal shower • Advanced – art paper and professional crepe paper flowers
Beginner Level Construction Paper Flowers • Easy and quick to make • Requires few materials, skills • Materials are generally inexpensive • Poor archival quality – glue is not designed to last, and construction paper colors will fade
Intermediate Level Tissue Paper “Roses” • A bit more complex to make • Requires few materials, skills • Materials are generally inexpensive • Poor archival quality – glue is not designed to last, and tissue paper colors will fade. Colors may leach and tissue paper tears easily when wet by glue.
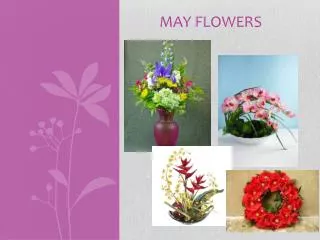
Advanced Level Art Paper and Professional Crepe Paper Flowers • A bit more complex to make, requires more patience, time, and manual dexterity • Requires more materials and skills • Materials are more expensive, and harder to find • Archival quality may be better, depending on the acid content of the paper and whether it is designed for artists
Advanced Level Art Paper and Professional Crepe Paper Flowers • Flowers at this level can be quite realistic and have texture along with beautiful colors due to higher-quality materials • Some advanced level flowers are sold in stores on Etsy • The advanced flowers are sometimes marketed for weddings and baby showers
Additionally… • You can also make paper flowers using Origami, the Japanese art of paper folding. • Origami takes special paper, patience, manual dexterity, and practice.
Examples • Beginner - https://www.youtube.com/watch?v=LFHGsHdY8w4 • Intermediate - https://www.youtube.com/watch?v=GXrOvUY5ZF8 • Advanced – https://www.youtube.com/watch?v=EuYz3zXBf9Y
Materials and Tools for Today • Paper - colored paper or construction paper – one sheet green for leaves, and one sheet colored for petals • Glue – Elmer’s School Glue • Green plant stake Additionally, if you try this at home: • Regular scissors • A ruler
Materials and Tools for Today • To save time, we have pre-cut the paper for you. All you will need to do is apply glue and wrap the leaf and petal strips around the top of the plant stake.
Template for Later Fold line ½” down 3” height A. Petal Strip Cut from colored paper Not shown to scale, provided for measurements! 11” width B. Leaf Strip Cut from green paper Not shown to scale, provided for measurements! 2” height 3” width
Full Steps to Create the Flower • Gather your materials and tools. • Cut the petal strip – 11” w x 3” h. • Cut the leaf strip – 3” w x 2” h. • Take the petal strip and lengthwise fold the top down 1/2” and press firmly to crease it. • Cut a fringe into the petal strip up as far as the top ½”, using the folded edge at the top as a guide on where to stop cutting: fringe
Full Steps to Create the Flower • Take hold of the first fringe strip and use your fingers to curl it backwards (left): • Keep curling until you reach the crease at the top. • Curl the remaining fringe strips. • Looking sideways, your petal strip should look something like this: crease
Full Steps to Create the Flower • Flip the petal strip over so the curled fringe is on the bottom. • Apply a line of glue down the length of the folded petal strip. • Use your fingertip to spread the glue more evenly. • Wipe the glue from your finger(s) with a baby wipe, and dry your fingers if necessary with a paper towel. • Pick up the green stake.
Full Steps to Create the Flower • Carefully pick up the petal strip (watch out for the glue), and starting at the top of the green stake, press the flat folded side (with the glue) of the paper strip against the stake at an angle, turning the stake with one hand, winding and pressing the petal strip down with the other hand. • Wrap down diagonally, overlapping a little, turning the stake as you go. Visualize wrapping a red stripe down a barber pole from the top, but with no “white” space in between turns. • Press the end of the strip firmly against the stake. Put the stake down gently.
Full Steps to Create the Flower • Take the leaf strip and lengthwise fold the top down 1/2” and press firmly to crease it. • Starting left, cut a half sharp peak, then 2 full sharp peaks, then a half sharp peak into the leaf strip up as far as the top ½”, using the folded edge at the top as a guide on where to stop cutting:
Full Steps to Create the Flower • Flip the leaf strip over. • Apply a line of glue down the length of the petal strip. • Use your fingertip to spread the glue more evenly. • Wipe the glue from your finger(s) with a baby wipe, and dry your fingers if necessary with a paper towel. • Pick up the green stake. • Press the end of the leaf strip against the stake with your other hand, and wrap the leaf strip around horizontally this time, turning the stake as you go.
Full Steps to Create the Flower • Press the end of the leaf strip against the stake with your other hand, and wrap the leaf strip around horizontally this time, turning the stake as you go. • Press the end of the strip firmly against the stake. Put the stake down gently. • If needed, use the baby wipes to clean glue off your hands.
Resources to Learn More Videos • How to make paper hyacinths - https://www.youtube.com/watch?v=Pp9dStDckNA&feature=youtu.be • ABC Video library – large group of how-to paper flower tutorials – the fuschia video I showed came from this library - https://www.youtube.com/channel/UC8MGdsdoHtenMqtxXALT1yw/videos • Lia Griffith’s site – painted tulips – Lia does high-end paper flowers and has her own line of die cuts at Joann’s for making paper flowers - https://liagriffith.com/pastel-painted-crepe-paper-tulips/ • Design Sponge – tutorial on gorgeous paper daffodils - http://www.designsponge.com/2016/03/paper-daffodil-tutorial.html • Artsncraft4u – cherry blossoms and more - https://www.youtube.com/watch?v=dM5tJgvOgv0 • Check YouTube and Pinterest – search for paper flowers
Resources to Learn More Books • Bold and Beautiful Paper Flowers by Chantal LarocqueShe uses 65 pound card stock for petals, and molds them, cutting the entire shape together. She then layers petal groupings and adds centers. • The Exquisite Book of Paper Flower Transformations by LiviaCettiShe uses tissue paper for petals, wire for shape, floral wire and tape for stems, stamens, and Cansongreen paper for leaves; uses gouache (opaque watercolor) and Rit dye to create variegated colors in the petals, and gouache for speckles on leaves. • 100 Simple Paper Flowers by Kelsey ElamShe uses tissue paper or crepe paper for petals; tissue paper or card stock for leaves, and wraps her floral wire stems with floral tape.
Supplies • Local – Joann Fabric and Michael’s both have a nice selection of colored paper. Joann’s carries Fiskar’s Paper Edger scissors with pinked and scalloped edges. Both carry floral wire and tape; the floral stakes we used in class came from Michael’s. • Online:Lia Griffith’s shop - https://shop.liagriffith.com/ - Lia’s shop has special tissue paper and crepe paper and paper flower kits. She stocks the special wide crepe paper necessary to make some of the really beautiful high-end paper flowers.
Contact Website: dixielang.com Slides:http://dixielang.com/class-handouts/ Email: dixie.lang@ymail.com
Thanks everyone! Go forth and make flowers, I look forward to seeing what you create.


![[READ DOWNLOAD] Paper Flowers](https://cdn7.slideserve.com/12480210/slide1-dt.jpg)