Download
1 / 5
50 likes | 214 Views
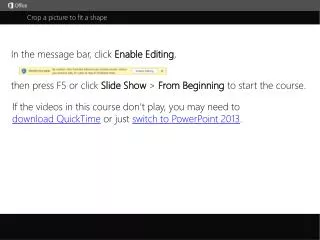
Crop a picture to fit a shape. In the message bar, click Enable Editing , . then press F5 or click Slide Show > From Beginning to start the course. . If the videos in this course don’t play, you may need to download QuickTime or just switch to PowerPoint 2013 . j.

E N D
Crop a picture to fit a shape In the message bar, click Enable Editing, then press F5 or click Slide Show > From Beginning to start the course. If the videos in this course don’t play, you may need to download QuickTime or just switch to PowerPoint 2013. j
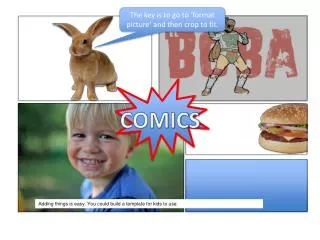
Crop a picture to fit a shape Closed captions I’ll find a picture style I like, such as this one, with a white border and perspective shadow, and click to apply it. For more information, see the course summary and do more experimenting with PowerPoint. This opens the Shapes gallery, where you choose a shape for the picture. Note that Crop to Shape maintains the picture’s aspect ratio, meaning its height-to-width proportions. That shape works nicely, cutting out little of the image and giving it rounded corners. Look for a shape that works well with the picture image and orientation. For this picture, let’s try a rounded rectangle. You can enhance a picture by giving it a different shape. A quick way to do this is with Crop to Shape. On the Format tab, in the Size group, click the arrow under Crop, and point to Crop to Shape. Then, look for the Picture Tools Format tab, which appears when you select the picture. Click Format. First, select the picture on the slide. then I chose the shape I wanted using Crop to Shape. To experiment with another shape, just click the arrow under Crop, and point to Crop to Shape. Interesting result, but I think it cuts out too much of the picture, especially of the central figure. Let’s go back to the original picture. We’ll look for a shape that’s quite different. How about this star? point to Crop to Shape, and choose the rounded rectangle. Now, with the picture still selected and the Format tab displayed, I’ll do a little bit of picture formatting. For example, I’ll click Picture Border and choose a border color. Then I’ll click Picture Border again, point to Weight, and increase the width of the border Following this process, I quickly got a more elaborate picture style, That’s a nice, simple accent. If you want more elaborate picture formatting, here’s a speedy way to apply it and also use Crop to Shape. to 4 ½ points, so it’s more visible. I’ll click Undo to return to the rounded rectangle shape, which accommodates this picture better. The gallery styles combine different things—the type of picture shape, border colors and styles, and effects such as reflections and shadows. Then, leaving the picture selected, I’ll click the Crop arrow, This time, before using Crop to Shape, I’ll select the picture, click Format, and click More to open the Picture Styles gallery. Press F5 to start, Esc to stop 1/1 videos 2:55 Help Crop a picture Feedback Summary
Help Course summary—Crop a picture to fit a shape Course summary Crop a picture to fit a shape If you want to change the outline of a picture and make it a shape (like a circle or a star), use the cropping tools on the Picture Tools Format tab. • Select the picture (or pictures) you want to crop.If you’re cropping lots of pictures at once, you have to use the same shape for all of them. To crop to different shapes, crop each picture one at time • On the Picture Tools Format tab, click Crop > Crop to Shape, and then pick the shape you want. Crop to fit or fill a shape You can have a picture as fill for a shape. Just click the shape to which you want to add a picture, then under Drawing Tools, on the Format tab, click Shape Styles > Shape Fill > Picture, and select the picture that you want. • Click the picture that you want within the shape. • Click Picture Tools > Format > Size and click the arrow under Crop. If you don’t see the Picture Tools and Format tabs, make sure that you selected a picture. • Click Fill or Fit. • Fill sets the picture size to match the shape’s height or width, whichever is greatest. This fills the shape with the picture. • Fit sets the picture size so that the picture’s height and width both match the shape’s boundaries. This fits as much of the picture into the shape as possible. Some areas of the shape might remain empty.Tip: You can drag the picture to change what area of it shows within the shape. • When you’re finished, press ESC. See also • Crop a picture or place it in a shape • Crop a picture to fit in a shape • Save and restore the original version of a cropped picture • More training courses • Office Compatibility Pack Press F5 to start, Esc to stop 1 • 2 • 3 4 2:55 Help Crop a picture Feedback Summary
Check out more courses Help Rating and comments Course summary How did we do? Please tell us what you think Thank you for viewing this course! Press F5 to start, Esc to stop 1 • 2 • 3 4 2:55 Help Crop a picture Feedback Summary
Help Help Course summary Using PowerPoint’s video controls Point at the bottom edge of any video to start, stop, pause, or rewind. You drag to rewind. Stopping a course If you’re viewing online, click your browser’s Back button. If you’re viewing offline, press Esc. If you’re watching a video, press Esc once to stop the video, again to stop the course. Going places You can go to any part of a course by clicking the thumbnails (light or shaded) below the video. You can also click the forward and back arrows, or press Page Up or Page Down. If you download a course and the videos don’t play Click Enable Editing if you see that button. If that doesn’t work, you may have PowerPoint 2007 or earlier. If you do, you need to get the PowerPoint Viewer. If you have PowerPoint 2010, you need the QuickTime player, or you can upgrade to PowerPoint 2013. Press F5 to start, Esc to stop 1 • 2 • 3 4 2:55 Help Crop a picture Feedback Summary