Solid Edge-to-GibbsCAM Transfer Add-in
110 likes | 266 Views
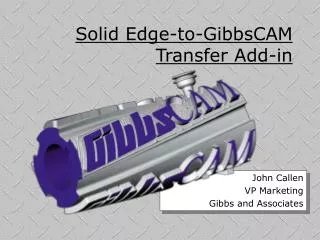
Solid Edge-to-GibbsCAM Transfer Add-in. John Callen VP Marketing Gibbs and Associates. Overview. Seamless exchange of models directly from within Solid Edge to GibbsCAM Single-Push-Button transfer GibbsCAM starts if not already running; if running, model import choices presented

Solid Edge-to-GibbsCAM Transfer Add-in
E N D
Presentation Transcript
Solid Edge-to-GibbsCAM Transfer Add-in John Callen VP Marketing Gibbs and Associates
Overview • Seamless exchange of models directly from within Solid Edge to GibbsCAM • Single-Push-Button transfer • GibbsCAM starts if not already running; if running, model import choices presented • Associative update of toolpath
Model Transfer • Transfer initiated through a single Solid Edge menu selection – “Transfer Part to GibbsCAM” • GibbsCAM is started if not already running, new session opened, Solid Edge model read in and displayed, ready for toolpath creation.
Toolpath Generation • Toolpath is then created for the Solid Edge model using GibbsCAM’s industry leading ease-of-use functionality • Stored processes can be used to speed toolpath creation • Geometry/Process/Toolpath entities are fully associative (more on this later)
Cut Part Rendering • Cut Part Rendering can be used at any time while creating toolpath to visually verify the machining process • Checks for: • Material remaining • Gouges • Rapiding through part/holders • Cutting past tool extents
Model Update • The design is modified within Solid Edge • Updated model is transferred to GibbsCAM, again using a single Solid Edge menu selection – the same one used to originally transfer the model to GibbsCAM
Update Transfer • When the updated model is presented to GibbsCAM, there are 3 options how to read it: • Create a new session • Insert it into current session (can be used to include stock, fixture models) • Replace session’s current part model
Toolpath Update • If the session’s current part is replaced, then the toolpath needs to be updated – using the “Redo all Ops” command. • Toolpath will be updated based on associativity between part model and processes.
Update Complete • Once “Redo All Ops” is completed, the toolpath should conform to the updated geometry. • Additional toolpath can be defined. • Cut Part Rendering can be used to validate updated toolpath.
Some Details • Compatible with Solid Edge V10 and GibbsCAM v5.57.14 • Supports Solid Edge Part, Assembly, Draft and Sheet Metal models • Both applications must be running on the same PC
For more information: Gibbs and Associates 323 Science Drive Moorpark, CA 93021 Toll-free (800) 654-9399 Fax (805) 523-0006 info@GibbsCAM.com www.GibbsCAM.com Request your copy of the Interactive Tour and find out – Why GibbsCAM!