Download
1 / 37
380 likes | 739 Views
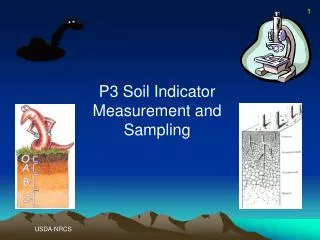
1. P3 Soil Indicator Measurement and Sampling . USDA-NRCS. 2. Field procedures consist of three parts:. Erosion assessment: % bare soil Soil compaction assessment: % area compacted Compaction type Soil sampling: Forest floor and litter thickness Forest floor sample collection

E N D
1 P3 Soil Indicator Measurement and Sampling USDA-NRCS
2 Field procedures consist of three parts: • Erosion assessment: • % bare soil • Soil compaction assessment: • % area compacted • Compaction type • Soil sampling: • Forest floor and litter thickness • Forest floor sample collection • Depth to restrictive layer • Mineral soil sample collection • 0 – 4 in • 4 – 8 in • Soil texture
FIA Plot Diagram Figure 1. FIA phase 2 plot diagram Erosion and Soil compaction assessments are collected on all 4 subplots. Soil samples are collected from within the macroplot at 2, 3, and 4 only.
4 Erosion Assessment 25 % 25 % % Bare Soil Estimation 25 % 25 % • Stand in the middle of the subplot and mentally divide the subplot into four quadrants. • Estimate the % bare soil in each quadrant. • % bare soil for the whole subplot = ∑ % bare soil in each quadrant / 4 • Record in 5 % cover classes. “00” indicates no bare soil; “01” indicates trace amounts; “99” indicates that all of the subplot consists of bare soil. • Note: If the entire subplot is not forested, multiply the % bare soil by the % of the subplot that is forested.
5 Bare Soil Definition • Bare mineral soil consisting of fine gravel (.08-20 inch or 2-5 mm), sand, silt, and clay sized particles • Bare organic soil • Exclude rocks, bedrock outcrops, talus • Exclude cryptobiotic crusts • Exclude basal tree area and stumps (usually very small area)
6 % Bare Soil • Where collected: subplots 1, 2, 3, 4 • When collected: any portion of the subplot contains at least one accessible forested condition class • Field width: 2 digits • Tolerance: ± 10 % • MQO: 75 % of the time • PDR codes: 00 none 25 21-25 55 51-5585 81-85 01 trace 30 26-30 60 56-6090 86-90 05 01- 05 35 31-35 65 61-65 95 91-95 10 06-10 40 36-40 70 66-7099 96-100 15 11-15 45 41-45 75 71-75 20 16-20 50 46-50 80 76-80
Soil Compaction Assessment % Area Compacted Estimation • Look for evidence of soil compaction on the subplot. • Estimate the % area of soil compaction in the subplot. • Record in 5 % cover classes. “00” indicates no soil compaction; • “01” indicates trace amounts; “99” indicates that all of the subplot • soil is compacted.
8 Compacted Area Estimation Compacted trail Compacted area
9 % Compacted Area • Where collected: subplots 1, 2, 3, 4 • When collected: any portion of the subplot contains at least one accessible forested condition class • Field width: 2 digits • Tolerance: ± 15 % • MQO: 75 % of the time • PDR codes: 00 none 25 21-25 55 51-55 85 81-85 01 trace 30 26-30 60 56-60 90 86-90 05 01- 05 35 31-35 65 61-65 95 91-95 10 06-10 40 36-40 70 66-70 99 96-100 15 11-15 45 41-45 75 71-75 20 16-20 50 46-50 80 76-80
10 Types of Compaction RutTrRutted trailRuts must be at least 2 inches deep into mineral soil or 6 inches deep from the undisturbed forest litter surface. ComTrCompactedUsually the result of many passes of vehicles, trailanimals, or people. ComArCompactedJunctions of skid trails, landing areas, work areaareas, campsites, etc. OtherOtherAn explanation must be entered in the plot notes.
11 Types of Compaction • Where collected: subplots 1, 2, 3, 4 • When collected: % compacted area > 00 • Field width: 1 digit • Tolerance: no errors • MQO: 75 % of the time • PDR codes: 1 present 0 not present
12 Examples of Compaction Skid trail Tire track Old ruts
13 Soil Sampling Locations • Subplot 2 soil sampling site: From the center of subplot 2, measure 30 ft on an azimuth of 180° (due south). • Subplot 3 soil sampling site: From the center of subplot 3, measure 30 ft on an azimuth of 300° (northwest). • Subplot 4 soil sampling site: From the center of subplot 4, measure 30 ft on an azimuth of 60° (northeast). Collect forest floor samples at soil sampling points in macro plots around subplots 2, 3, and 4. Collect 0-4 and 4-8 inch soil cores ONLY at sampling point in macro plot around subplot 2.
14 Soil Sampling Restrictions • Collect soil samples only if soil sampling location is in a forested condition regardless of forested condition of the subplot. • If cultural artifacts are present, do not collect soil samples. • Certain other conditions (e.g., obstructions, water on plot, safety) may preclude soil sample collection.
Soil Sample Subplot Number, Condition Class, and Visit Number • Where collected: all soil sample locations • When collected: soil sampling site is in a forested condition • Field width: 1 digit • Tolerance: no errors • MQO: At least 99 % of the time for subplot number and visit number; at least 95 % of the time for condition class • PDR codes: Subplot number: 2, 3, or 4 Condition class: 0 to 9 Visit number: 1 to 9
Soil Sample Status • Where collected: • Forest floor: subplots 2, 3, and 4 • 0-4 and 4-8 inch soil cores: subplot 2 only • When collected: soil sampling site is in a forested condition • Field width: 1 digit • Tolerance: no errors • MQO: at least 99% of the time • PDR codes: 1 Sampled 2 Not sampled: non-forest The following are for forested conditions: 3 Not sampled: too rocky • Not sampled: water or boggy • Not sampled: access denied • Not sampled: too dangerous • Not sampled: obstruction in sampling area • Not sampled: broken or lost equipment • Not sampled: other – enter reason in plot notes
Soil Sampling Equipment • Compass and measuring tapes • Small plastic tarp • Forest floor sampling frame (12-in diameter) • Knife for cutting forest floor layer and garden trowel • Soil sample bags, labels, indelible ink markers • Probe for depth to restrictive layer • Impact-driven soil core sampler (2-in diameter x 8-in depth) with two 2-in diameter x 4-in long stainless steel liners) • Cleaning cloth or tissues • Plastic water bottle and water for hand-texturing soil
N Depth Measurements 1=depth of forest floor 2=depth of litter layer 3=depth to a restrictive layer 4=maximum depth of evaluation (20 in) Top View 12 in E W S litter layer 2 1 forest floor humus layer 0 in mineral soil 3 soil samples 4 in 8 in restrictive layer 4 Side View 18 Soil Sampling
Sampling the Forest Floor • Place the soil sampling frame on the ground at the sampling point. • Measure the thickness of the forest floor and litter layer (in) at the four compass points (N, S, E, W) on the inner edge of the frame. • Remove any live vegetation from the sampling area. • Using a knife, cut through the forest floor along the inner surface of the frame. • Using an inward scooping motion, remove the entire volume of forest floor from within the sampling frame. • Discard any woody debris (e.g., pine cones, large pieces of bark, twigs, etc.) larger than ¼ in in diameter. Also, discard rocks or pebbles. • Working over the tarp, place the entire forest floor sample into a pre-labeled gallon sample bag(s).
Tips for Distinguishing Humus andMineral Soil In some soils, distinguishing between the bottom of the forest floor (duff layer) and the top of the mineral soil can be difficult. Look for the following: • Evidence of plant parts (leaves, needles, twigs, etc.). If you can see them decomposing in place, you are still in the humus layer. • Rub the soil between thumb and finger - does it crumble (humus) or feel gritty (sand), silty, or clayey? • Shiny flecks of mica or quartz (won’t help in all soils). • Subtle change in color - humus layer is black, mineral soil is more brownish. • Change in density – humus layer is light, mineral soil is more dense.
Forest Floor and Litter Thickness Measurements • Measure the thickness of the forest floor and litter layer at the four compass points (N, S, E, W) on the inner edge of the frame.
Distinguishing Litter and Humus • Litter layer – Decomposing plant parts can still be identified (e.g., leaves, needles, twigs, etc). • Humus (Duff) layer – Plant parts can no longer be identified because decomposition has proceeded to the point where stable humus has been formed (dark color, crumbly, organic layer)
Forest Floor and Litter Thickness • Where collected: soil sampling points in macro plot around subplots 2, 3, and 4 • When collected: soil sample status = 1 • Field width: 3 digits • Tolerance: ± 2 in • MQO: 90 % of the time • Values: 0.0 to 20.0
Depth to Restrictive Layer Definition: A soil condition that limits root growth. This limitation may be physical (rock or hard pan), chemical (acid layer), or both. • Insert tile probe into center of sampling area and push it into the soil. Stop pushing when you encounter an obstruction and note depth. • Repeat at the N, S, E, and W edges of the sampling area. • Record the median of the five measurements (maximum = 20.0 in). • Special codes: • Enter “00.0” if bedrock is present. • Enter “99.9” if soil is too rocky to insert tile probe.
Depth to Restrictive Layer • Where collected: soil sampling point in macro plot around subplots 2, 3, and 4 • When collected: soil sample status = 1 • Field width: 3 digits • Tolerance: ± 6 inch • MQO: 90 % of the time • Values: 0.0 to 20.0 00.0Surficial bedrock present 20.0 No restrictive layer found to maximum depth (20.0 in) 99.9Soil is too rocky to insert probe
Sampling the Mineral Soil • Prepare two zip-lock sample bags with labels for 0-4 in and 4-8 in samples. • Assemble soil core sampler with liners in place. • Drive soil core sampler to 8 in depth using the slide hammer attachment. • Remove soil core sampler from ground. • Disassemble the sampler and extract the soil cores from sampler. • Cut the cores so that they are flush with ends of liners. • Place samples into appropriate bags. • Clean the bulk density sampler and liners. • Use excavation method if soil is too rocky for bulk density sampler.
27 Sampling Problem Mineral Soils • Soils too rocky – Use excavation method. Collect same volume as core method. If coarse fragment content is high, collect more soil (double volume or fill sample bag). • Shallow soils – If soil is at least 4 in deep and not too rocky, use core sampler to collect 0-4 in depth in the lower soil liner (normally the 4-8 in soil liner). If soil is < 4 in deep, use excavation method. • Top liner (0-4 in) will not fill – Use core sampler to collect 4-8 in depth and excavation method to collect 0-4 in depth.
28 Sampling Organic Soils • Organic soil: More than 8 in of organic matter on top of the mineral soil. • Typically associated with wetlands. • Because of the high moisture content of these soils, you may not be able to use the bulk density sampler (the soil will compress upon impact). • Instead: • Use a shovel to excavate a hole. • Using a knife blade, collect material from 0-4 in and 4-8 in from the side of the hole. • Be sure to collect approximately the same amount of material that would have fit into the core. • If available, a punch tube or Dutch auger may also be used. • Important difference: On organic soils, collect only the litter from the sampling frame as a forest floor sample.
29 Soil Sample Collected by Regular Field Crew State: ____ Unit:_____County: ____ Plot #: ___ Soil Visit #: __ Crew #: _______ Date: __/__/ ____ Subplot #: 2 3 4 Layer: Forest Floor 0 – 4 in 4 – 8 in Sampler: Bulk density Other
30 Soil Texture Definition: The relative amount of sand, silt, and clay-sized particles in a soil. In the FIA program, we classify texture by “feel.” This estimate is used in the soil loss equation to determine the potential erodibility of the soil. 0 – organic 1 – loam 2 - clay 3 - sand 4 - coarse sand
31 Soil Texture • Where collected: soil sampling site in macro plot around subplot 2 • When collected: soil sample status = 1, subplot = 2 • Field width: 1digit • Tolerance: ± 1 soil texture class • MQO: 80 % of the time • PDR codes: 0 Organic 1 Loam 2 Clay 3 Sandy 4 Coarse sand
32 Care and Feeding of Soil Samples • Microbes don’t know that they are in a bag. They will continue to eat, excrete, and otherwise go on with their little lives. • In time, decomposition will deplete the oxygen content in the bag, and cause the sample to go anaerobic. • These changes can alter the sample pH, exchangeable cation concentrations, and carbon and nitrogen contents. So… • Send samples to the lab within a week of collection (regular mail is fine, no need to Fed Ex). • If you can’t send samples within a week, refrigerate them.
NRS FIA Soil Samples Shipping Form Name: _________________________ Shipped Via: _________________________ Signature: __/s/__________________ Tracking Number: _____________________ Date: __________________________ Crew #: ______________ QA Status: ٱ Standard ٱ Audit
Requests from the Soils Lab • When collecting from multiple states, use a separate shipping form for each state. • Use FIA state and county codes, not state postal abbreviation and county names. • Shipping form electronically sent should be printed and placed in shipping box. These are official documents for tracking purposes and need to be identical. One handwritten and one typed/printed is not acceptable, they need to match. • One sample, one row. If multiple bags for a sample annotate total number of bags in Bags/Sample column. Sample bags should be labeled [1 of 2, 2 of 2, etc.] • If no sample is sent, remove from shipping form. • Label box “FIA SOILS REFRIDGERATE UPON ARRIVAL”
Shipping Soil Samples Soil samples are sent to this regional lab: John Larson Forestry Sciences Lab 1831 Highway 169 East Grand Rapids, MN 55744 Phone: 218-326-7113 Email:jlarson@fs.fed.us
APHIS (Animal and Plant Health Inspection Service) The shipment of soils from regulated areas (red) through non-regulated areas (white) is strictly regulated by USDA APHIS. The responsibility for meeting federal regulations falls on the field crews. ForNRS - New York Crews
Soil AnalysisOnce the samples are sent to the labs, what happens? Mineral soil: • Physical properties: • Bulk density • Water content • Coarse fragments (> 2 mm) • Chemical properties: • Organic and inorganic carbon • Total nitrogen • pH • Exchangeable cations (Na, K, Mg, Ca, Al), metals (Mn, Ni, Cu, Zn, Cd, Pb), and sulfur • Extractable phosphorus Forest floor: • Physical properties: • Bulk density • Water content • Chemical properties: • Total carbon (organic) • Total nitrogen