Download
1 / 15
150 likes | 384 Views
Recording Audio with Audacity. Workshop by Dr. Luba Iskold Fulvia Alderiso and Kellen Mickley. August 2007 Dept. of Languages, Literatures and Cultures - Language Learning Center. Audacity Instructions. Introduction What is Audacity What can you do with Audacity

E N D
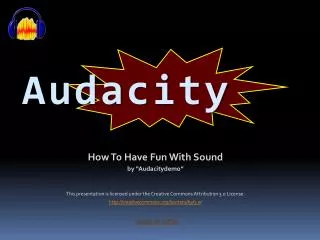
Recording Audio with Audacity Workshop by Dr. Luba Iskold Fulvia Alderiso and Kellen Mickley August 2007 Dept. of Languages, Literatures and Cultures - Language Learning Center
Audacity Instructions • Introduction • What is Audacity • What can you do with Audacity • Audacity Control Panel • How-To • Open Audacity • Record using a microphone • Working with an audio track • Play your recording • Save your recording as an MP3 file • Save your project • Append one audio track to the end of another • Upload your recording to Blackboard • Language Support
Introduction • What is Audacity? Audacity is a free cross-platform audio recording and editing program.
Introduction • What can you do with Audacity? • Record your own audio and save it as MP3 or WAV files. • Edit existing audio files (for example, cut, copy, or paste audio segments).
Introduction • Audacity Control Panel:Basic controls for audio recording and playback
How-To • Open Audacity: • Click on the Audacity icon on the desktopat the LLC. • Download Audacityonto your own PC. • The link is located on the LLC Dept. page under Workshops and is calledRecording with Audacity
How-To • Record using a microphone: • Press the Record button to begin recording. Your audio track will appear in the window as you record. • Press the Stop button when finished recording. • Press the Pause button to temporarily stop recording; click Pause again to resume recording.
How-To Please Note: 1. Prior to recording, make sure the microphone is on. If using the lab’s microphone headsets, check the volume control switch on the cord and make sure that there is no red color showing through the button. 2. Once you have pressed Stop, each new recording will start on a new track which begins at 00:00.
How-To • Working with an audio track: • Click Mute to mute this track when playing. • Click Soloto hear only this track when playing. • Click the X in the upper left hand corner to delete the track.
How-To • Play your recording: • Press thePlay button to begin playback. Press Stop to finish. • Start playback from the beginning of your recording by clicking on Skip To Start, then Play. • Start playback at any place of your recording by placing the cursor there and clicking on the audio track.
How-To • Save your recording as an MP3 file: • On the menu, click File and then Export As MP3. Please Note: 1. If you have multiple audio tracks, Audacity may notify you that they will be mixed (combined into one track). 2. Save your MP3 file onto your USB Thumb Drive: remember that you cannot save anything onto the LLC PCs. 3. You may enter MP3 “Tag” information that is displayed to the user when the audio file is played.
How-To • Save your project: To edit your individual tracks later, save your work as a project. • Click on File and then Save Project. • Select a location for your project. A project file (.aup) and associated folder will be saved to the selected location. Please Note: 1. If prompted that this project file cannot be played directly by an external program (e.g. Windows Media Player), click Ok.
How-To • Append one audio track to the end of another: • The Selection Tool should be selected by default. However, if it is not, select it by clicking the button that looks like • Click and hold at the end of the second track and then drag the mouse to the beginning to select the entire track. • ClickEdit, then Cut • Click at the end of the first track to set the cursor there. You can then press Skip to End to ensure that the cursor is at the end. • ClickEdit, thenPaste • You should now have your second track appended to the end of the first. • You may now delete the second track (empty).
How-To • Upload your recording to Blackboard: • Click your Course Documents in Blackboard • Click on Add New Item • You can attach the MP3 file as you would a Word document OR • In Blackboard, you can ‘embed’ the sound file by clicking on theSpeaker Buttonin the Word-like toolbar. This will allow students to use a media player with controls.
Language Support • Audacity has support for Arabic, Basque, Bulgarian, Catalan, Chinese (simplified), Chinese (traditional), Czech, Danish, Dutch, Finnish, German, Greek, English, French, Hungarian, Irish, Italian, Japanese, Lithuanian, Macedonian, Norwegian, Polish, Portuguese, Russian, Slovenian, Spanish, Swedish and Ukrainian in its user interface.