Download

1 / 68
680 likes | 784 Views
Learn to create top-down and bottom-up assemblies, constrain and edit components, drive constraints, and manipulate Bill of Materials with Autodesk software.

E N D
Chapter 6 - Objectives • After completing this chapter, you will be able to perform the following: • Understand the assembly options • Create bottom-up assemblies • Create top-down assemblies • Create subassemblies • Constrain components together using assembly constraints • Edit assembly constraints • Create adaptive parts • Pattern components in an assembly • Check parts in an assembly for interference • Drive constraints • Create a presentation file • Manipulate and edit the Bill of Materials (BOM) • Create individual and automatic balloons • Create and perform edits on a Parts List of an assembly
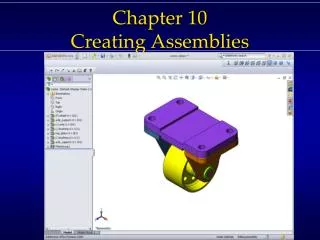
Creating Assemblies • New Assembly Files • .IAM Extension • New icon – What To Do • New – File Menu • New icon – Down Arrow
Creating Assemblies • Assembly Options • Tools tab > Application Options > Assembly tab
The Assembly Capacity Meter • Number of occurrences in active assembly • Number of open files • Memory (RAM) used (32 bit operating systems only) • Application Option
Creating Assemblies • Assembly Browser • Part Occurrence • Assembly Constraints • Subassembly Occurrence
Creating Assemblies • Bottom-Up Approach • Components are created in their individual files • Place Component tool • ‘P’ shortcut key
Creating Assemblies • Occurrence • Copy of existing components • Copy/Paste • Ctrl Select Multiple Files • Place Component • Drag & Drop • Any change to original updates all occurrences • Save Copy As… to create a copy that is not linked to original
Creating Assemblies - Editing • Occurrence • Active Component – Available for edit • Double-click in the graphics area • Double-click file name/icon in the Browser • Right-click in the Browser > Edit
Open and Edit Components • Open or Edit • Access via • Browser • Graphics window
Creating Assemblies • Occurrence • Grounded Component • The Component will not move • All Degrees Of Freedom are removed • When constraining, components move to a Grounded or constrained component • Any number of components can be grounded
Assembly Constraints • Constraints • Create relationships between components • Example - Bolt and a Hole • Degree of Freedom • Constraints reduce the number of Degrees of Freedom • 6 total (3-translational & 3-rotational) • View tab > Visibility panel > Degrees of Freedom • Component Properties > Occurrence tab
Assembly Constraints • Constraints • Placing Constraints • Constraint tool • Right-click > Constraint • ‘C’ shortcut key • Place Constraint Dialog
Assembly Constraints • Constraints • Constraint Types – Assembly tab • Mate • Plane, Line, or Point • Assembles two components so that the surface normal on the selected planes are opposite each other • Assembles the edges of lines • Assembles two points together • Flush Solution • Aligns two components so the selected planes face the same direction (surface normal point in the same direction)
Assembly Constraints • Constraints • Constraint Types – Assembly tab • Angle • Specify the degrees between the selected planes or use an Explicit Reference Vector
Assembly Constraints • Constraints • Constraint Types – Assembly tab • Tangent • Defines a tangent relationship between planes, cylinders, spheres, cones, and ruled splines • At least one selected face must be a curve • Inside/Outside Solutions
Assembly Constraints • Constraints • Constraint Types – Assembly tab • Insert • Two circular edges • Centerlines are aligned & mate constraint is applied to the planes defined by the circular edges. • 5 DOF are removed with an insert constraint
Assembly Constraints • Constraints • Constraint Types – Motion tab • Animation the motion of gears pulleys, rack and pinions, etc. • You can drive one component and cause others to move accordingly • Motion constraints are secondary constraints • They do not maintain positional relationships between components • Recommended: fully constrain components before applyingmotion constraints, then suppress the constraints restricting motion • Rotation • Define a component that will rotate in relation to another component • Specify a ratio for the rotation between the two components • Forward & Backward solution types
Assembly Constraints • Constraints • Constraint Types – Motion tab • Rotation-Translation • Define rotation relative to translation of a second component
Assembly Constraints • Constraints • Constraint Types – Transitional tab • Transitional • Specifies a transitional relationship between a cylindrical part face and a contiguous set of faces on another part
Assembly Constraints • Constraints • Constraint Types – Constraint Set • Constrain two UCSs
Assembly Constraints • Constraints • ALT – drag a part to another part • No Place Constraint dialog box • Select correct area on the part to apply the constraint
Assembly Constraints • Moving & Rotating Components • Move Component Tool • Drag individual components in any linear direction in the viewing plane • Temporarily suppresses assembly constraints on the component until the assembly is updated (constraints are then re-applied) • Rotate Component Tool • After selected, the 3D rotate symbol appears • Similar to the Move Component tool, Rotate Component temporarily suppresses any assembly constraints applied to the component
Assembly Constraints • Editing Constraints • Two Methods via the Browser • Double-click the constraint name • Right-click the constraint name and click Edit, Suppress, or Delete • Edit - opens the Edit Constraint dialog box • Suppress – the assembly constraint is not applied • Delete – deletes the assembly constraint • Assembly View • Assembly constraint symbols nested below constrained components • Modeling View • Assembly constraints are located in a Constraints folder
Find Other Half • Find component that constrained is applied to • Tooltips • List constraints and components
User-Defined Assembly Folders • Organize components into folders • Unlimited number of folders • Add components to new folder • Drag components into folders • No affect on assembly constraints
Isolate Assembly Components • Display selected components • Isolate and Edit Constraint • Undo Isolate – return visibility of components before isolating
Assembly Constraints • Conflicts • Alert Box • If you try to place or edit an assembly constraint and it cannot be applied, an alert box is displayed explaining the problem. • Conflicting • When assembly constraint conflicts with another one, a small yellow icon with an exclamation point is displayed in the Browser • Recover • Displays the Design Doctorto walk you through the steps to fix the problem
Exercise 6-1 • Assembling Parts
Designing Parts In Place • In-Place Creation • Initial Sketch Creation • Face of an existing assembly component • Work Plane • Automatically constrain the sketch plane to the selected face or work plane • Creates a Flushconstraint betweenthe sketch and theselected face or plane
Designing Parts In-Place • In-Place Creation • After the base feature is created • Create additional features based on geometry from another part in the assembly an adaptive work plane is created. • The adaptive work plane moves as necessary to reflect changes in the component that it is based upon • The sketch moves with the plane • Features based on the sketch adapt to match its new position
Exercise 6-2 • Designing Parts in the Assembly Context
Assembly Browser Commands • Tools • In-Place Activation • Double-click a subassembly or component occurrence in the Browser to activate it • Right-click > Edit • All components that are not active are shaded in the Browser
The Assembly Return Tool • Return to subassembly • Return to top level assembly
Assembly Browser • Tools • Visibility Control • Expand the Browser until the desired component occurrence is visible • Right-click > Visibility
Adaptivity • Definition • Allows the size of a part to be determined by setting up a relationship between the part and another part in the assembly • Under-constrained sketches and features can adapt • The adaptivity relationship is acquired by applying constraints between an adaptive sketch or feature and another part • The sketch cannot be fully constrained • A part can only be adaptive in one assembly at a time • Only one occurrence of a part can be adaptive – other occurrences reflect the size of the adaptive part • Example • Diameter of a pin from the size of a hole or vice-versa
Adaptivity • Options • Tools tab > Application Options > Assembly tab
Adaptivity • Example • The rectangular sketch is not dimensioned along its length • The extruded feature is defined as adaptive
Adaptivity • Example • Parts are placed, constraints applied between the two plates (flush between the faces on the ends of the plates)
Exercise 6-3 • Creating Adaptive Parts
PATTERN COMPONENTS • Pattern Components • Rectangular • Circular • Based on Feature Pattern • Suppress Elements • Pattern Assemblies • Replace Components
Exercise 6-4 • Patterning Components
Minimum Distance Command • In an assembly measure distances between • Components • Parts • Faces and Edges
Analysis Tools • Center of Gravity • View tab > Visibility panel > Center of Gravity • Displays Gray when the properties are out of date • Hover the cursor over the origin of the symbol to display the COG coordinates • Measure to
Analysis Tools • Interference Checking • Analysis tab > Interference Panel > Analyze Interference • Define Set #1 – select components that define set 1 • Define Set #2 – select components that define set 2
Exercise 6-5 • Analyzing an Assembly
Driving Constraints • Drive Constraint tool • Simulate motion • Right-click on a constraint in the Browser > Drive Constraint
Driving Constraints • Drive Constraint tool • Assembly Constraints • Record • Drive Adaptivity • Collision Detection
Exercise 6-6 • Driving Constraints
Presentation Files • .IPN Extension • Exploded Views • Hide specific components • Create animations of assembly and disassembly of components • Work Plane • Associated with the assembly file • Changes made to the assembly are reflected in the presentation file