Microcontrollers and Microprocessors
Explore the definitions of microcontrollers and microprocessors, such as the Z80 and 68HC11, and their applications in embedded controls. Learn about creating projects using Integrated Development Environment (IDE) and developing code in languages like C. Build and download compiled code to microcontroller units and run finished programs. Code examples and practical assignments are provided to enhance understanding of concepts.


Microcontrollers and Microprocessors
E N D
Presentation Transcript
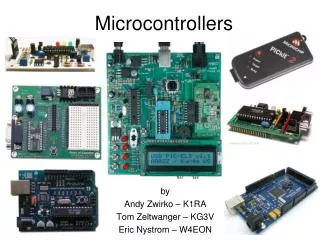
Microcontrollers and Microprocessors Prepared by: Greg Brownell
Definitions • Micro: Tiny • Controller: Control – Decision-based Action • Processor: Process Data (crunch numbers)
Embedded Controls: Examples • Microcontrollers • ASICs (Application-Specific Integrated Circuits) • PGAs (Programmable Gate Arrays) • PLDs (Programmable Logic Devices) • SOCs (System On a Chip)
Microprocessors: Examples • Intel 8086, 80286, 80386, 80486, 80586 • Zilog Z80, Z8, Z8000 • AMD K6 • Intel Pentium, Xeon, Itanium • Motorola 6800
Comparison: 8-Bit Microcontroller 68HC11 (MicroStamp) 8-Bit Microprocessor Z80 • 8-Bit Microcontroller • 8-Bit Microprocessor Atribute Control/Monitor Process Data Function Instructions External Application Performance Data Handling Programming Connections Support RISC: 145 Full Set: 158 Text Text Digital/Analog Peripherals Text Embedded Logic CPU Core Text Text Text Instructions/second MFLOPS I/O Pins Bus-oriented Text Text Internal ROM External RAM Text 20 pins 40 pins Stand-alone External Chipset
Programming the MicroStamp • Create a Project using Integrated Development Environment • Write the Source Code using the built-in text editor • Include Links to Definition (header) files needed • Add your Files to the Project • Build the Project (compile programs) • Download Compiled Code to MicroStamp
Creating a Project • Open the IDE Application: ICC • Select “Project”, “New” • Enter a unique Name for your Project
Write the Code • Various Language Compilers Available • C Language is Versatile and Popular • MicroStamp uses a limited Subset of ANSI C
Include Header Files • Some Standard Functions from KERNEL.C • Other Library Routines from VECTOR.C • Use Standard #INCLUDE directives
Adding Files to the Project • Simple Menu-driven Procedure • Select Files from the List • Pick “Project”, “Add Files”
Building the Project • Files can be Compiled Individually, or • Click the “Build Project” Button • Automatically Compiles Programs
Download Code to Stamp • Connect Serial Cable from PC Port • Run the program: MicroLoad.EXE • Under “Options” select MicroStamp 11 • Hit “Load” and open your .S19 file • Follow the on-screen instructions • Click the Download button
Running the Finished Program • Switch the MicroStamp from “boot” to “run” and from “load” to “code protect” • Press the Master Reset button • Return switches to “load” position to download another program
Code Example: IFLAB.C #include"kernel.c" void _HC11Setup(){ *(unsigned char volatile*)(0x3D) = 0x01; OPTION = 0x04; } void main(void){ int ilevel; int istep; init(); ilevel=0 ; display_digit(ilevel); while(1){ istep=butcontrol(); ilevel=(ilevel+istep)%8; display_digit(ilevel); } } #include"vector.c"
Display Decoder Function void display_digit(int data){ int i; for(i=1;i<8;i++) clear_pin(i); switch (data){ case 0: set_pin(1);set_pin(2);set_pin(3); set_pin(4);set_pin(5);set_pin(6); break; case 1: set_pin(2);set_pin(3); break; case 2: set_pin(1);set_pin(2);set_pin(7); set_pin(5);set_pin(4); break;
Hexadecimal Display (base 16) Hexadecimal is used to represent numbers with a radix of 16. It consists of the numeric digits 0-9 plus alpha characters A-F. This “shorthand” notation is commonly used when writing binary computer code because fewer digits are required.
Assignment • Create and Build your own project • Modify the existing code: IFLAB.C • Change the Display output from 0-7 to A-H or define your own character set
Special Notes • Put the .c files in your own project folder • After demonstrating that your program runs, reload the original program from C:\ICC\learn_1\learn_1.s19 • Leave your project folder on the laptop as evidence that you have completed lab • Back up your files and then delete them • If the serial port becomes unplugged, re-insert it matching the black pin to the dot