Download
1 / 17
170 likes | 313 Views
Canon Vixia HF M300. Operation. White Balance. Step 1 – turn on camera Step 2 – Choose M mode (switch) Step 3 – touch FUNC Step 4 – Touch WB (white balance) Step 5 – Drag your finger up on the screen. White Balance. Step 6 – zoom into white card Step 7 – touch SET WB

E N D
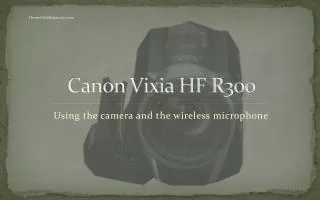
Canon VixiaHF M300 Operation
White Balance • Step 1 – turn on camera • Step 2 – Choose M mode (switch) • Step 3 – touch FUNC • Step 4 – Touch WB (white balance) • Step 5 – Drag your finger up on the screen
White Balance • Step 6 – zoom into white card • Step 7 – touch SET WB • Step 8 – When icon is finished flashing, white balance is complete • Step 9 – touch the X in the upper right hand corner of screen to exit the menu.
FOCUS • Step 1 – Touch FUNC • Step 2 – Menu • Step 3 – Touch FOCUS • Step 4 – Touch MF (manual focus) The dot next to MF will turn yellow. • Step 5 – Zoom in all the way on your subject’s eyes.
FOCUS • Step 6 – Touch either the mountains or the person shape to adjust your focus until subject is sharp and clear.
Adjust Aperture • Step 1 – Touch FUNC • Step 2 – Exposure • Step 3 – touch Exposure A • Step 4 – Touch M (activates the manual exposure.) circle beside the M will turn yellow.
Adjust Aperture • Step 5 – Slide the on screen f-stops to a greater number to close down the aperture. (darken the image) Slide the on screen f-stops to a smaller number to open the aperture. (brighten the image)
Adjust Aperture • Step 6 – To return to automatic, touch the M – it will gray out • Step 7 – X will exit this function and return to screen.
Manual Audio • Step 1 – Touch FUNC • Step 2 – Touch MIC. LEVEL • Step 3 – Touch MANUAL • Step 4 – Adust level
Manual Audio You don’t want to be in red. Yellow is warning. Red – sound will be distorted.
Audio Level Indicator Touch the Audio Level Indicator to turn it on. You will always know where your audio levels are. Press X to exit this screen.
Playback Mode Step 1 – Touch the tools (wrench) Touch AV/Headphones – choose either AV or Headphones
Playback Mode If AV – then playback volume can be adjusted by: Touch the screen to activate display Touch the audio meter and drag your finger to the right to make sound louder, or to the left to make sound softer.
Playback Mode If in AV mode, you will not be able to hear sound in headphones.
Playback Mode To have sound in headphones: Touch MENU, Choose Tools (wrench) Scroll to AV/Headphones Choose headphones Adjust the same as for AV
Playback Mode Choose playback mode
Playback Video • Touch ALL SCENES to see a thumbnail of all clips. • Drag your finger left or right to view more clips • Touch a clip to view • Touch the screen to activate on screen controls. • Touch the control you want: play, rewind, stop, fast forward.